DIY UPCYCLED PLANTER USING THE CRICUT JOY™
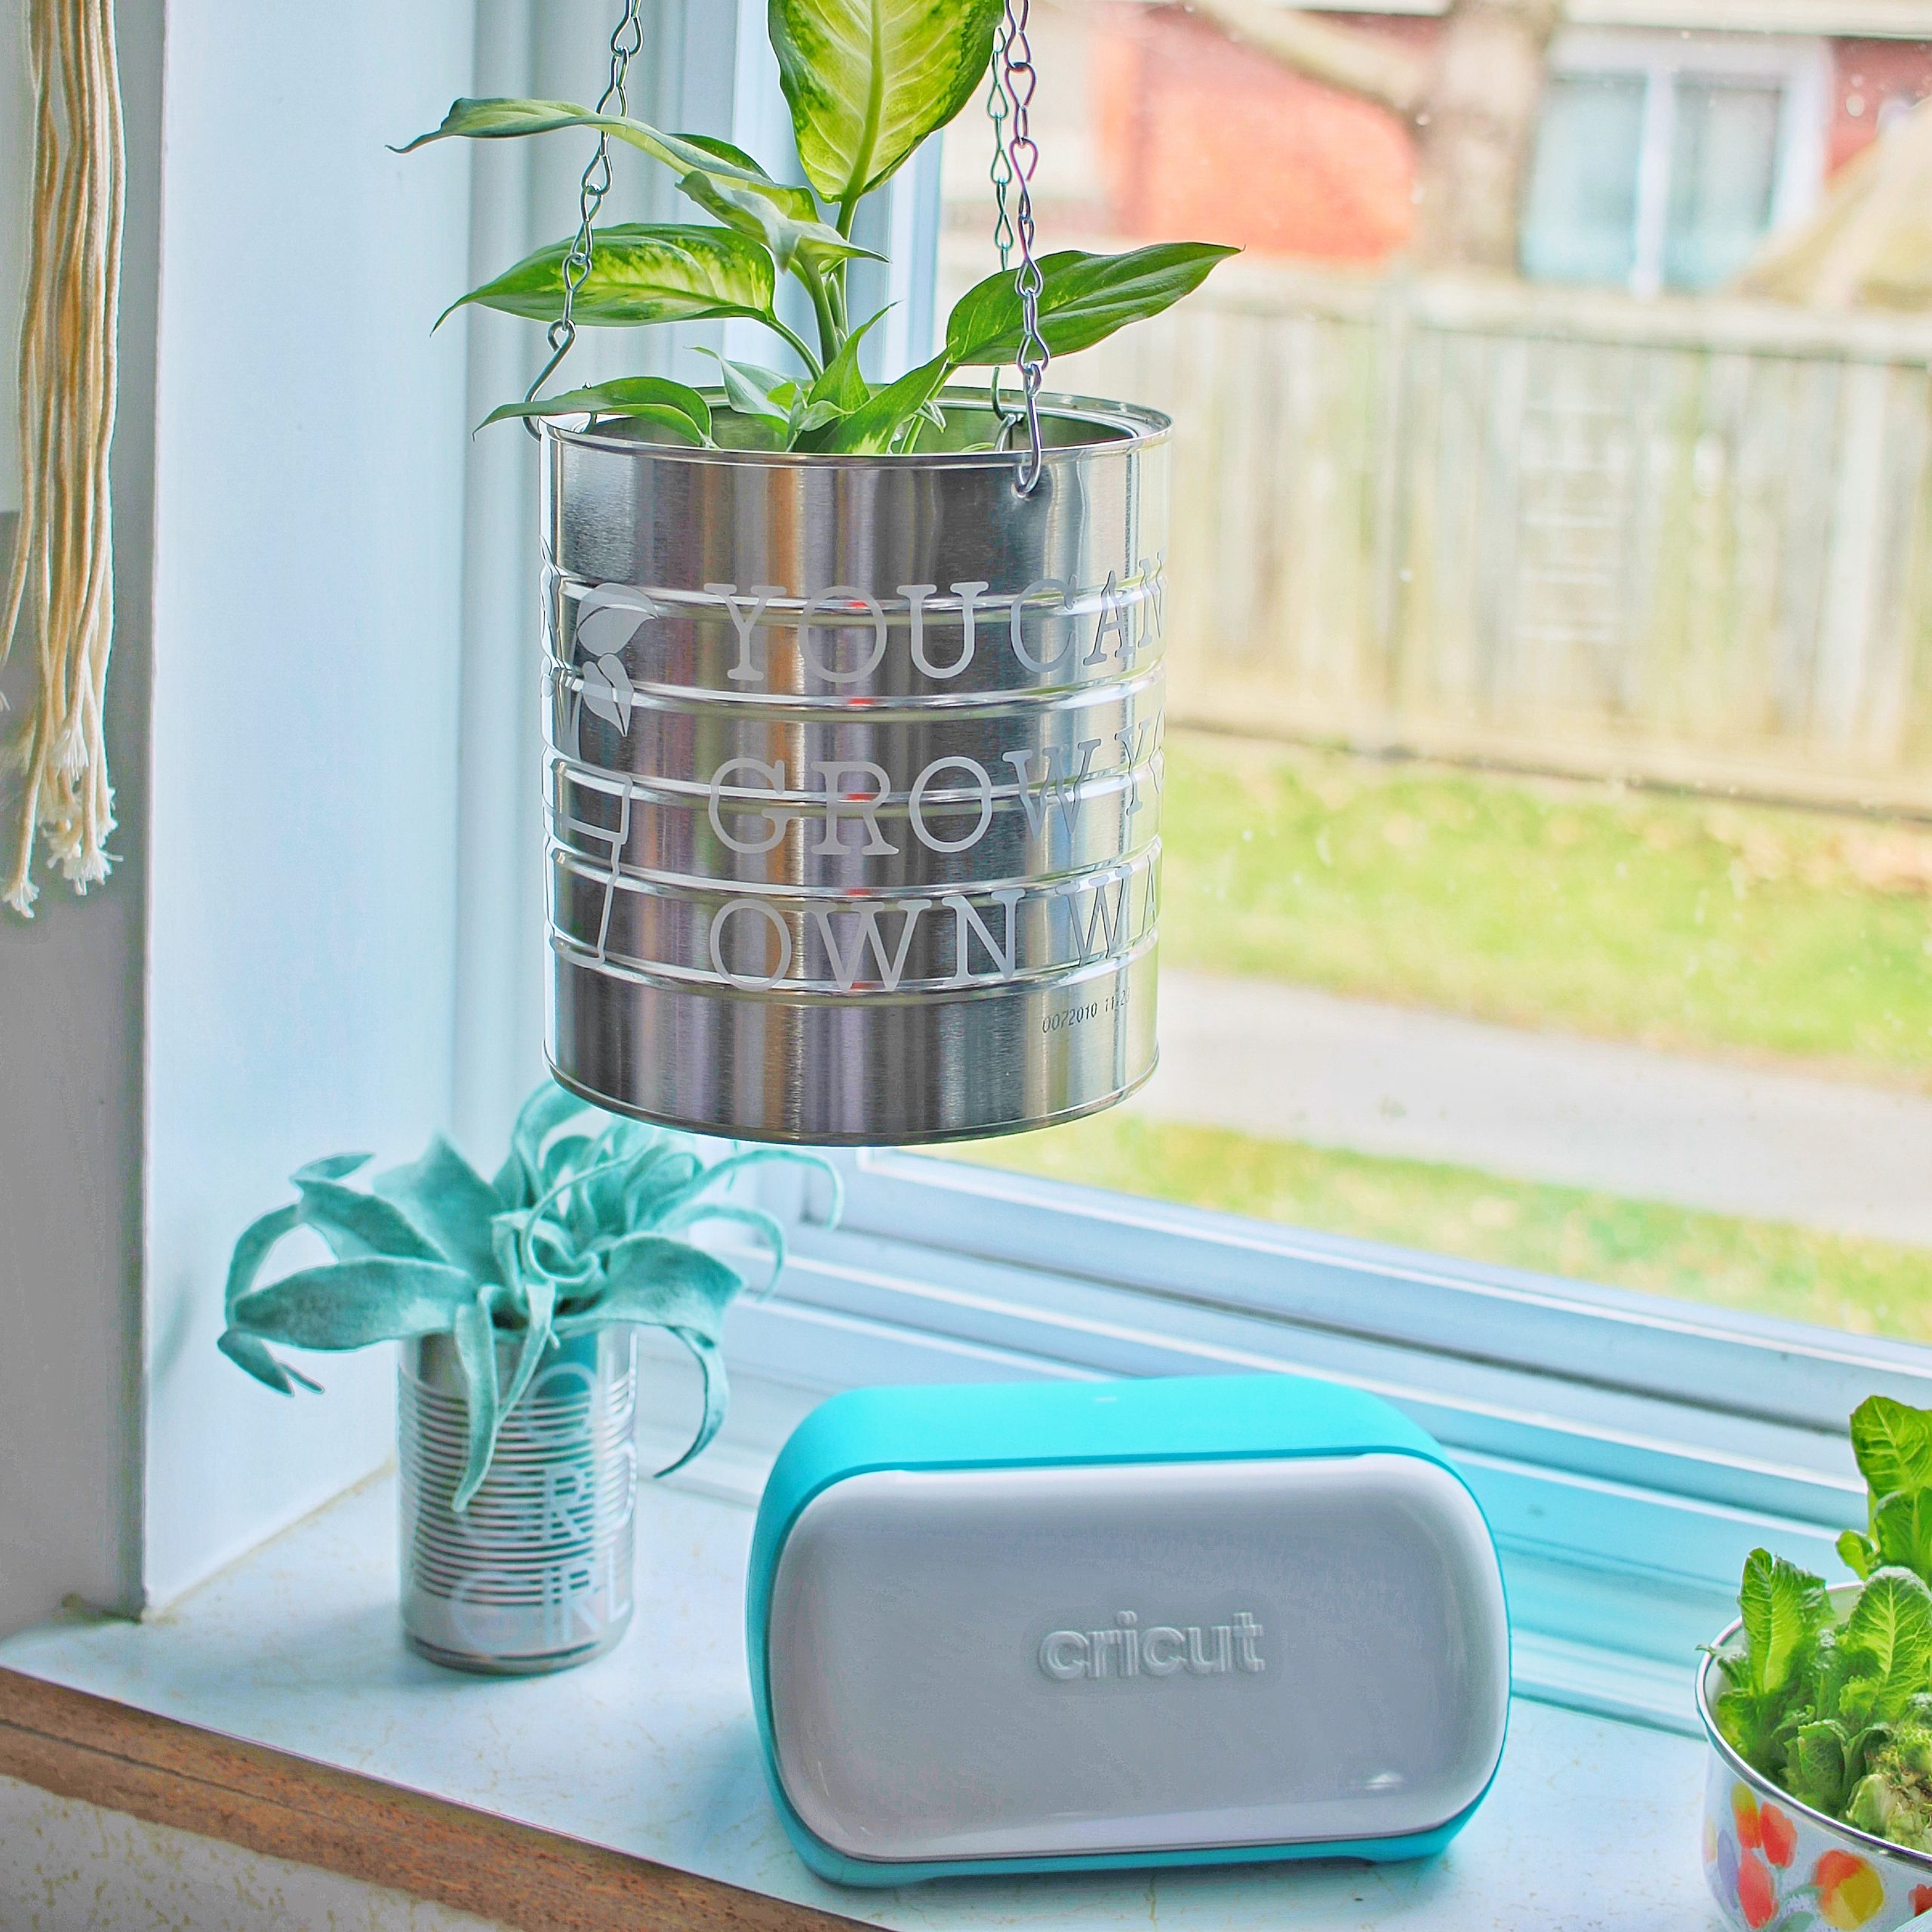
Once upon a time I decided to redecorate our kitchen so it could include a beautiful new plant window, full of hanging planters and dishes regrowing vegetables. I quickly realized that most planters I looked at either clashed with my ideas or were just too out of budget for me to want to splurge on. So I did what I do best – I looked around the house to figure out what I could revamp into a planter I enjoyed.
That’s how this little DIY upcycled planter using the Cricut Joy™ came about!
THIS ARTICLE CONTAINS GIFTED PRODUCTS BUT ALL IDEAS AND OPINIONS ARE MY OWN
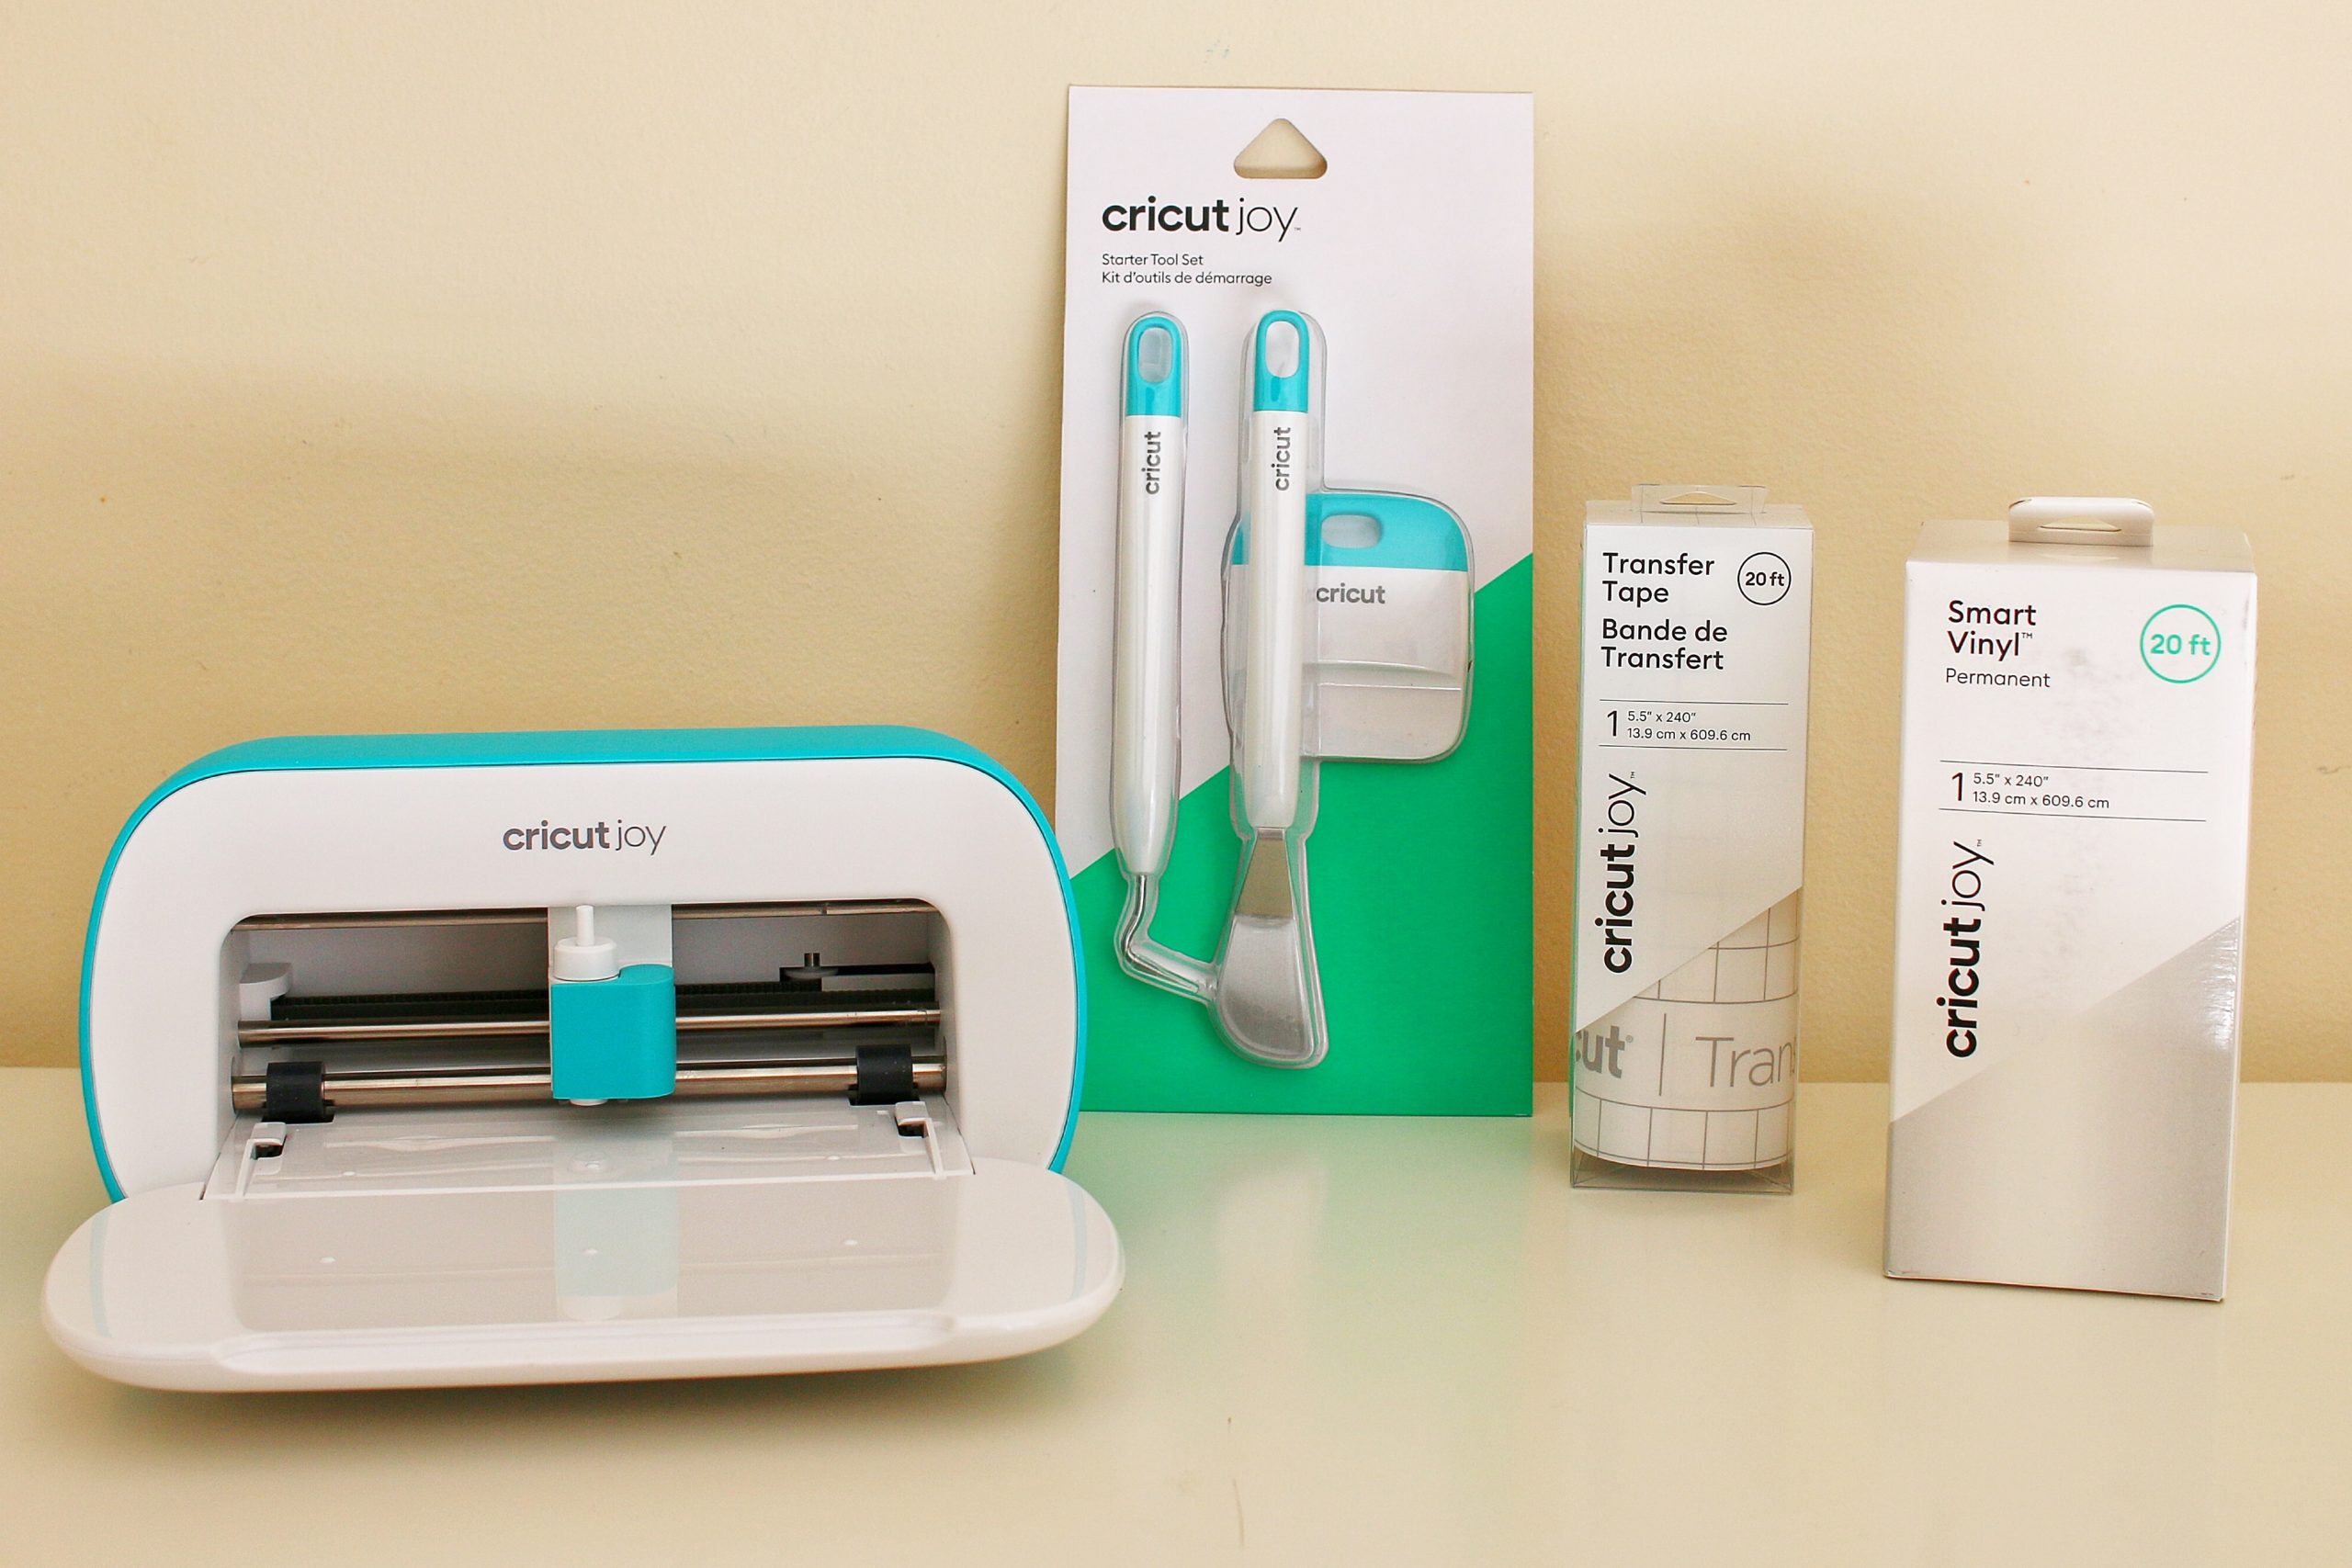
MATERIALS USED
- Cricut Joy™
- Cricut Joy™ StrongGrip Transfer Tape
- Cricut Joy™ Smart Vinyl™ Permanent in White
- Cricut Starter Tool Set
- ‘You Grow Girl’ Design Space Link
- ‘You Can Grow Your Own Way’ Design Space Link
- Recycled cans (I used one coffee can and one soup can)
- Scissors
Before you start this DIY upcycled planter using the Cricut Joy™, you’ll need to prep the recycled containers. I used a coffee tin and a soup can, but you could also use a plastic coffee container, a tea tin or a plain planter you already own! Make sure it’s washed well, remove the leftover glue if you wish and then let it dry.
Now you’re ready to go!
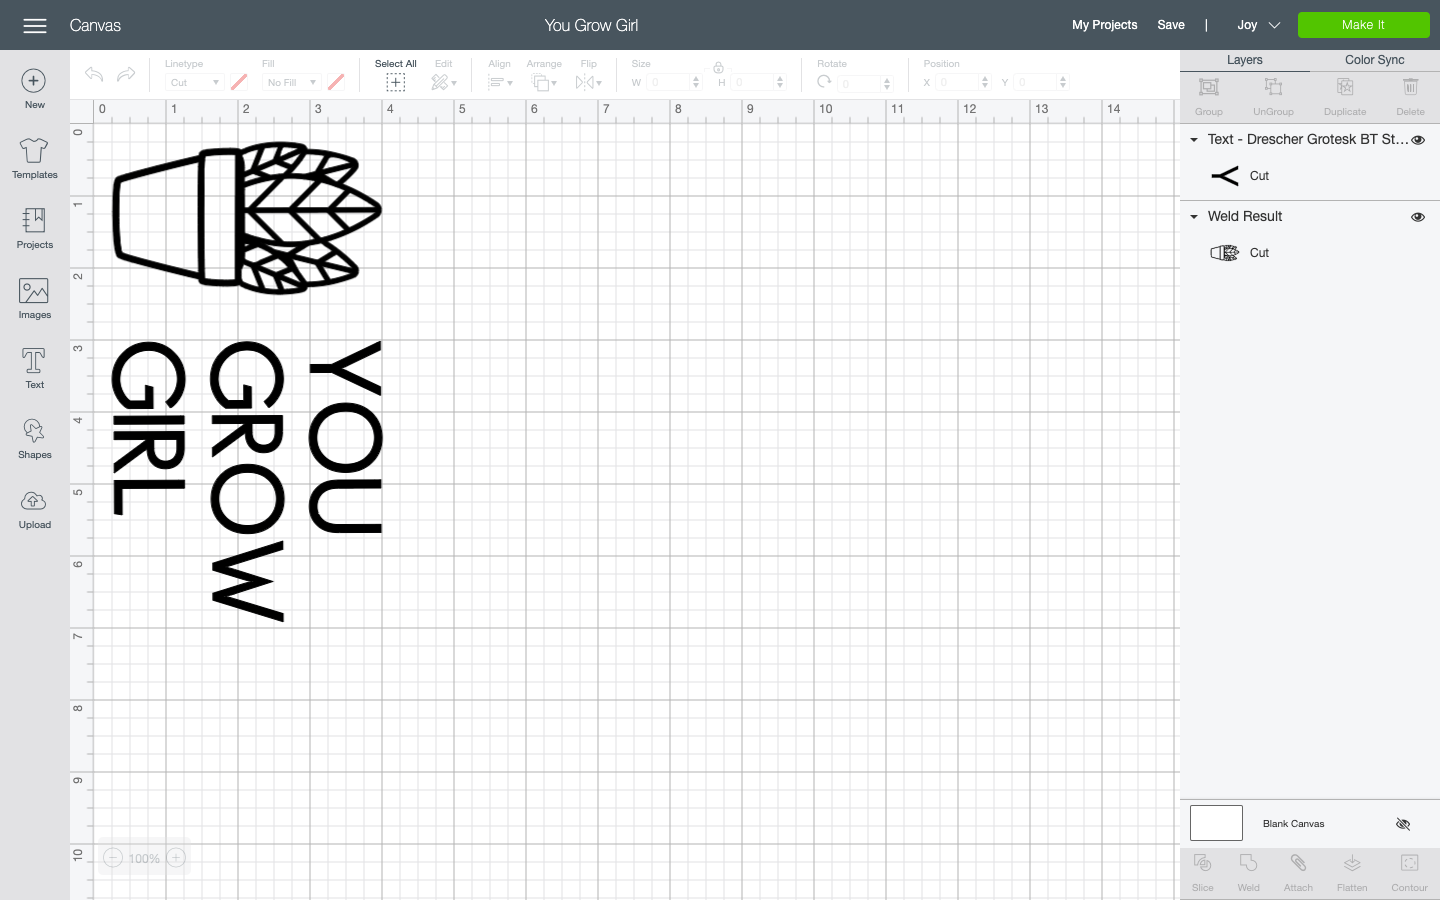
STEP ONE: CREATE YOUR DESIGN IN DESIGN SPACE
Measure the planters you’ll be using to decide how tall and wide you want your design to be. It’ll allow you to play with your fonts and images without needing to resize them all after!
You can find the You Grow Girl one I made h e r e and the You Can Grow Your Own Way one I made h e r e !
Some other plant puns you could use are:
- Aloe, is it me you’re looking for
- I wet my plants
- Blame it on my roots
- Succ It
- I beleaf in you
- Plant puns are so ferny
If you search ‘potted plant’ in the images section of Design Space you’ll find lots of options. You could even find the same plant you’re planning on adding to the planter!

STEP TWO: PRINT AND PEEL, BABY!
If you’re new to using your Cricut machine, printing your designs for you DIY upcycled planter using the Cricut Joy™ is fast, easy – and quiet! Once I was finished designing and was ready to print, I let the machine quietly work while I prepped a snack for my kids.
Once printed and unloaded, peel the backing you don’t need off. Tip: If there’s a lot of excess vinyl around your design, cut around your design first so you can reuse your scraps!
Use the Weeder tool to pick out any small pieces, like the circles inside of the letter o. I highly suggest using to tool instead of your nails to pick them out. I’ve ruined vinyl designs from trying to use something other than the Weeder.
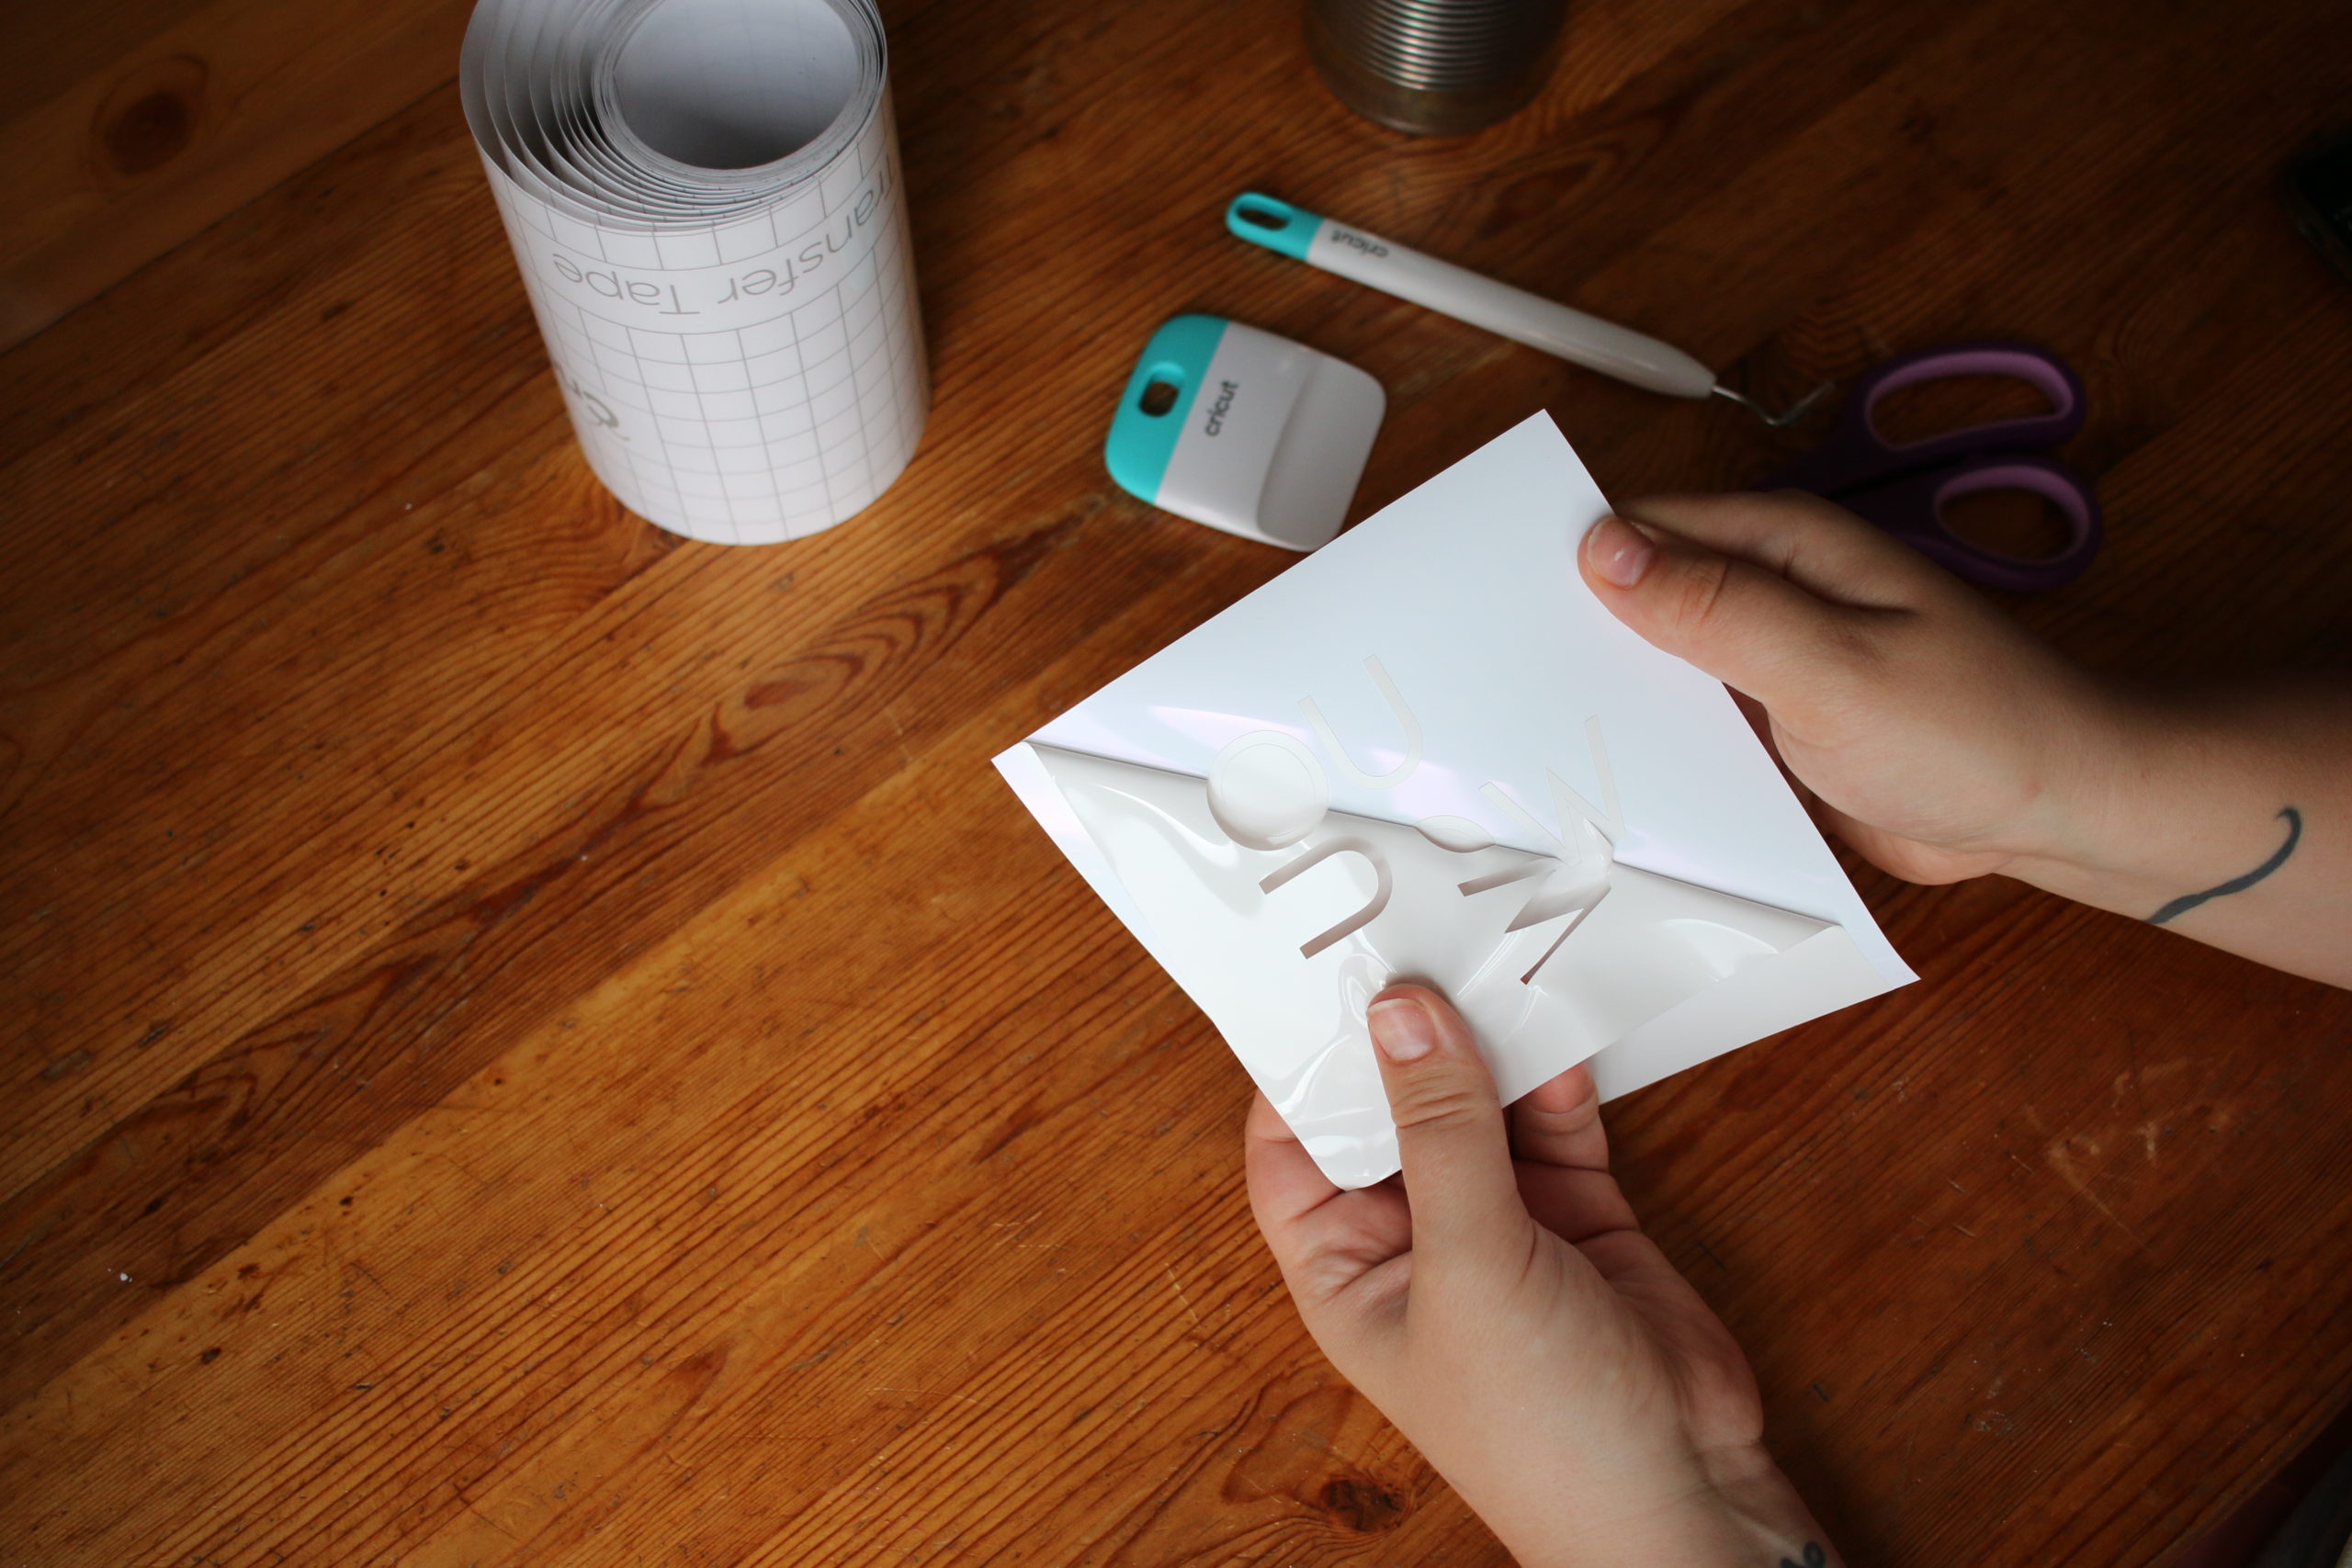
STEP THREE: PREPARE FOR TRANSFER
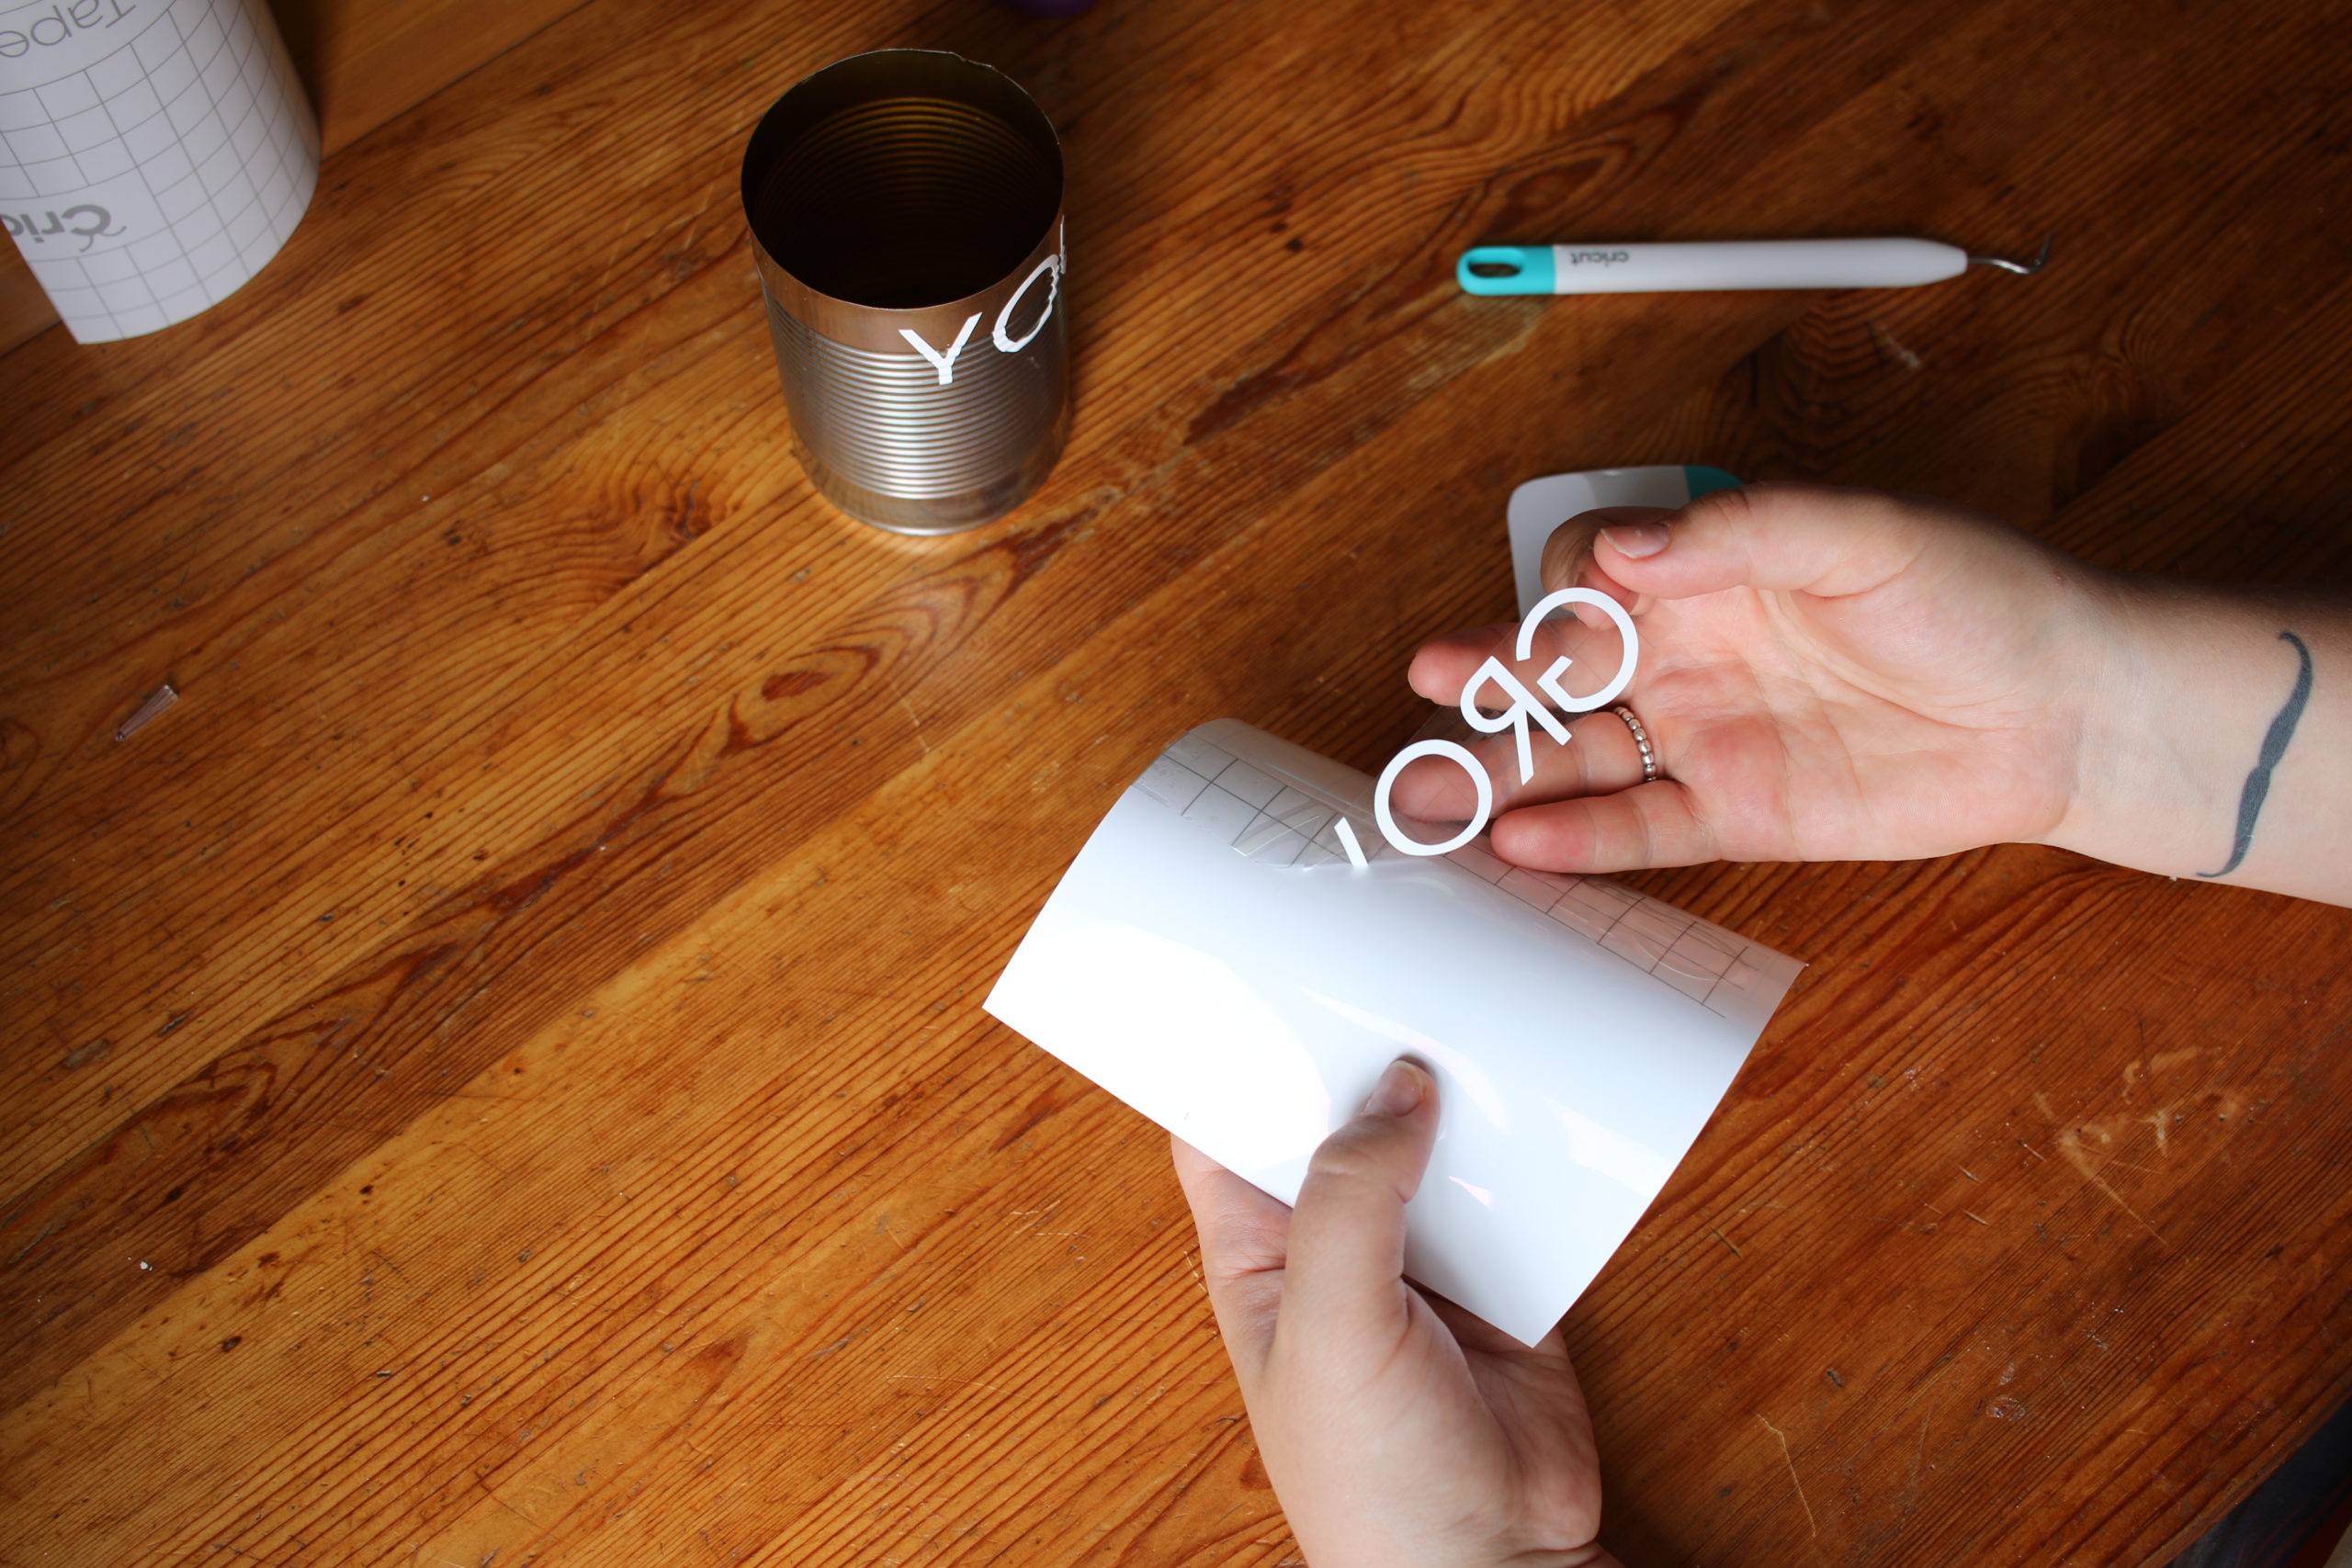
The Transfer Tape is the next material you need for this DIY Upcycled Planter using the Cricut Joy™. Cut out a piece that will just fit, peel off the backing and then cover the vinyl with it. I went word by word for mine and it was hugely due to the cans having the divets in their sides that I would need to work the vinyl into – and doing so in smaller chunks was best.
If you’re trying to keep your project as low waste as possible, cut out the smallest piece of transfer tape necessary. Some of my words weren’t 100% covered and if you choose to do the same carefully use the Weeder tool if you’re struggling to get the ends of your pattern the aren’t covered to lift off.
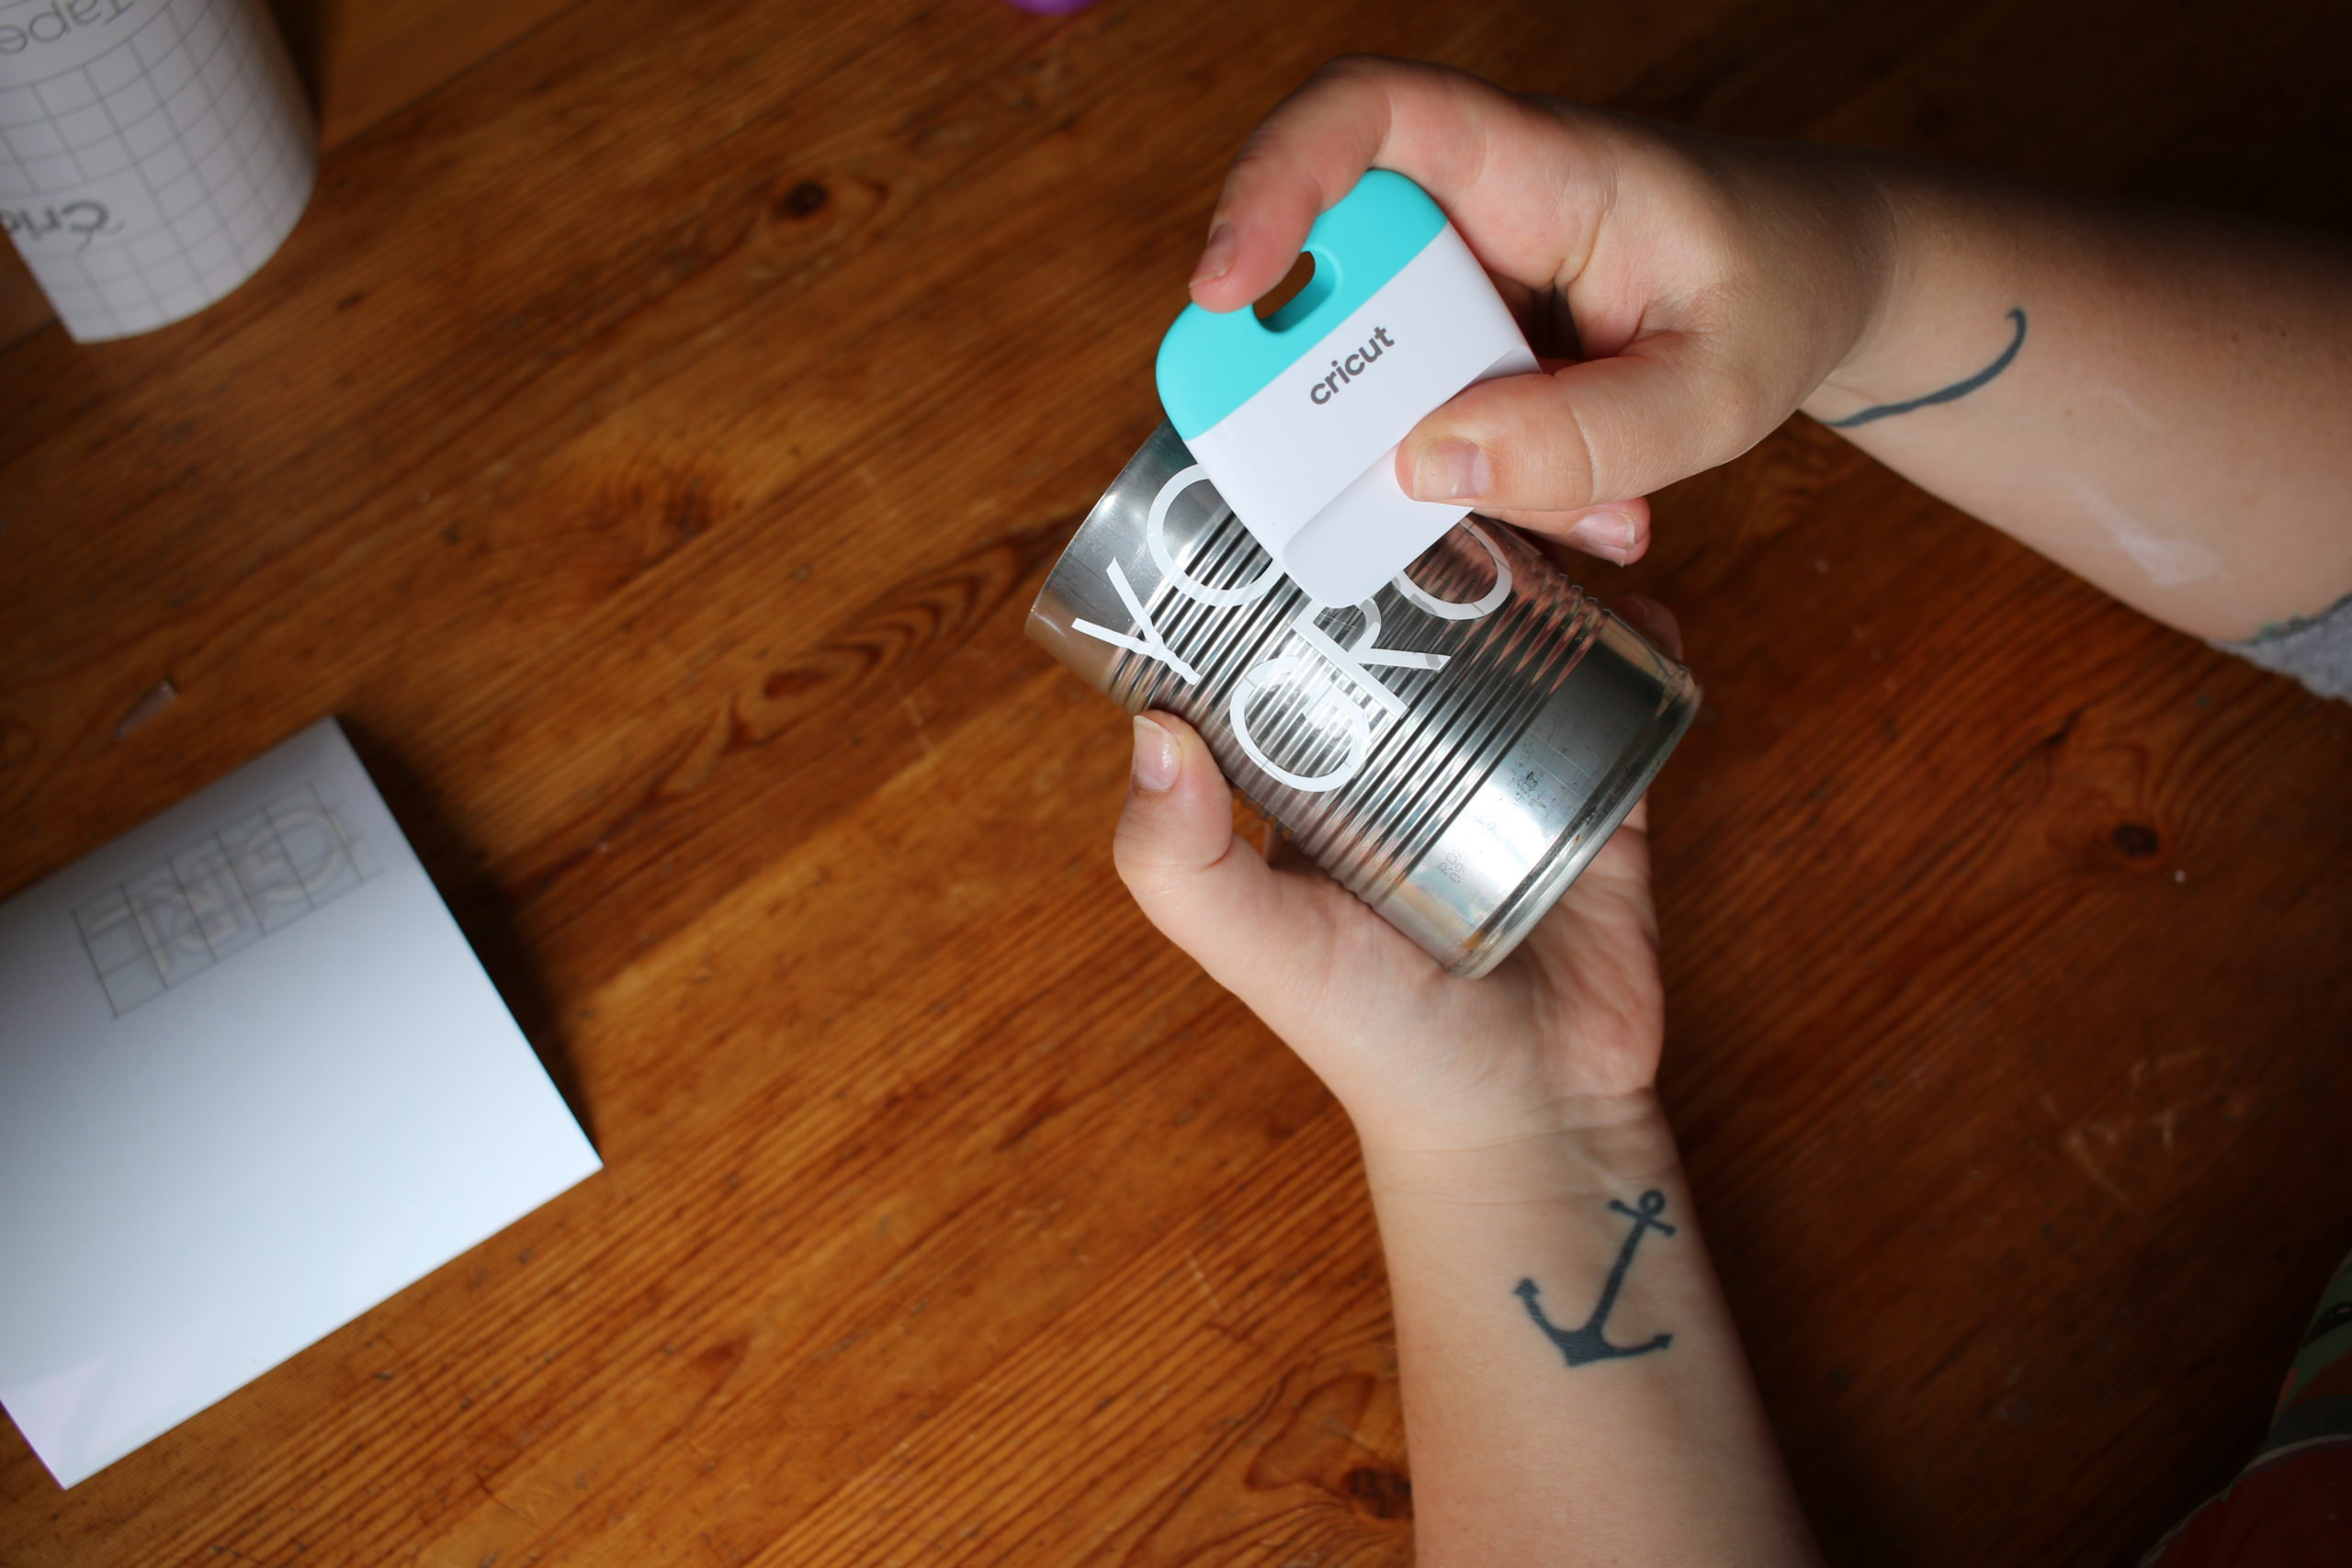
STEP FOUR: PRESS ON THE GOOD STUFF
Line up your design onto the pot and then press it on, either from left to right or top to bottom. I went top to bottom to ensure the vinyl was really getting into the groves of the sides of the cans. Once it’s in place use your Cricut Scraper to really get that vinyl stuck on and ensure it’s bubble free! Once it’s transferred, carefully peel back the Transfer Tape.
Now repeat until all your vinyl pieces are done!
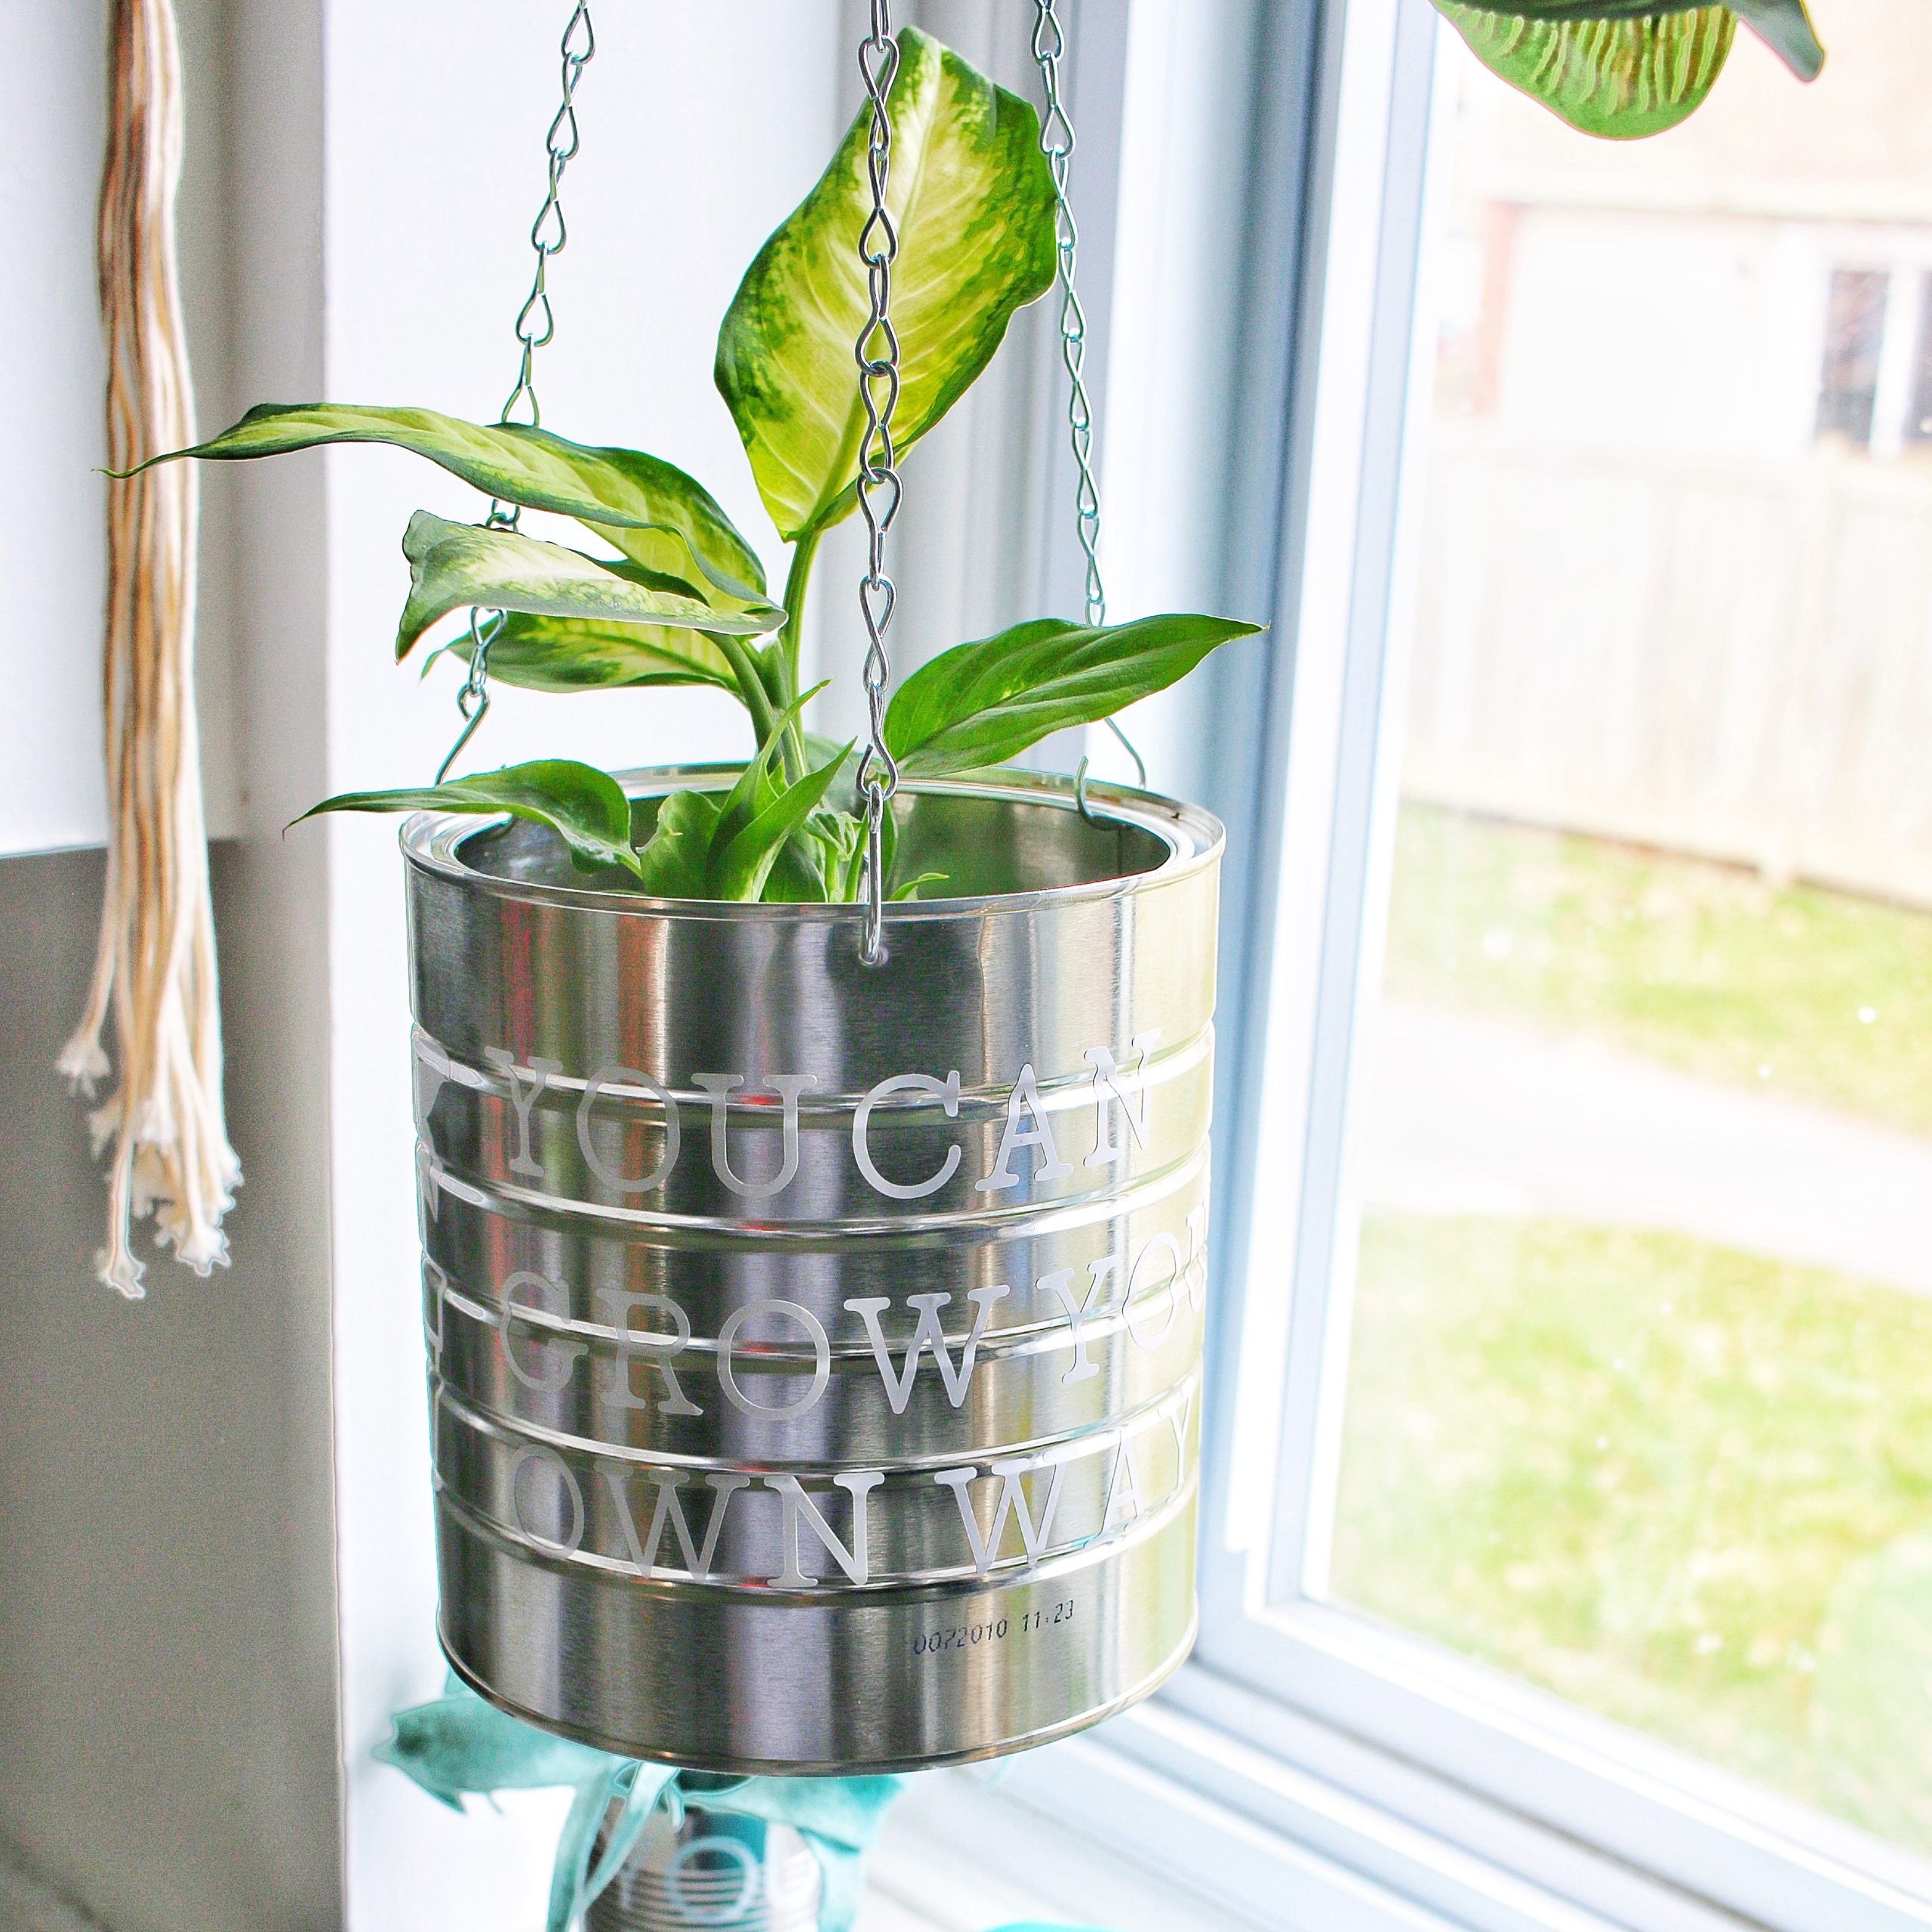
I had some hanger chains leftover from an old planter, so I decided to make my coffee canister into a hanging planter. I used a hammer and a nail to make three small holes and then inserted the chain hooks.
If you don’t already have planter chains, you could use string, twine or plain wire. Shower curtain hooks make great top hangers for planters, or you can use cheap S hooks. I found mine at our local Dollarama in the gardening section, but most hardware stores carry them too.
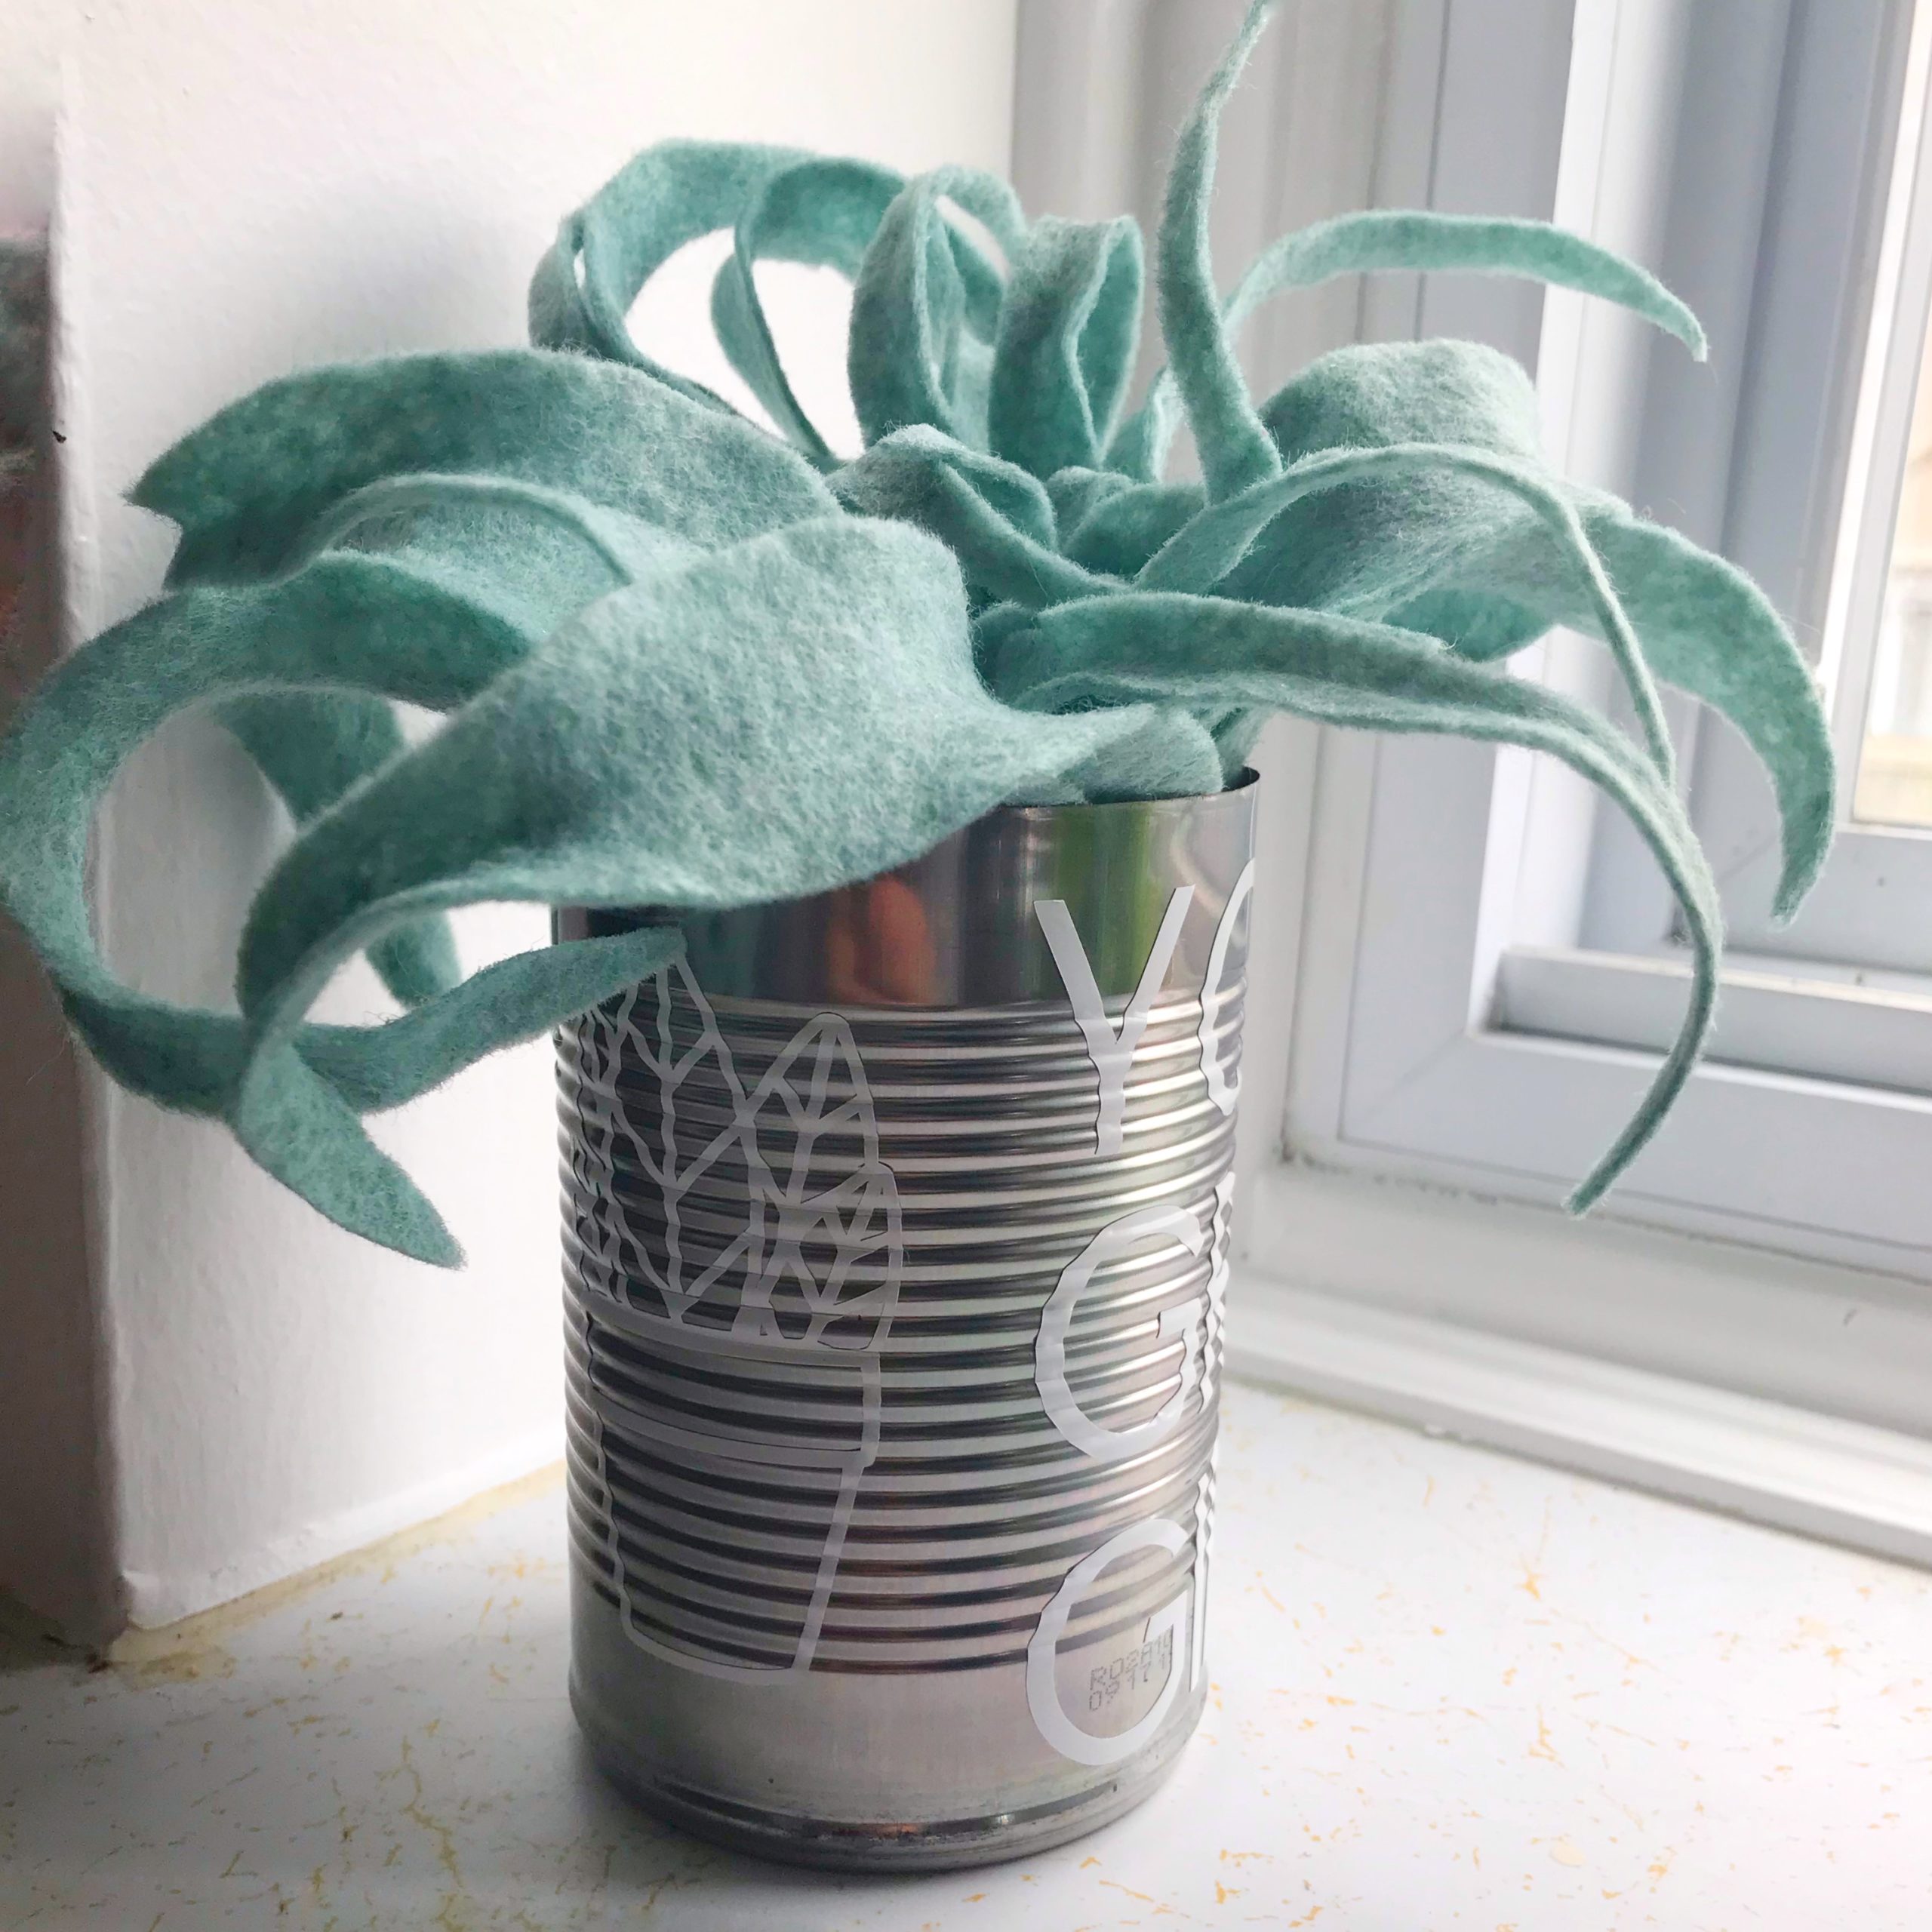
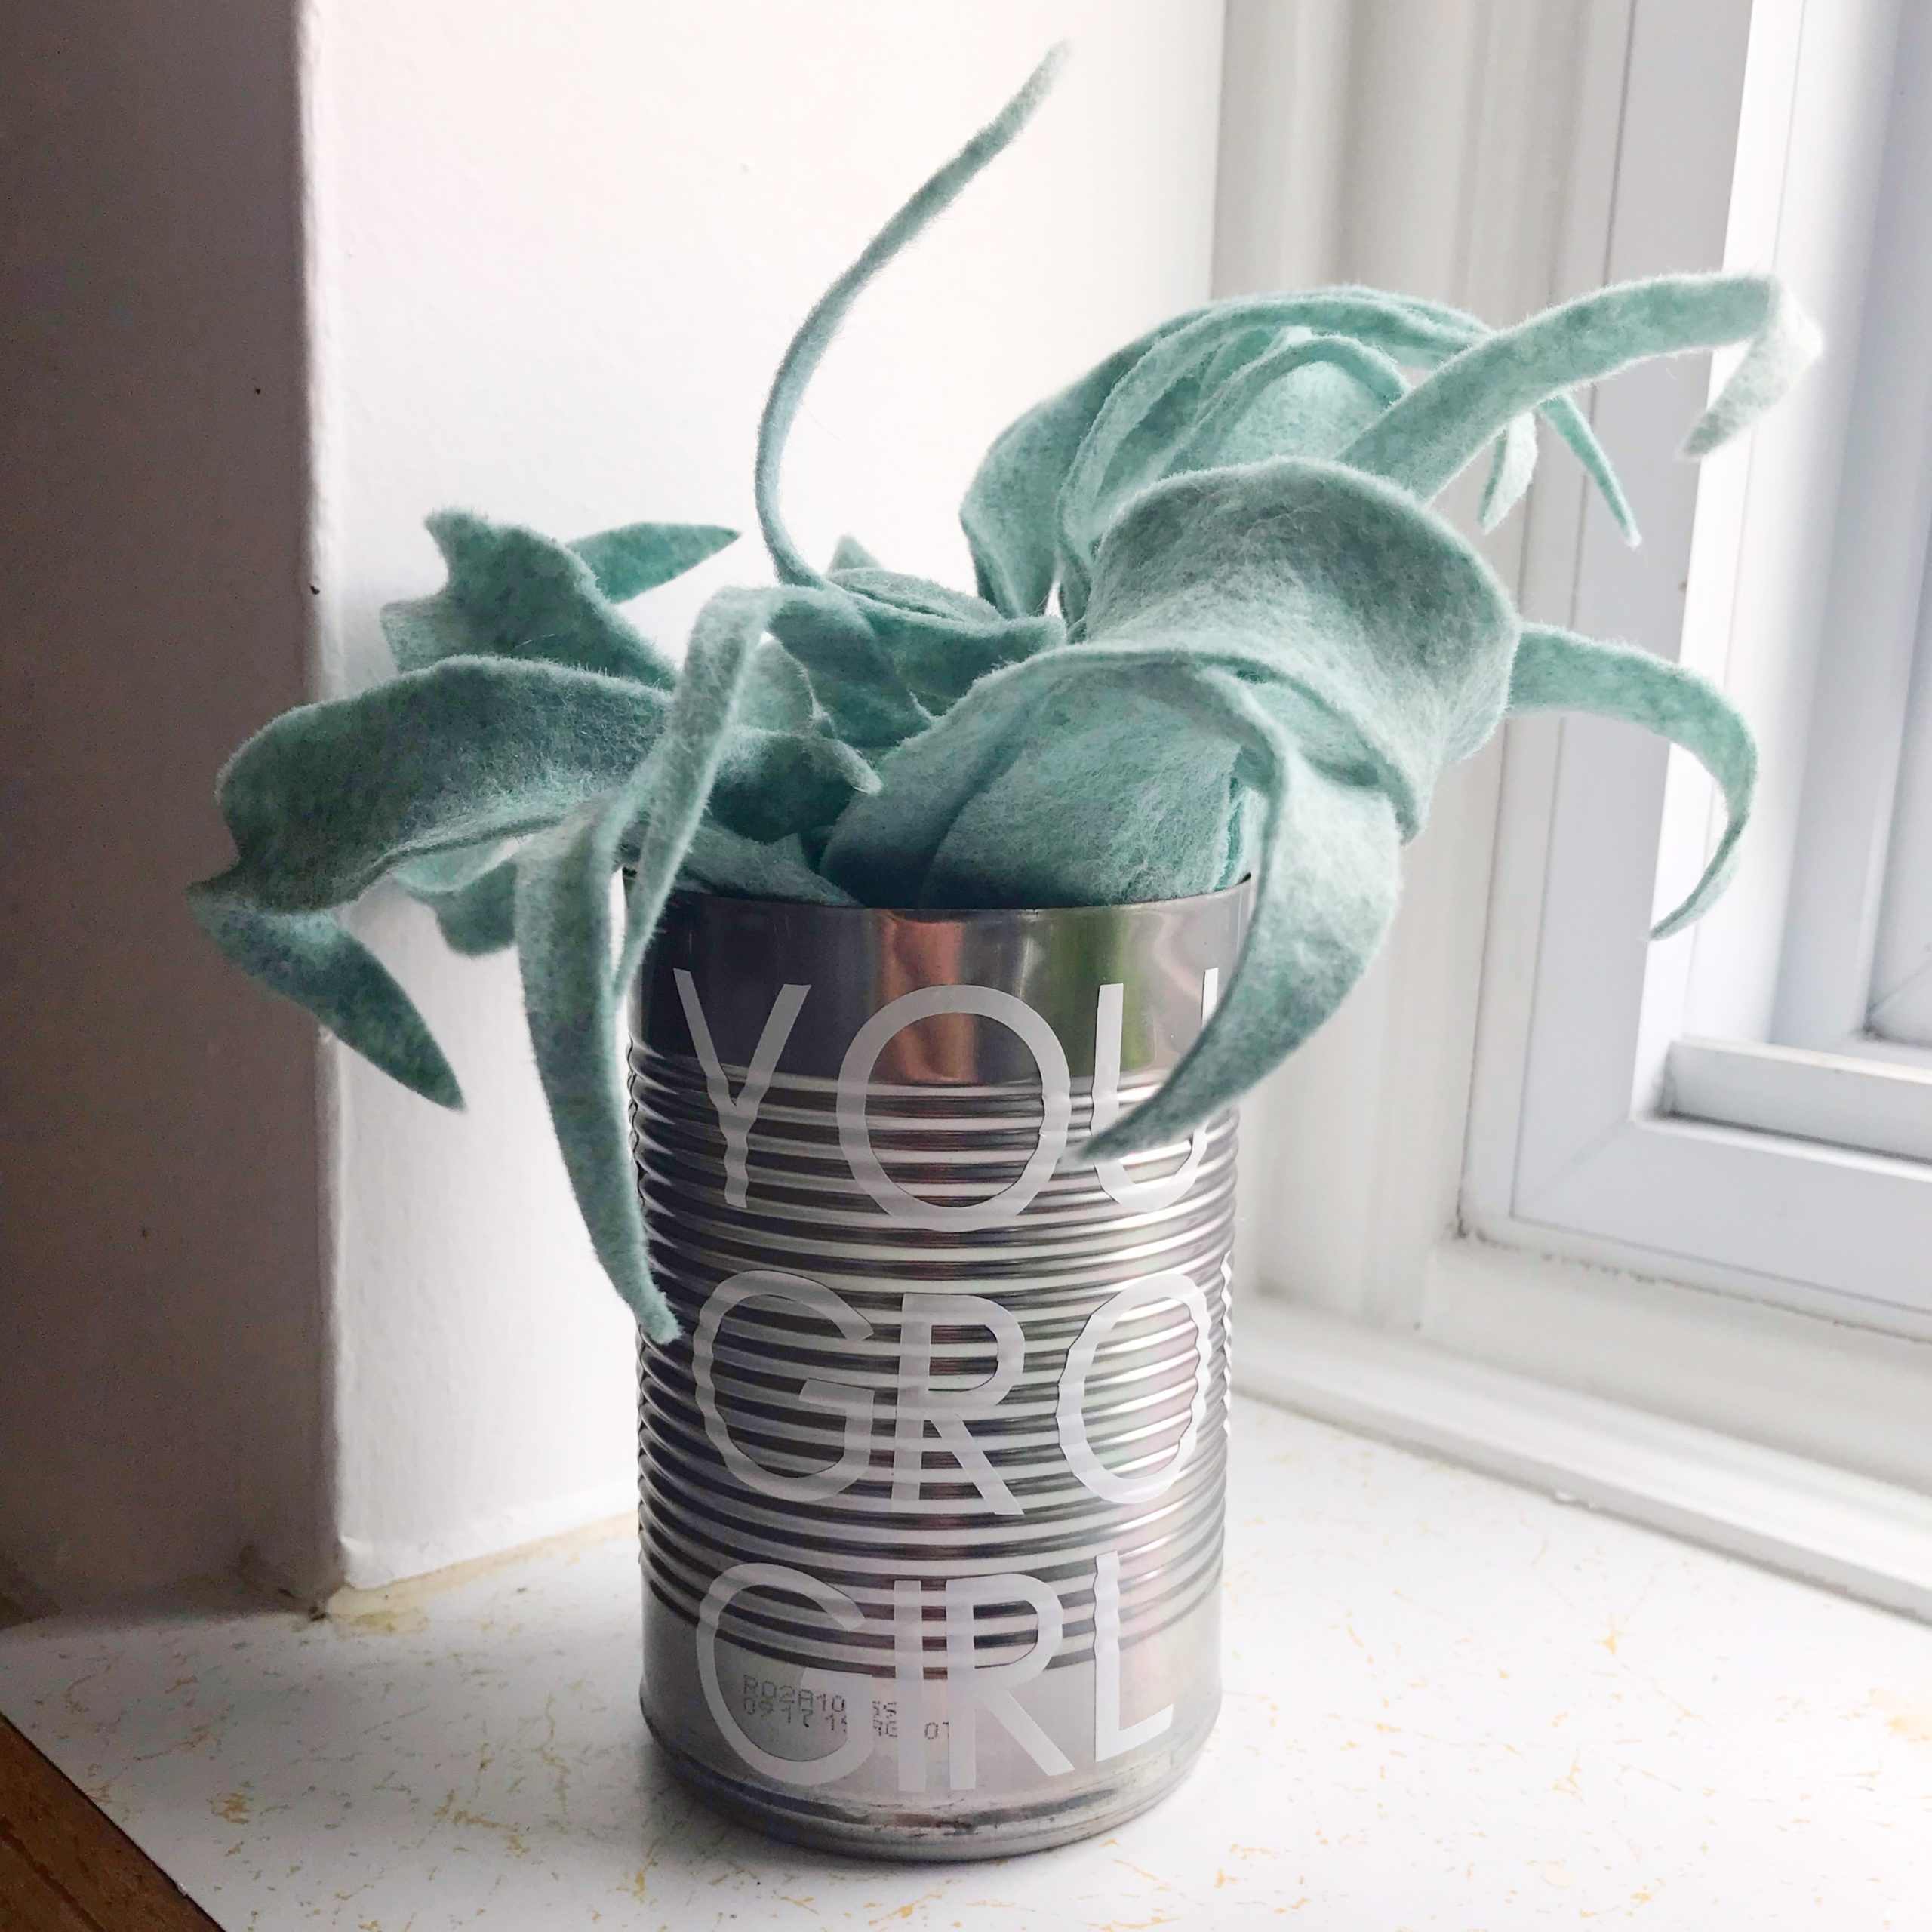
If you aren’t someone with a good green thumb you can still make these! They work great for artificial plants (I especially love the ones Ikea sells) or a felt plant like this beautiful one I recently got from Bear and Barbaloot.
Well, there it is! My DIY upcycled planter using the Cricut Joy™. I have many more ideas, including some fun kids toy upcycles, coming up using this fun little machine so be sure to check back, follow me on Pinterest or join the newsletter list below!
The form you have selected does not exist.
Disney Castle Wall Decor Using the Cricut Joy
July 22, 2020 at 1:07 am[…] UPCYCLED PLANTERS USING THE CRICUT JOY […]
EASY PERSONALIZED LEARNING CORNER FOR NOT-SO BACK TO SCHOOL (USING THE CRICUT JOY!) | BEING THIS MAMA
August 21, 2020 at 5:45 pm[…] DIY UPCYCLED PLANTER USING THE CRICUT JOY™ […]
DIY Mickey Mouse Pillow using the Cricut Joy
August 28, 2020 at 1:56 am[…] UPCYCLED PLANTER DIY USING THE CRICUT JOY […]
Five Reasons I love My Cricut Joy - Being This Mama
August 30, 2020 at 1:28 pm[…] DIY UPCYCLED PLANTERS USING THE CRICUT JOY […]
Melissa and Doug Grocery Store Makeover by Being This Mama
September 16, 2020 at 7:11 pm[…] CHECK OUT MY CRICUT JOY PLANTER DIY […]