PLANT SHELF DIY
This may be one of my favourite DIY hacks to date. After a year or two of staring at our kitchen window and wanting to create something beautiful I went ahead with this plant shelf DIY using some Ikea GREJIG shoe racks!
NOTE: Head to the bottom for an update one year later!
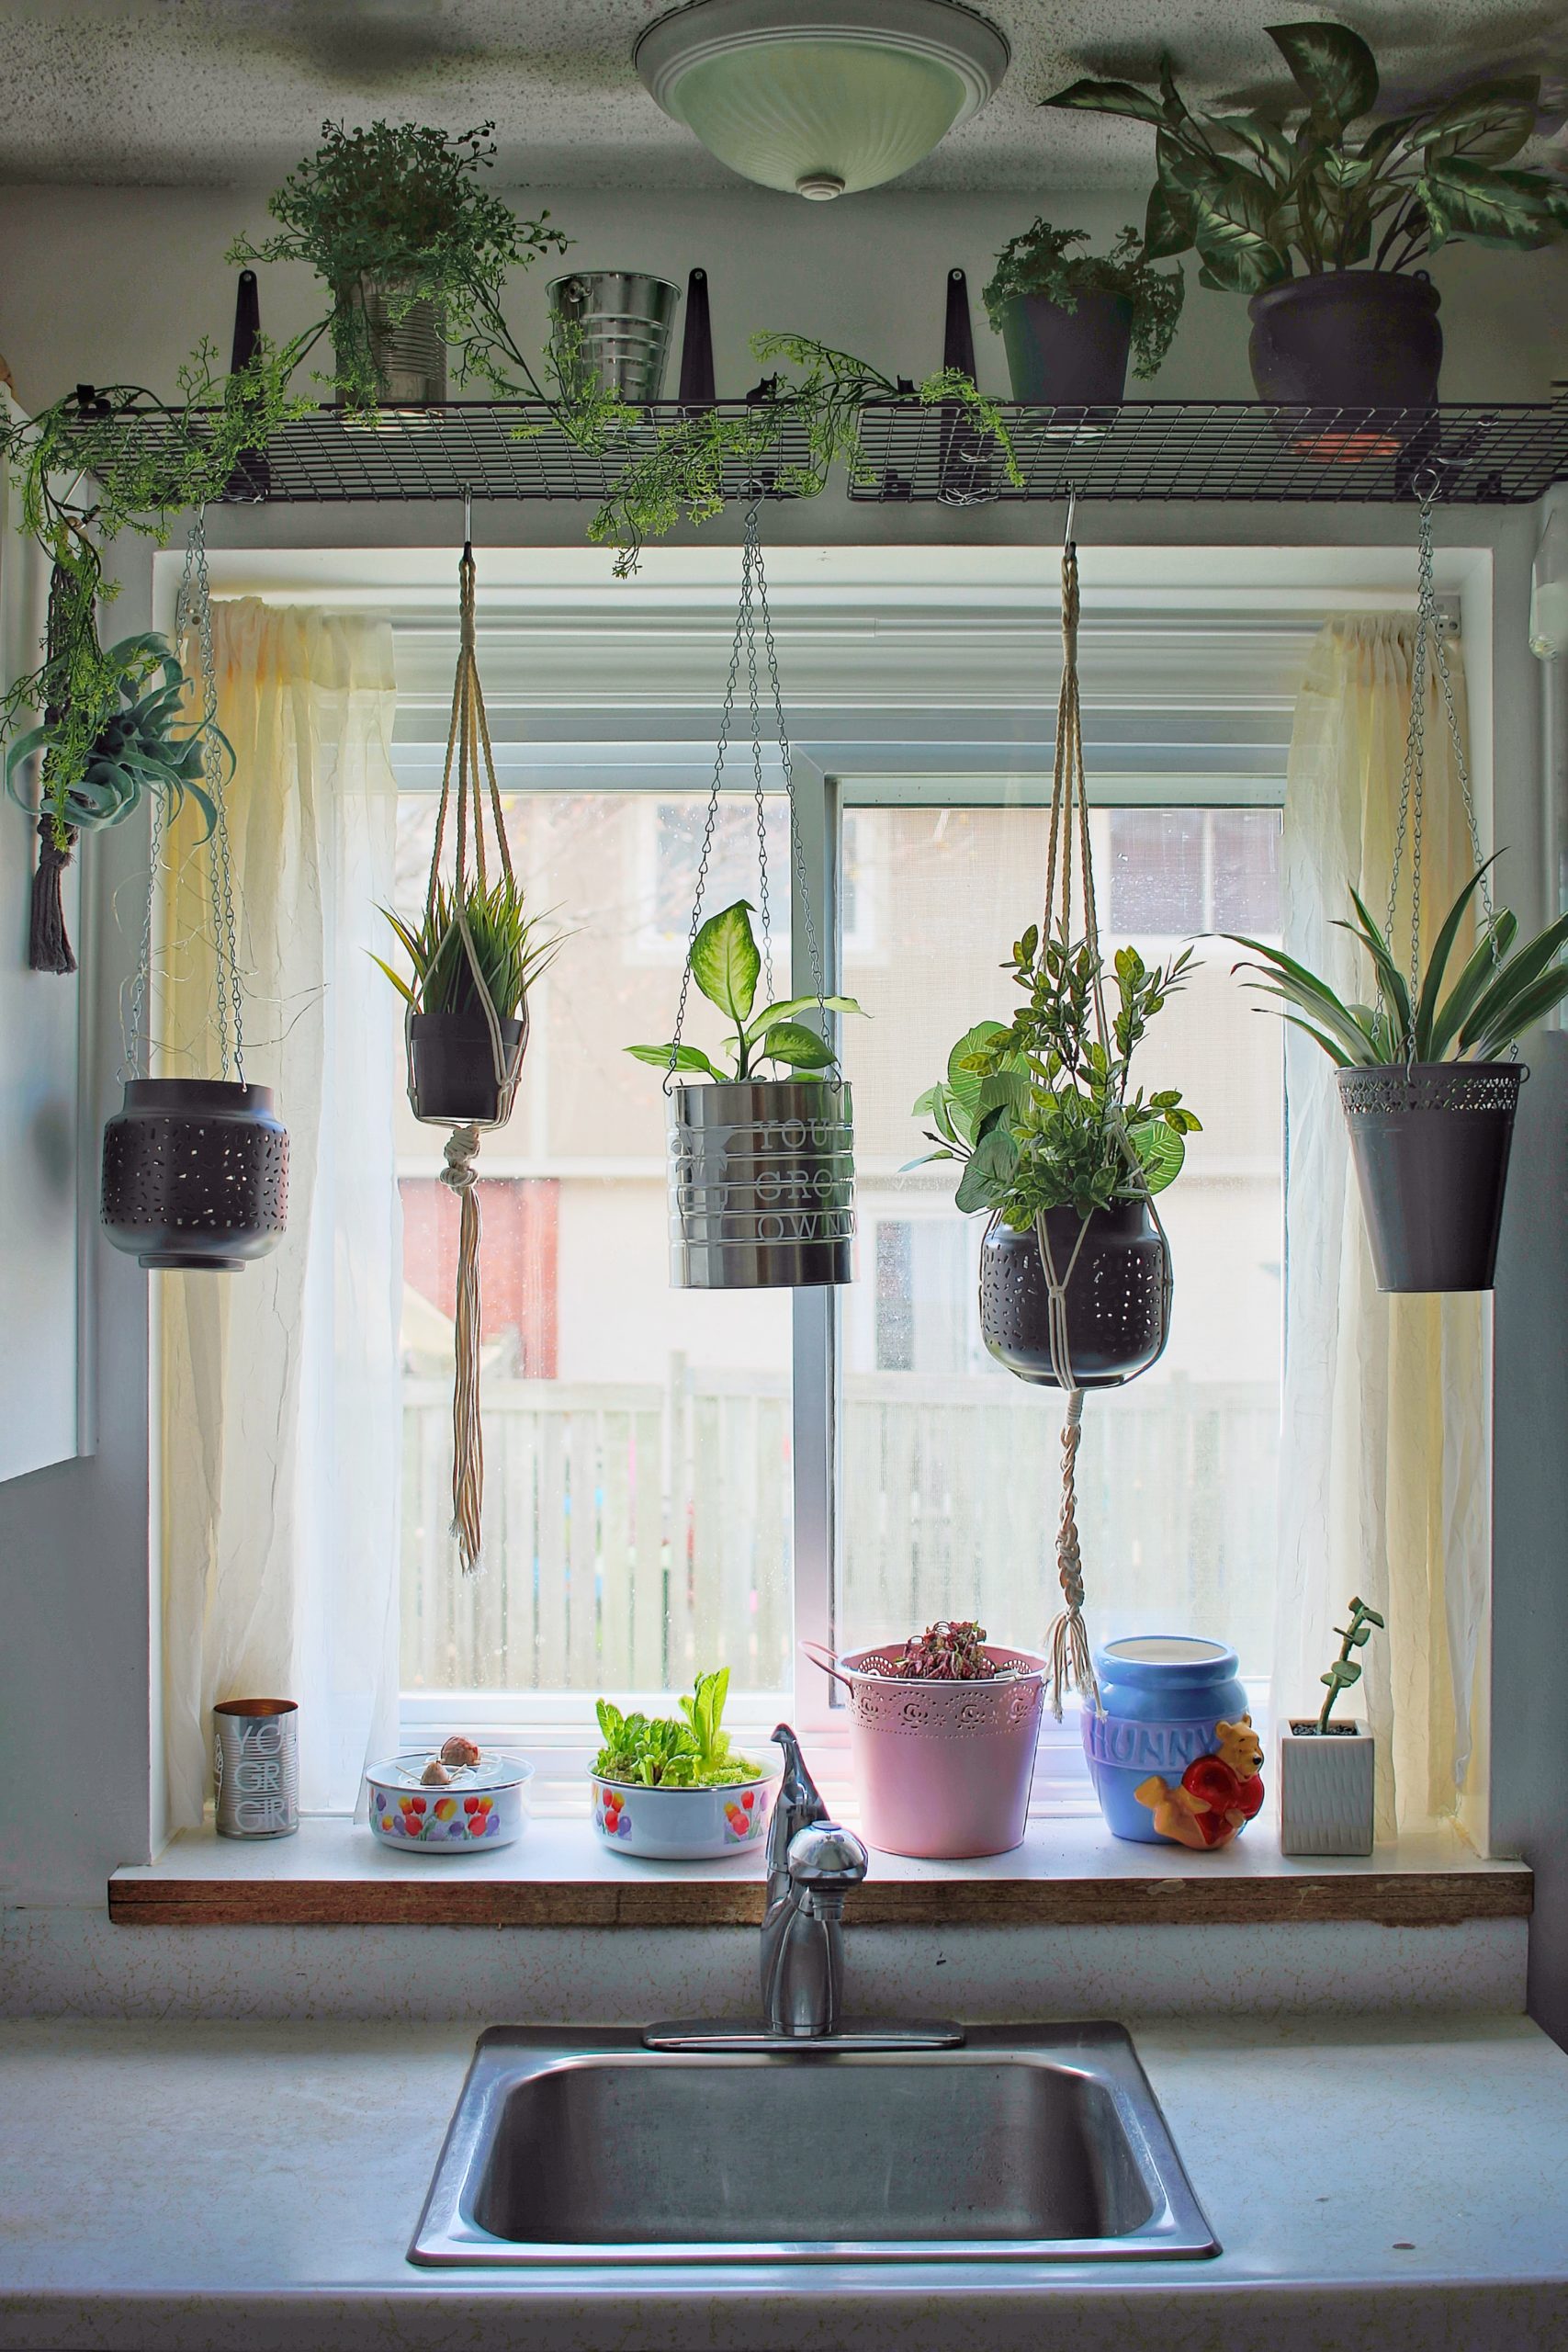
When I was planning our mini kitchen makeover during the long 2020 lockdown a huge part of it was wanting a beautiful kitchen window that allowed as many plants as possible. While the window is small it’s our only ground floor window aside from our back door. Downsides to living in the middle of a townhouse row. At first I was going to to a rod across to hang plants, but I couldn’t help but feel like I could utilize the space even better.
Before coming up with the plant shelf DIY I had considered putting up shelving after deciding a rod wasn’t right. The problem with putting in a regular shelf is our kitchen light that’s above the sink and almost right against the wall, so if we put up a regular shelf it would block too much light.
As I stood in the kitchen I saw our front hall closet in the corner of my eye and it dawned on me – I could easily pull together a plant shelf DIY using an Ikea shoe rack. Honestly, we weren’t a fan of these shoe racks for our closet anymore anyways. They’re too small and always fell over. Upcycling them into a plant shelf DIY was a great way to reuse instead of giving away or sending them to landfill.
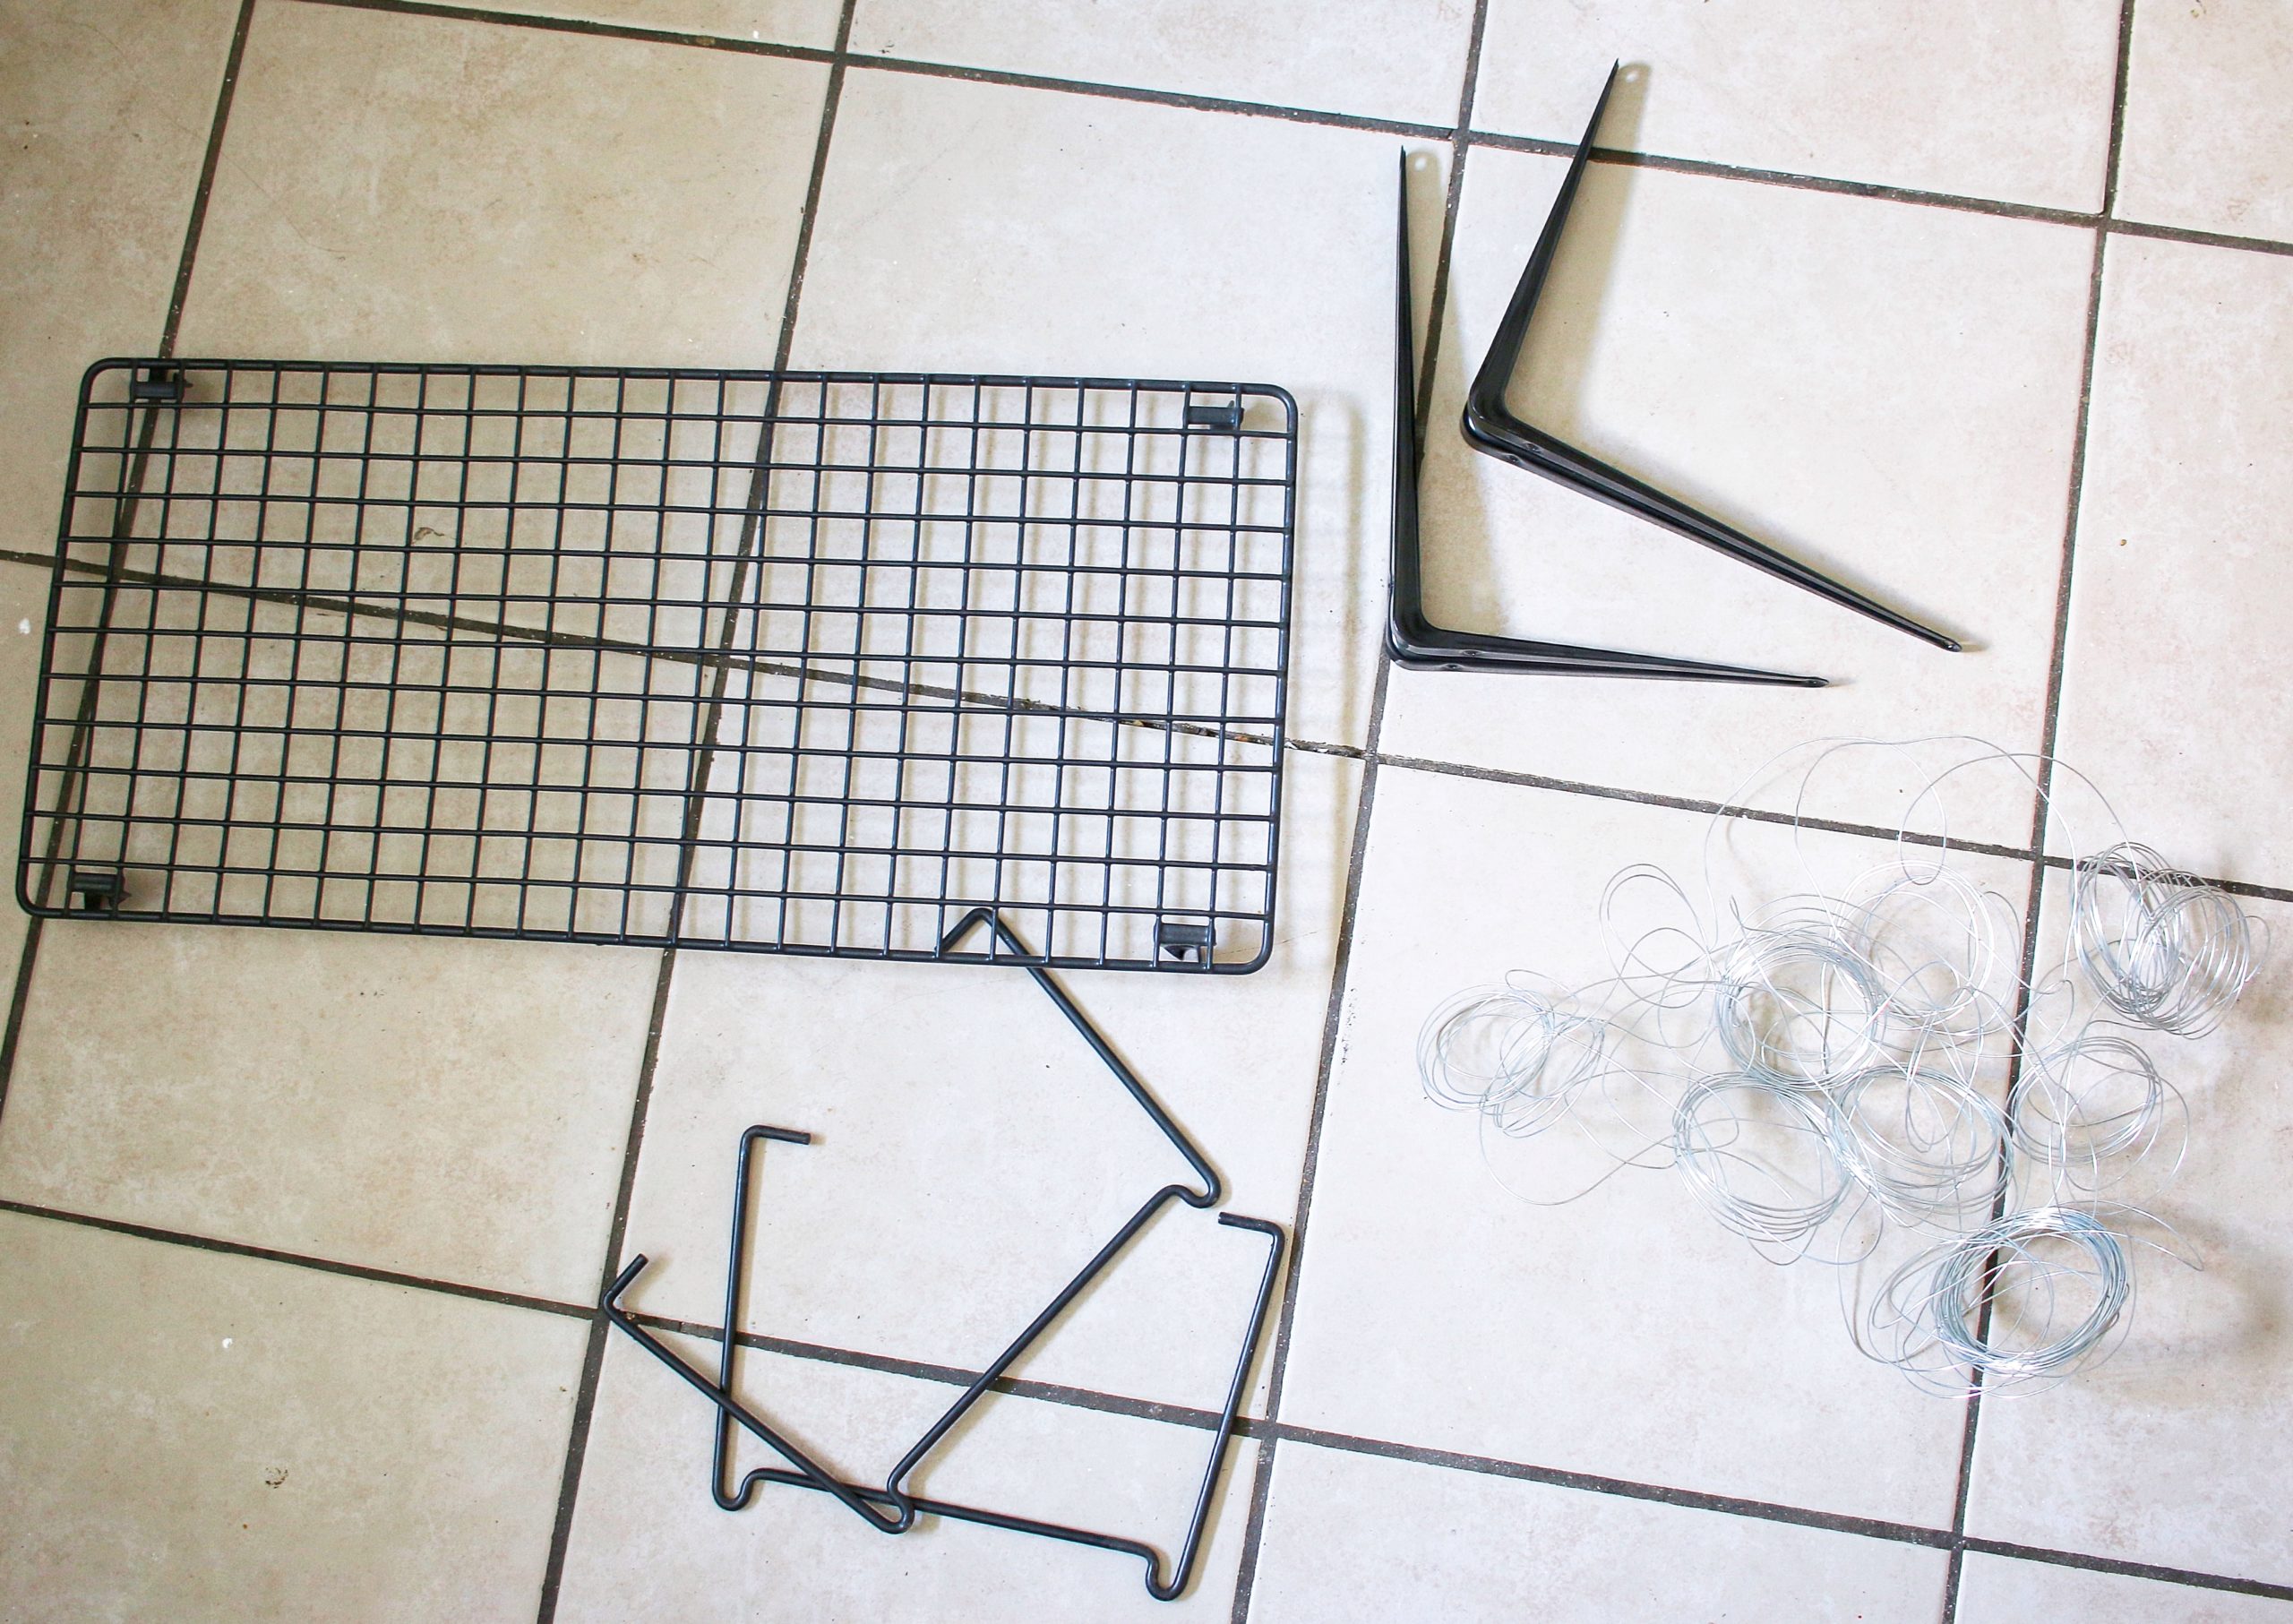
MATERIALS USED FOR THE PLANT SHELF DIY:
- Ikea GREJIG shoe racks
- Two shelf brackets per shoe rack
- Wire
- Optional: twine
- Screwdriver
- Screws + wall plugs
- Level
- Measuring Tape
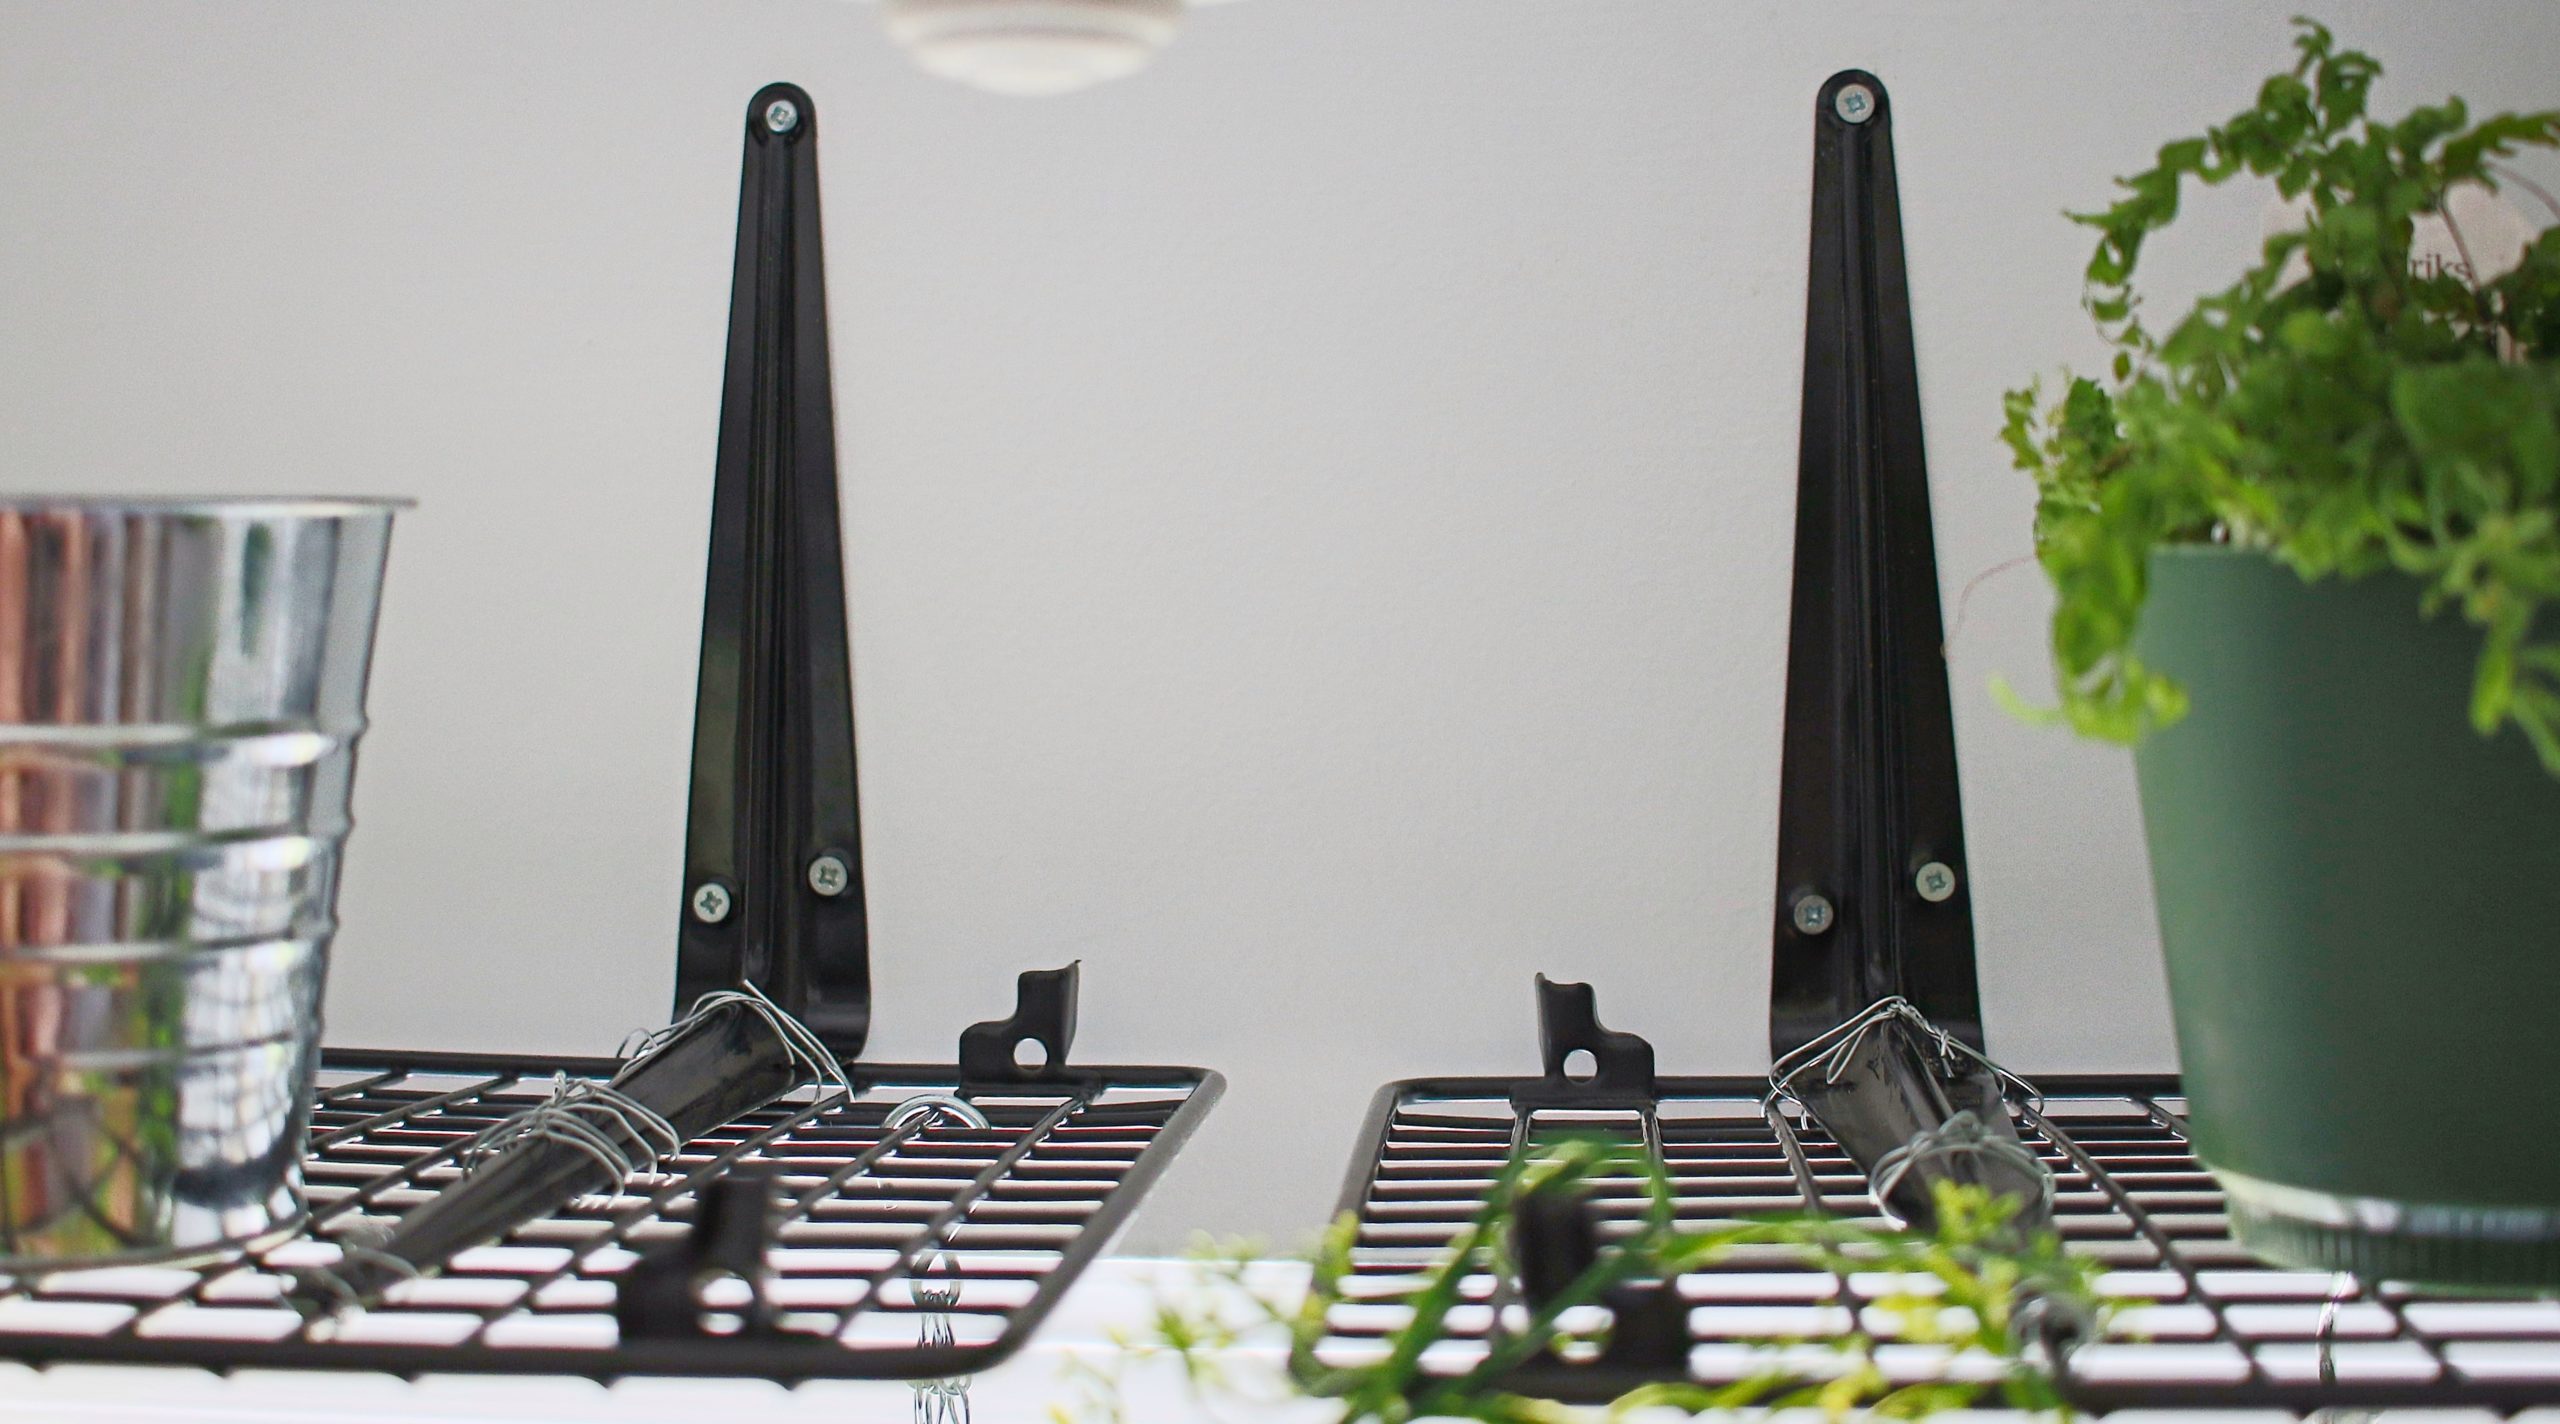
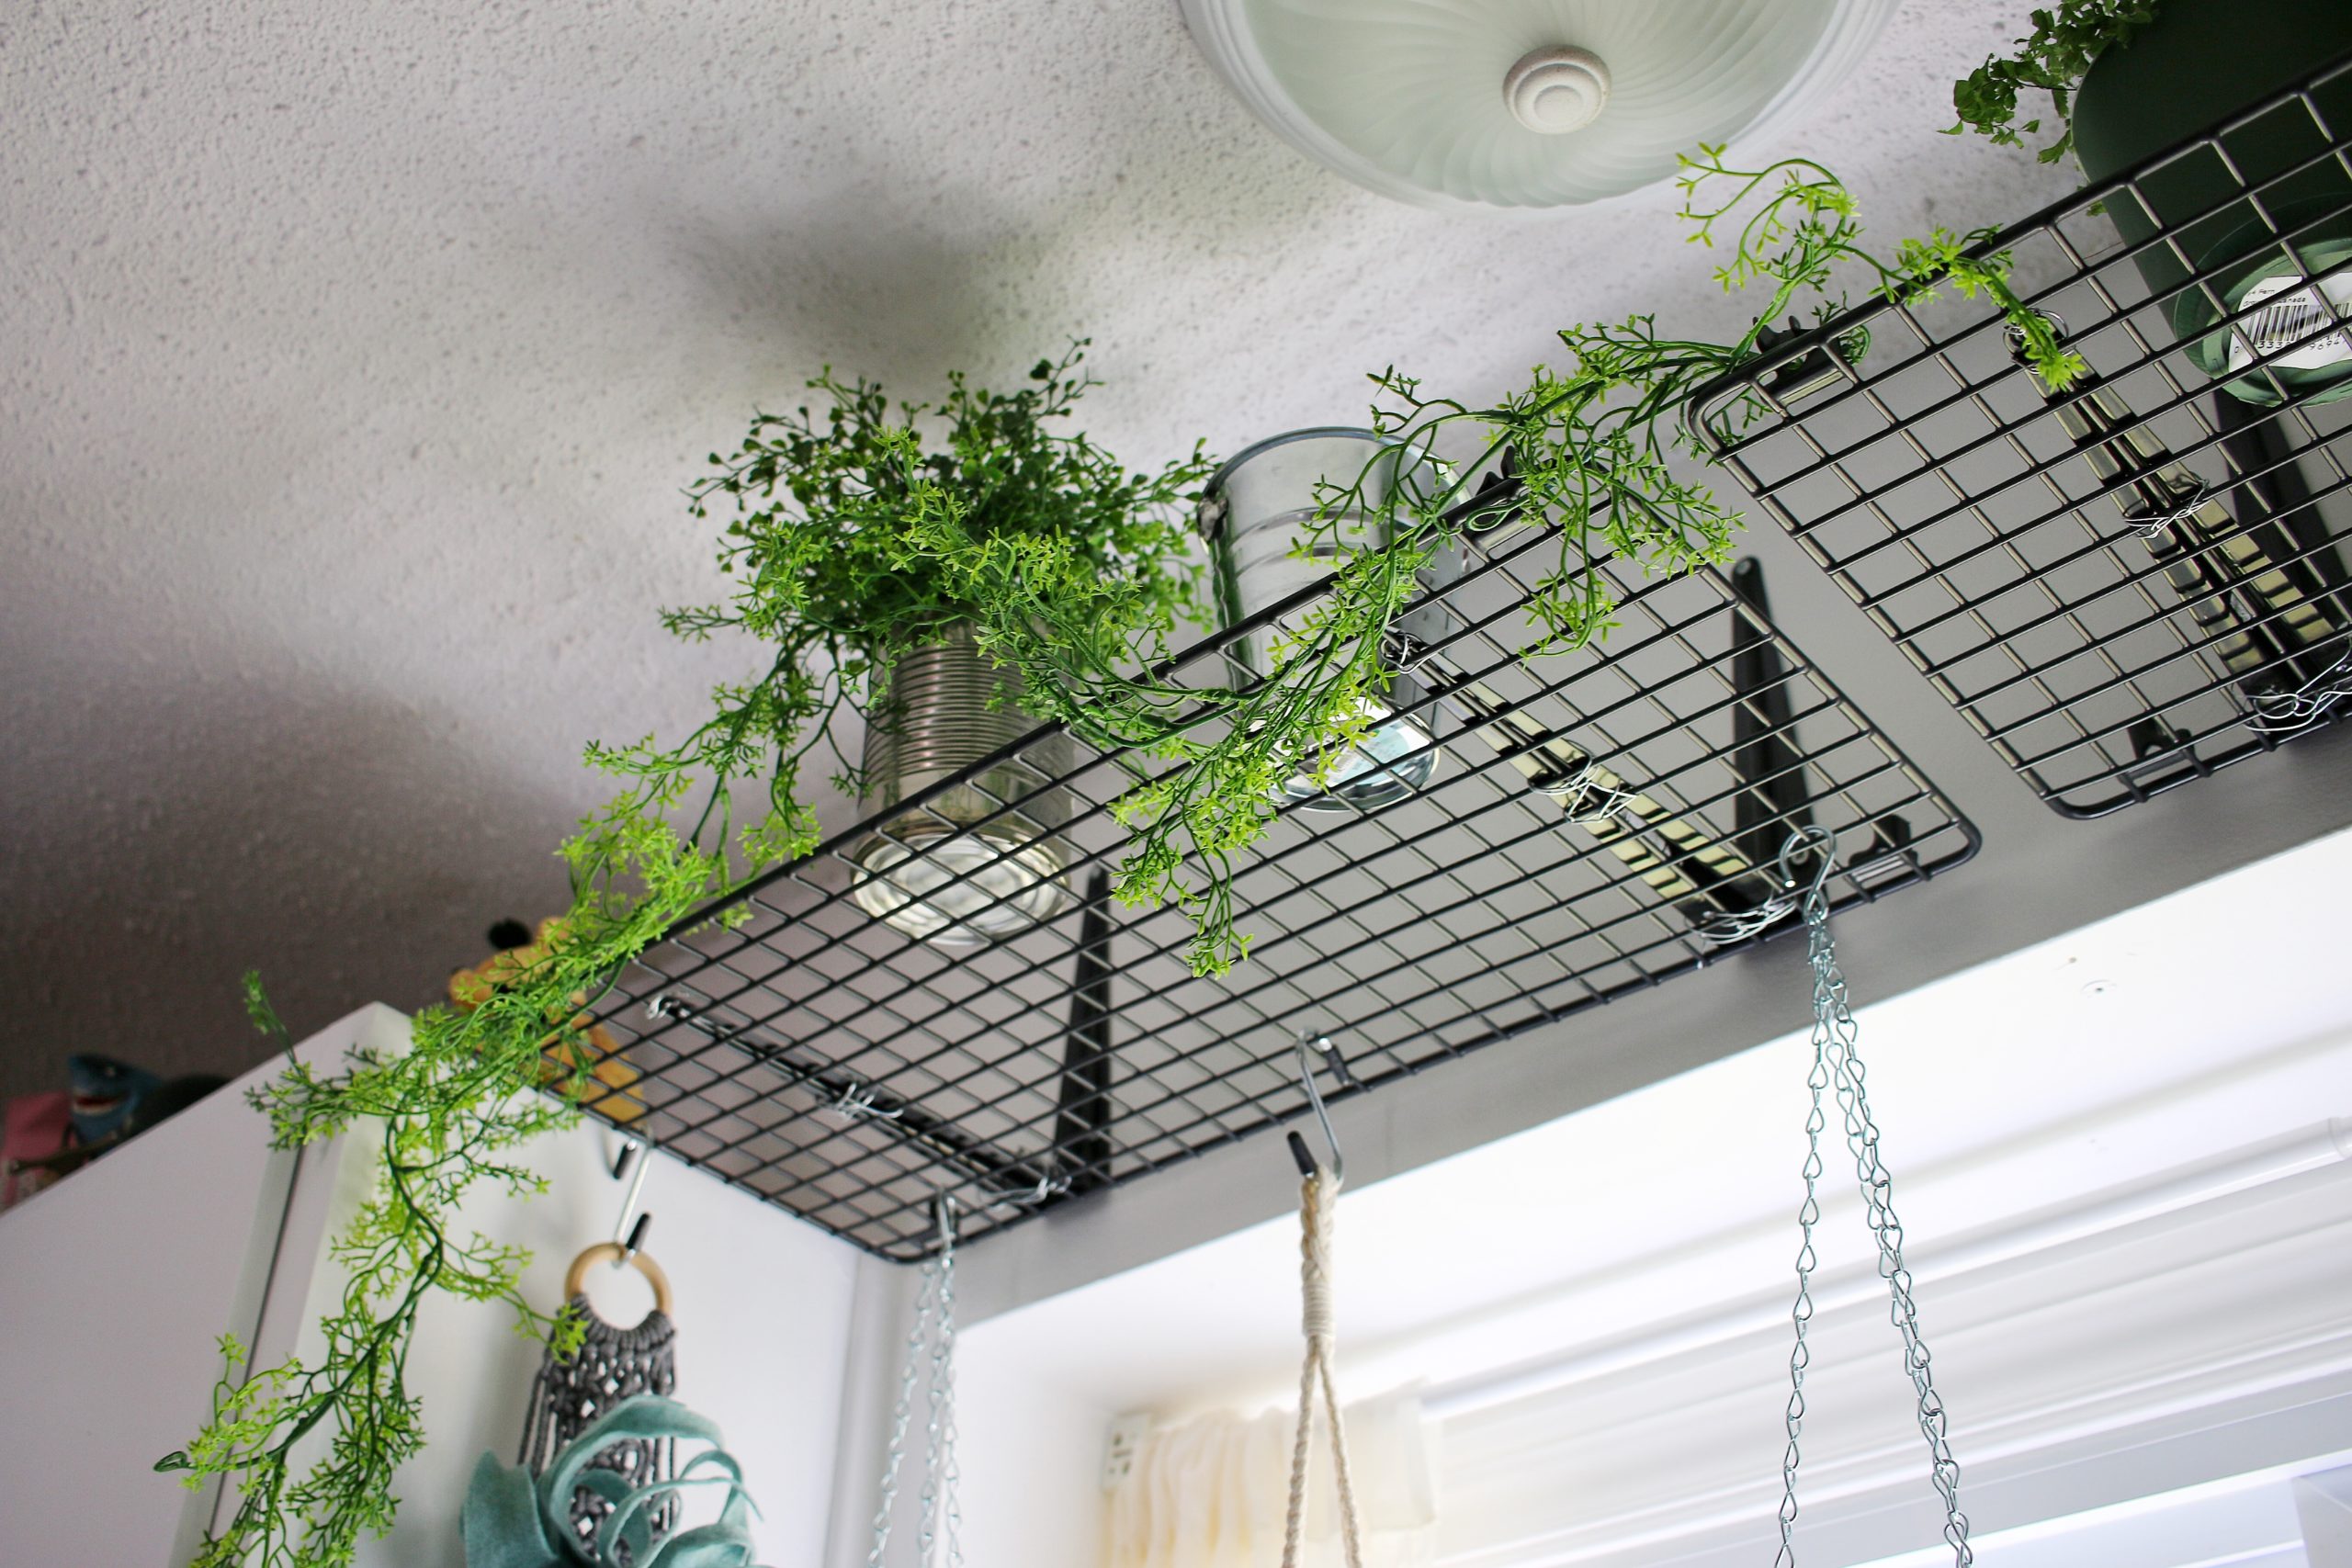
Step one in this plant shelf DIY was finding the best place to put the brackets. I found the centre of the rack using the measuring tape and then put a bracket halfway between the end and the halfway point on either side. If you’re planning on the shelf having a lot of weight on the top or edge of it you want to add a third bracket to the centre.
Next, I cut pieces of wire that were long enough to loop around each bracket a few times. One wrap near the tip of the bracket, one in the centre and another at the base. You’ll want to be sure to take the time to wrap every pass of the wire as tightly as possible to keep it from shifting or slipping over time.
Optional: wrap it in twine or a fun coloured rope after to hide the wire. I skipped this step since I have enough hanging from the racks to kind of hide it.
Hardest part of this plant shelf DIY is over.- thats how easy it is!
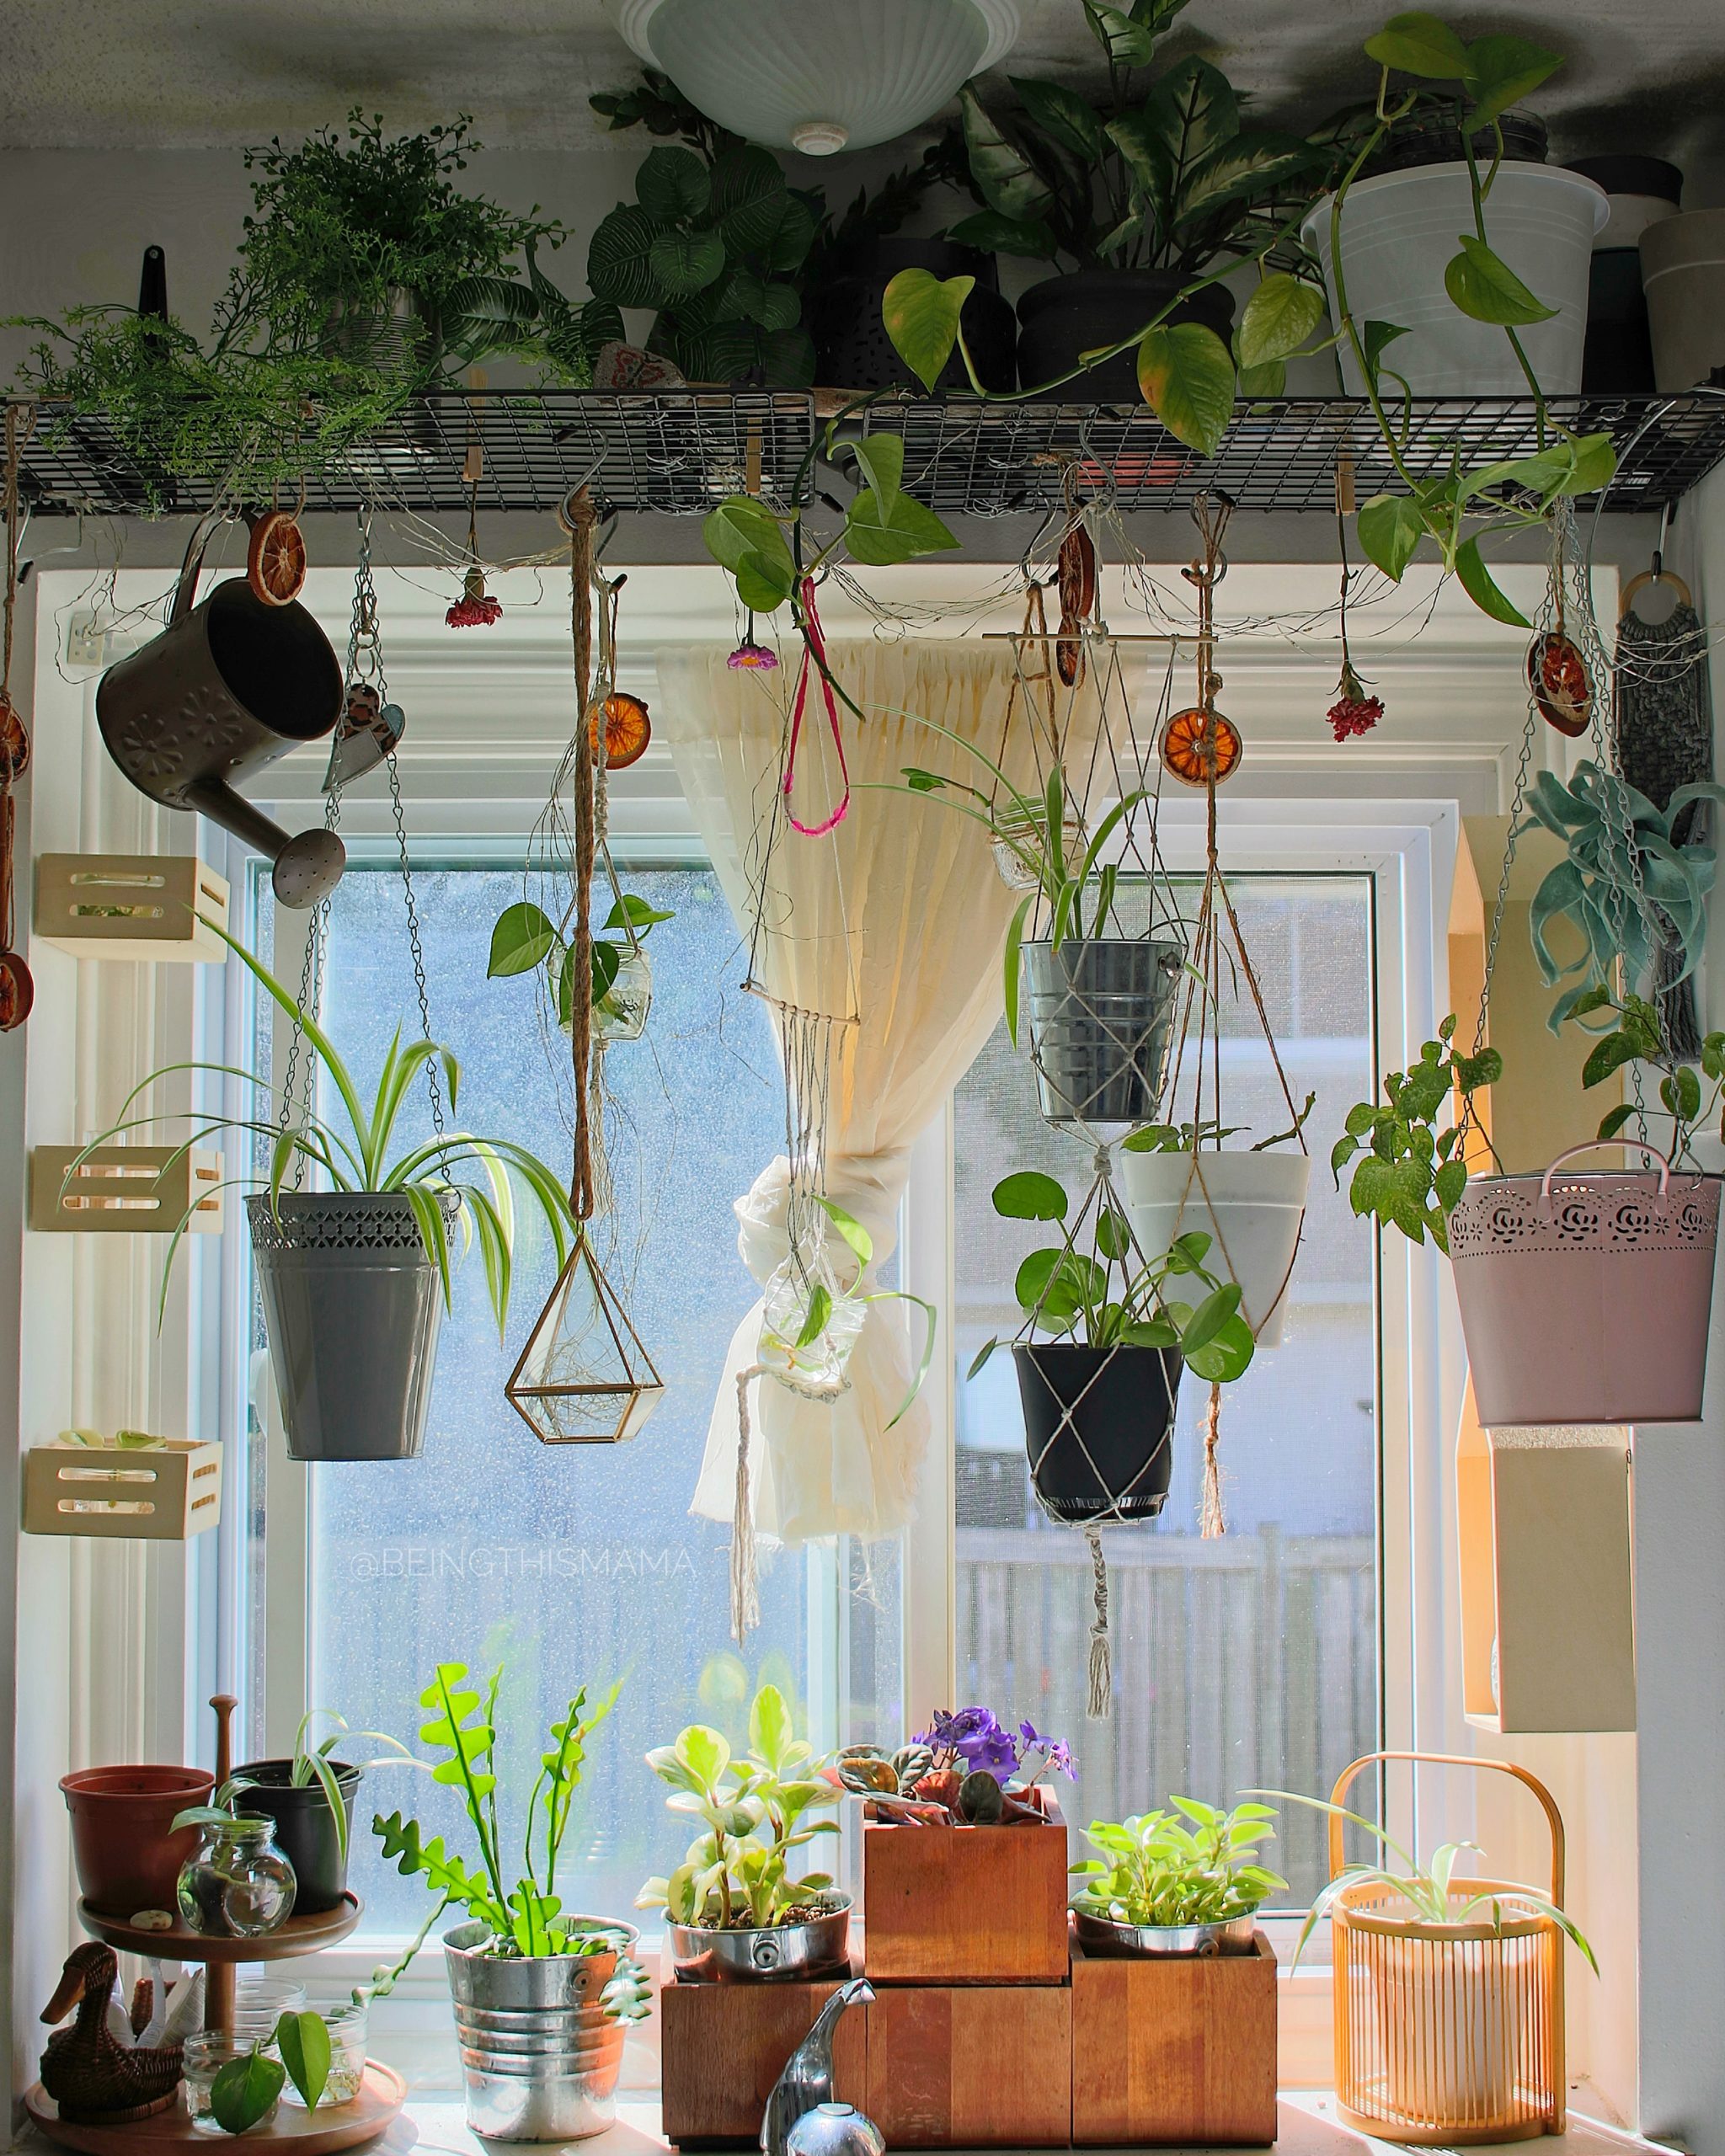
Decide where you’d like your shelf to hang. You’ll also need to decide if your brackets will be above or below the plant shelf. Mine went above for height reasons mainly, but also so the potted plants above the shelf could hide the brackets.
Once you’ve decided, level your shelf and mark where your holes will be. If you’re like me and require hanging more than one shoe rack I’d suggest hanging them one by one to be sure you end up with flush, even shelving. Since it’s a plant shelf DIY some of your brackets could be at slightly different places on each one and drilling all the holes at once can cause spacing issues.
Since I was not drilling into studs I used some heavy duty wall plugs to assure my plant shelf DIY would stay sturdy and not come crashing down at midnight some night. It’s best practice to try and use a stud when hanging shelving, anything heavy or rods that you’re hanging from but it’s not always possible. When buying wall plugs be sure to check the package and see what material they’re made for (not all studs are made for all wall materials) and what total weight is expected to be held.
Once all of your shoe racks are hung and ready, take a minute to stand back and admire it. You crushed this plant shelf DIY friend!
THAT’S IT!
A few easy steps and your plant shelf DIY is complete and ready to be filled with all the plants and flowers your hearts desire. No shame if you decide to fill them with fake plants, thats what mine mainly was when I first did it… Fake or real, the pop of colour is a fantastic change.
Be sure to sign up for my newsletter below for more fun, simple DIY projects like this one!
DIY PLANT SHELF: ONE YEAR LATER
It’s been just over one full year since I first did this plant shelf DIY and I have nothing but good news about it.
When I first put together the plant self DIY post I wasn’t fully sure if I’d be updating with good or bad news one year later.
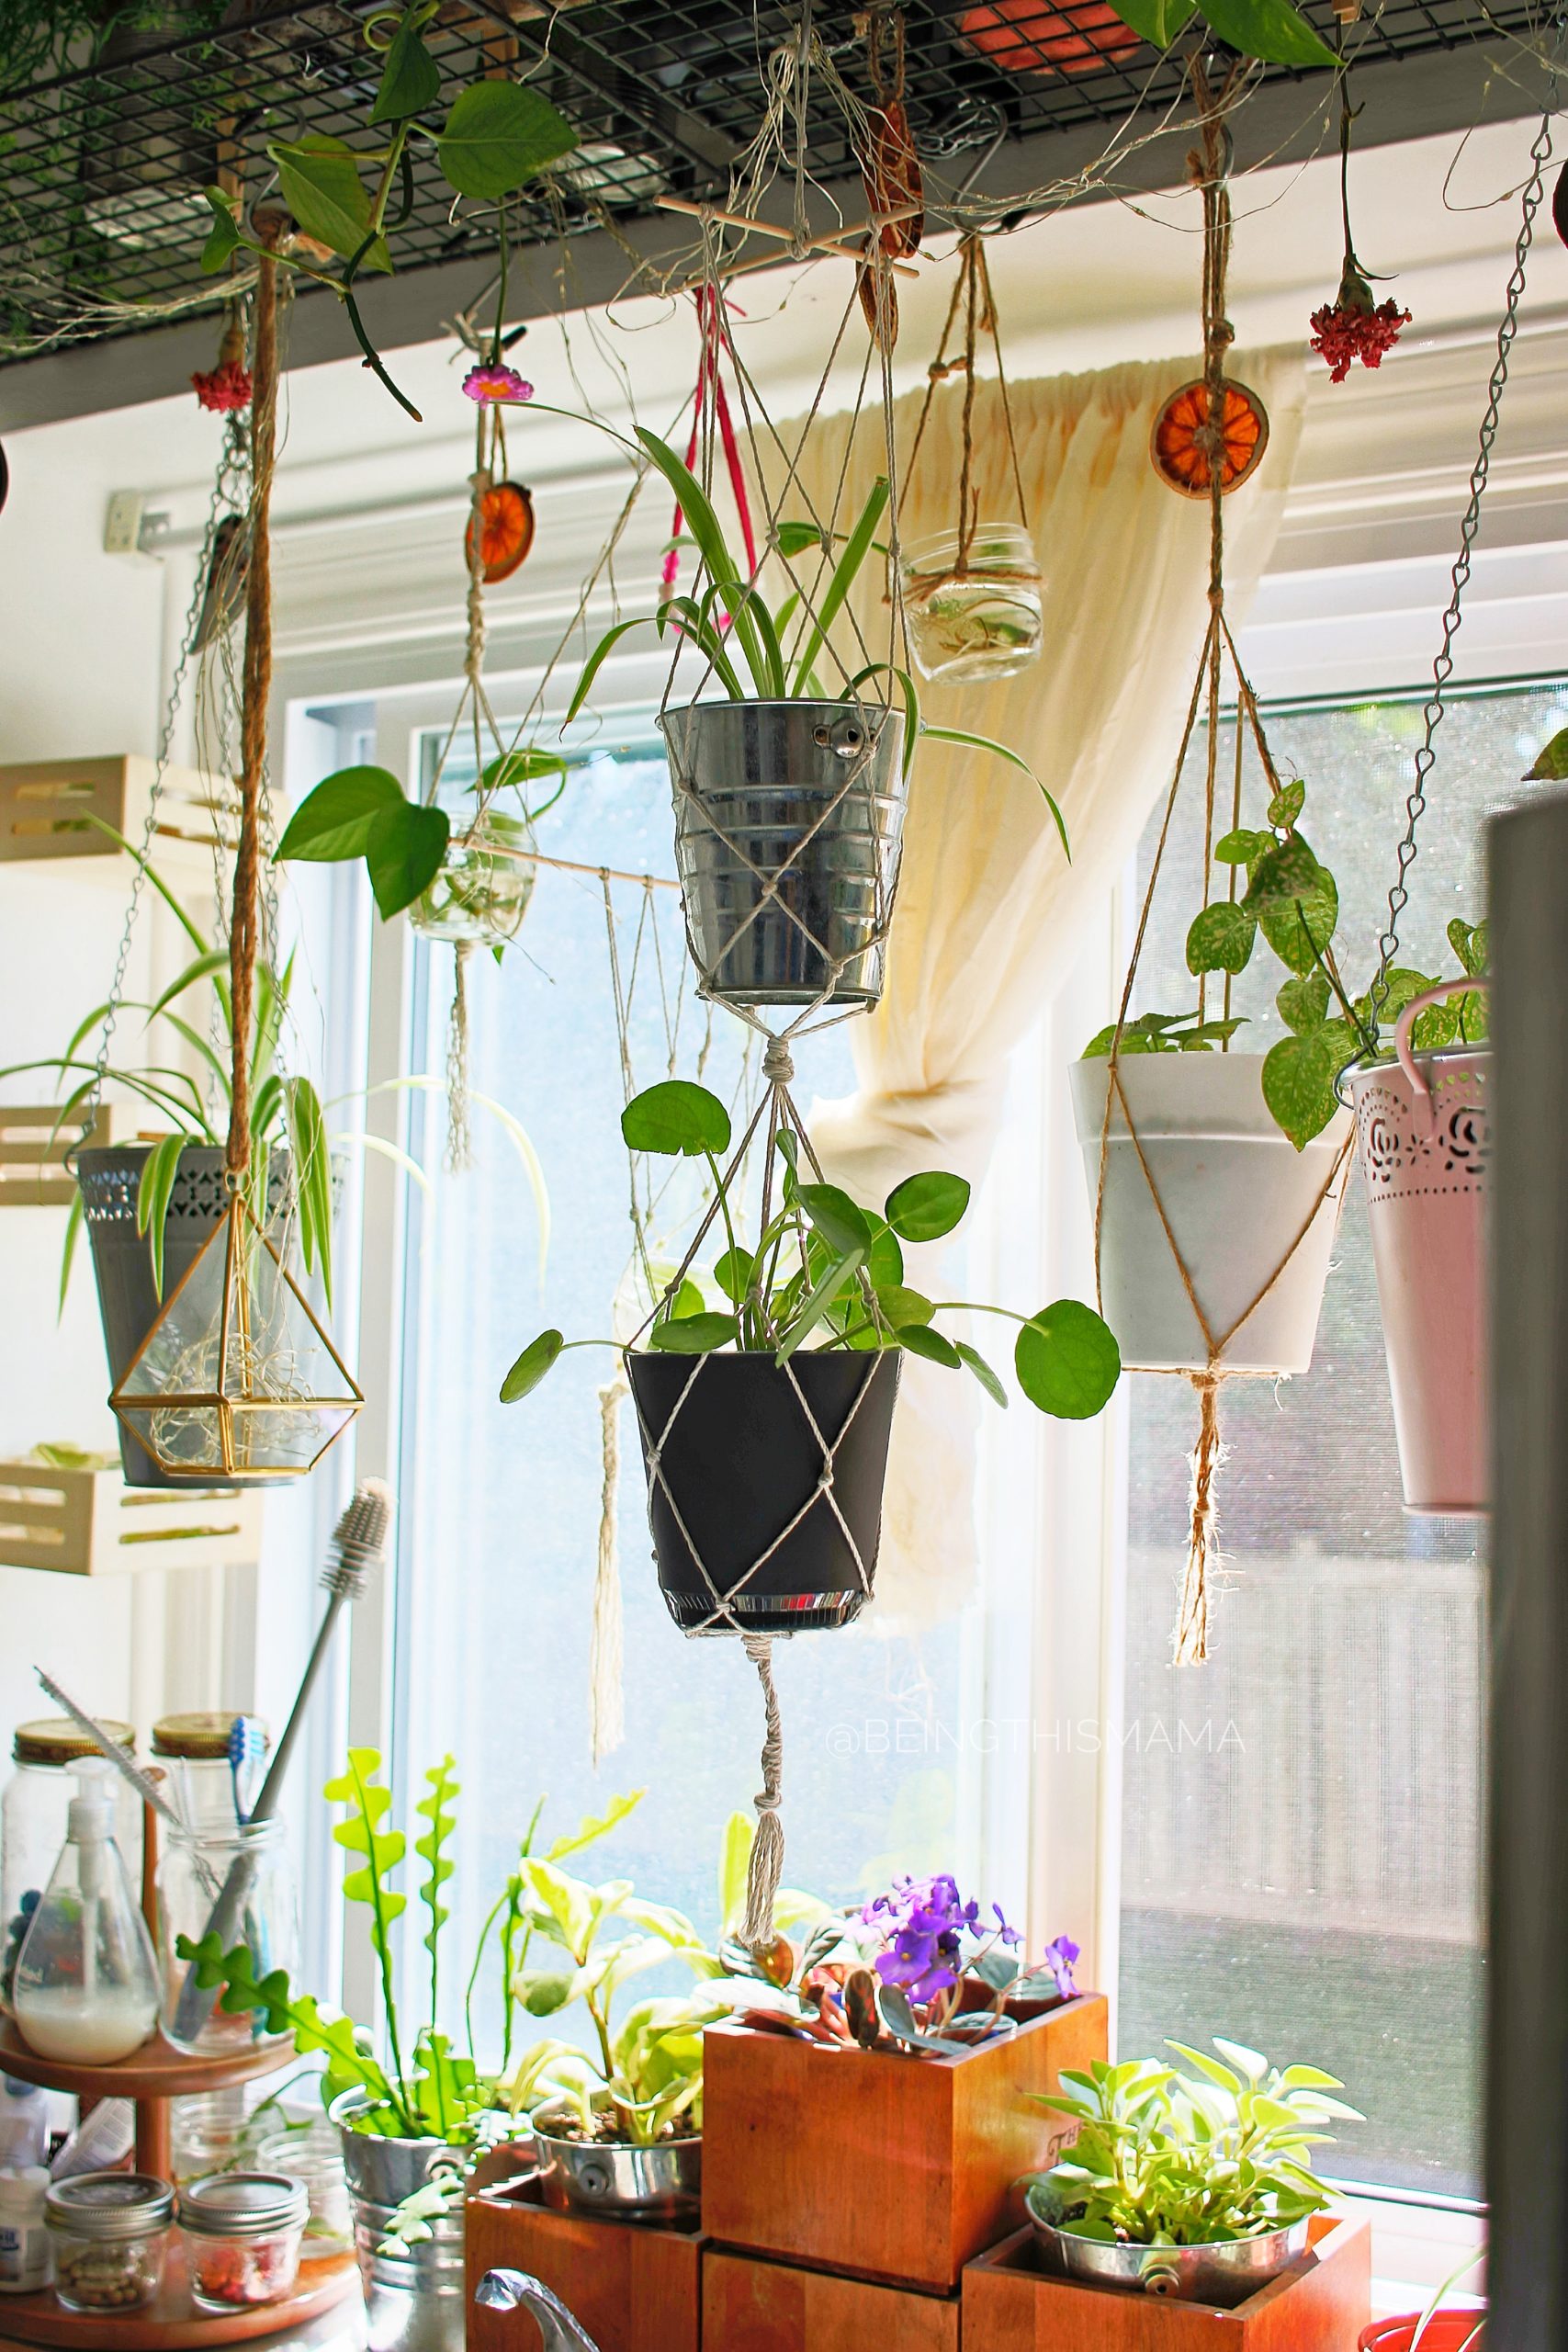
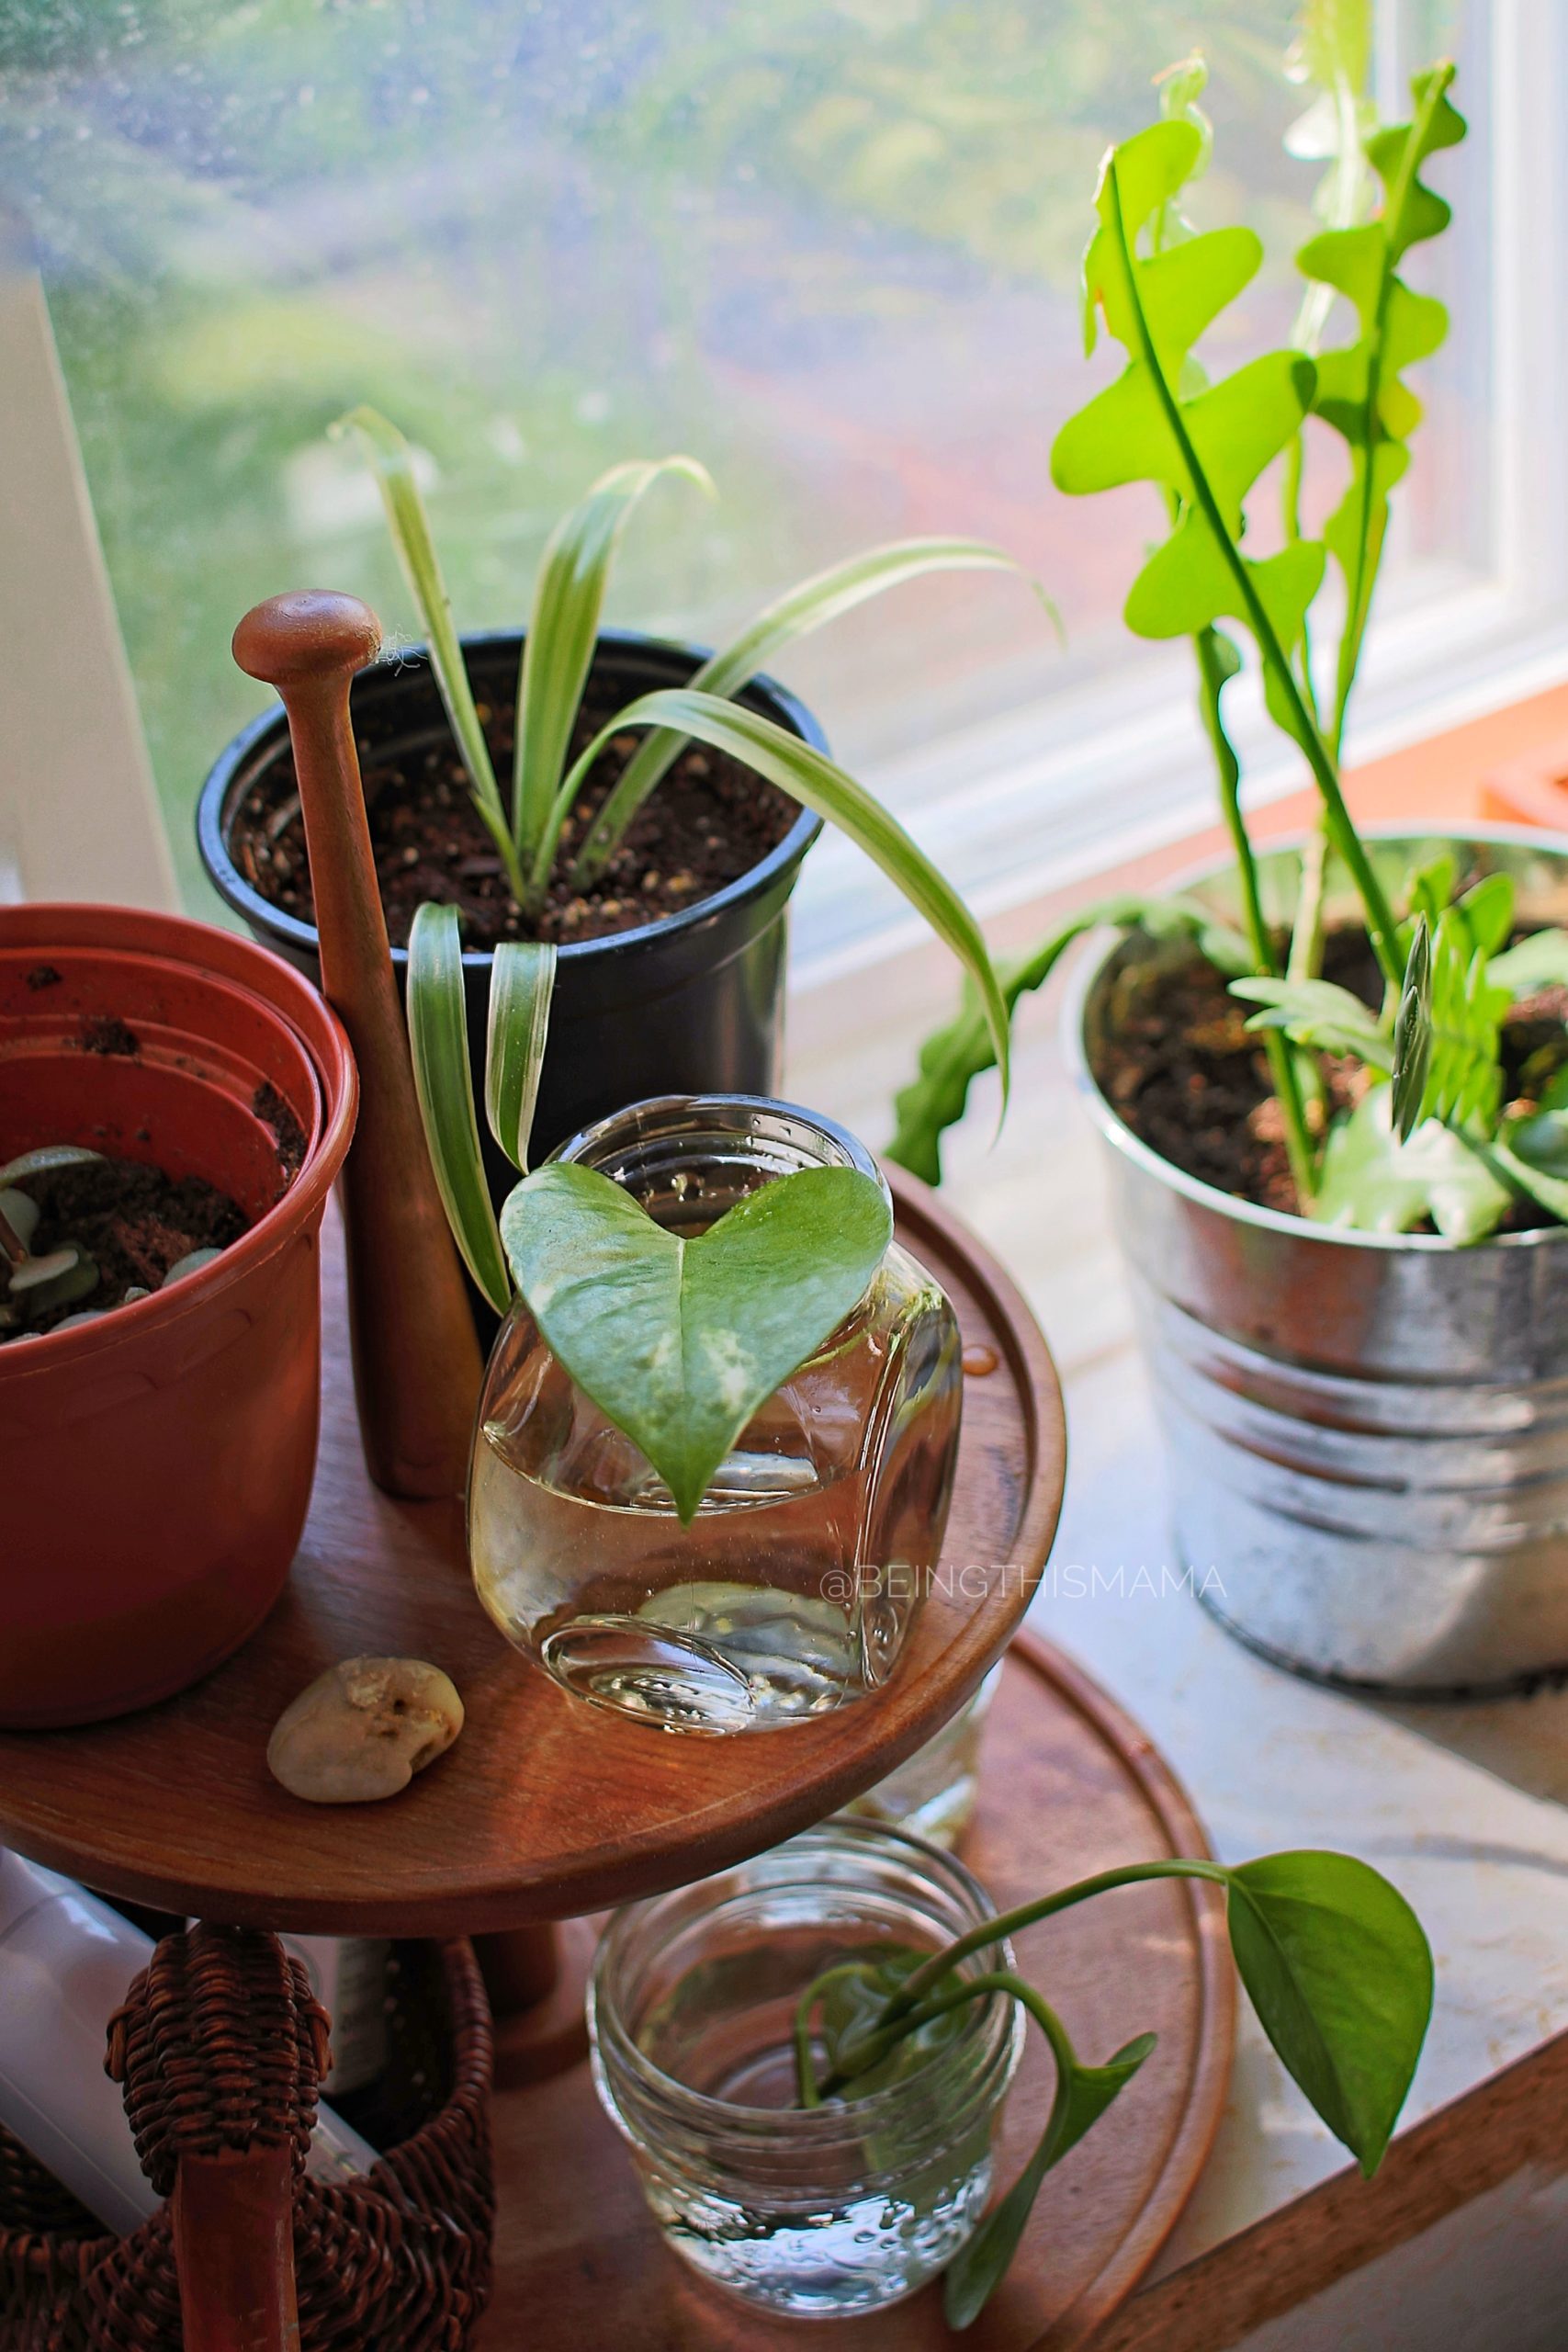
Thankfully it has been nothing but a pleasure to have these shelves in the kitchen. Over time I’ve been slowly filling it with plants, added a thrifted two-tier shelf to hold soaps and propagations, added some small upcycled shelves to the wall for more propagating clippings and decided to put my thrifted boxes on the ledge as planter boxes.
There have been some thrifted bits and pieces added as decor, I’ve DIY’d some plant hangers to hold smaller plants and clippings and even have dried fruit and flowers. There’s even some battery operated fairy lights for the nights I want it to look extra fun!
The racks haven’t budged despite plants being added and shifted around on a fairly regular basis. The spaces in the racks have always been big enough to accommodate the different sizes of hooks for hanging planters and clothespins can be used with no issues. I even used the plant shelf DIY as a mask drying rack at one point!
Overall I’m extremely happy with my plant shelf DIY and don’t have any plans at all to change it anytime soon.
Melissa and Doug Grocery Store Makeover by Being This Mama
June 19, 2020 at 2:51 am[…] CHECK OUT MY PLANT SHELF DIY – IKEA HACK ALERT! […]
DIY Star Wars Wall Art (Using the Cricut Joy)
October 20, 2020 at 5:59 pm[…] PLANT SHELF DIY […]
carrie henderson
November 17, 2020 at 1:28 amlove this! gonna copy!
beingthismama
November 18, 2020 at 12:17 amYay! Love to hear that.
26 Practical Indoor Window Shelf Ideas for Plants - GoViral
December 28, 2021 at 11:22 am[…] beingthismama […]
21 Indoor Window Plant Shelf: Practical And Stylish Ideas
March 8, 2022 at 8:31 pm[…] shoe rack needs two brackets for mounting. You can install them above the window. You can simply put the shoe rack on the brackets and secure them with wire. Use a piece of twine to disguise the wiring and make the shelf more attractive. Put the plants in […]
20 Cool Window Shelf Ideas To Freshen Up Your Living Space
March 30, 2022 at 8:38 am[…] From: beingthismama.com […]
Merrymepenelope
June 19, 2022 at 11:40 amI love your plant window! The ceiling boob is funny though.