EASY PERSONALIZED LEARNING CORNER FOR NOT-SO BACK TO SCHOOL (USING THE CRICUT JOY!)
)
This is a sponsored post written by me on behalf of Cricut. All opinions are 100% mine.
What do you do when your back to school plans get crushed by a global pandemic? You grab some materials, your Cricut Joy and make the most of it.
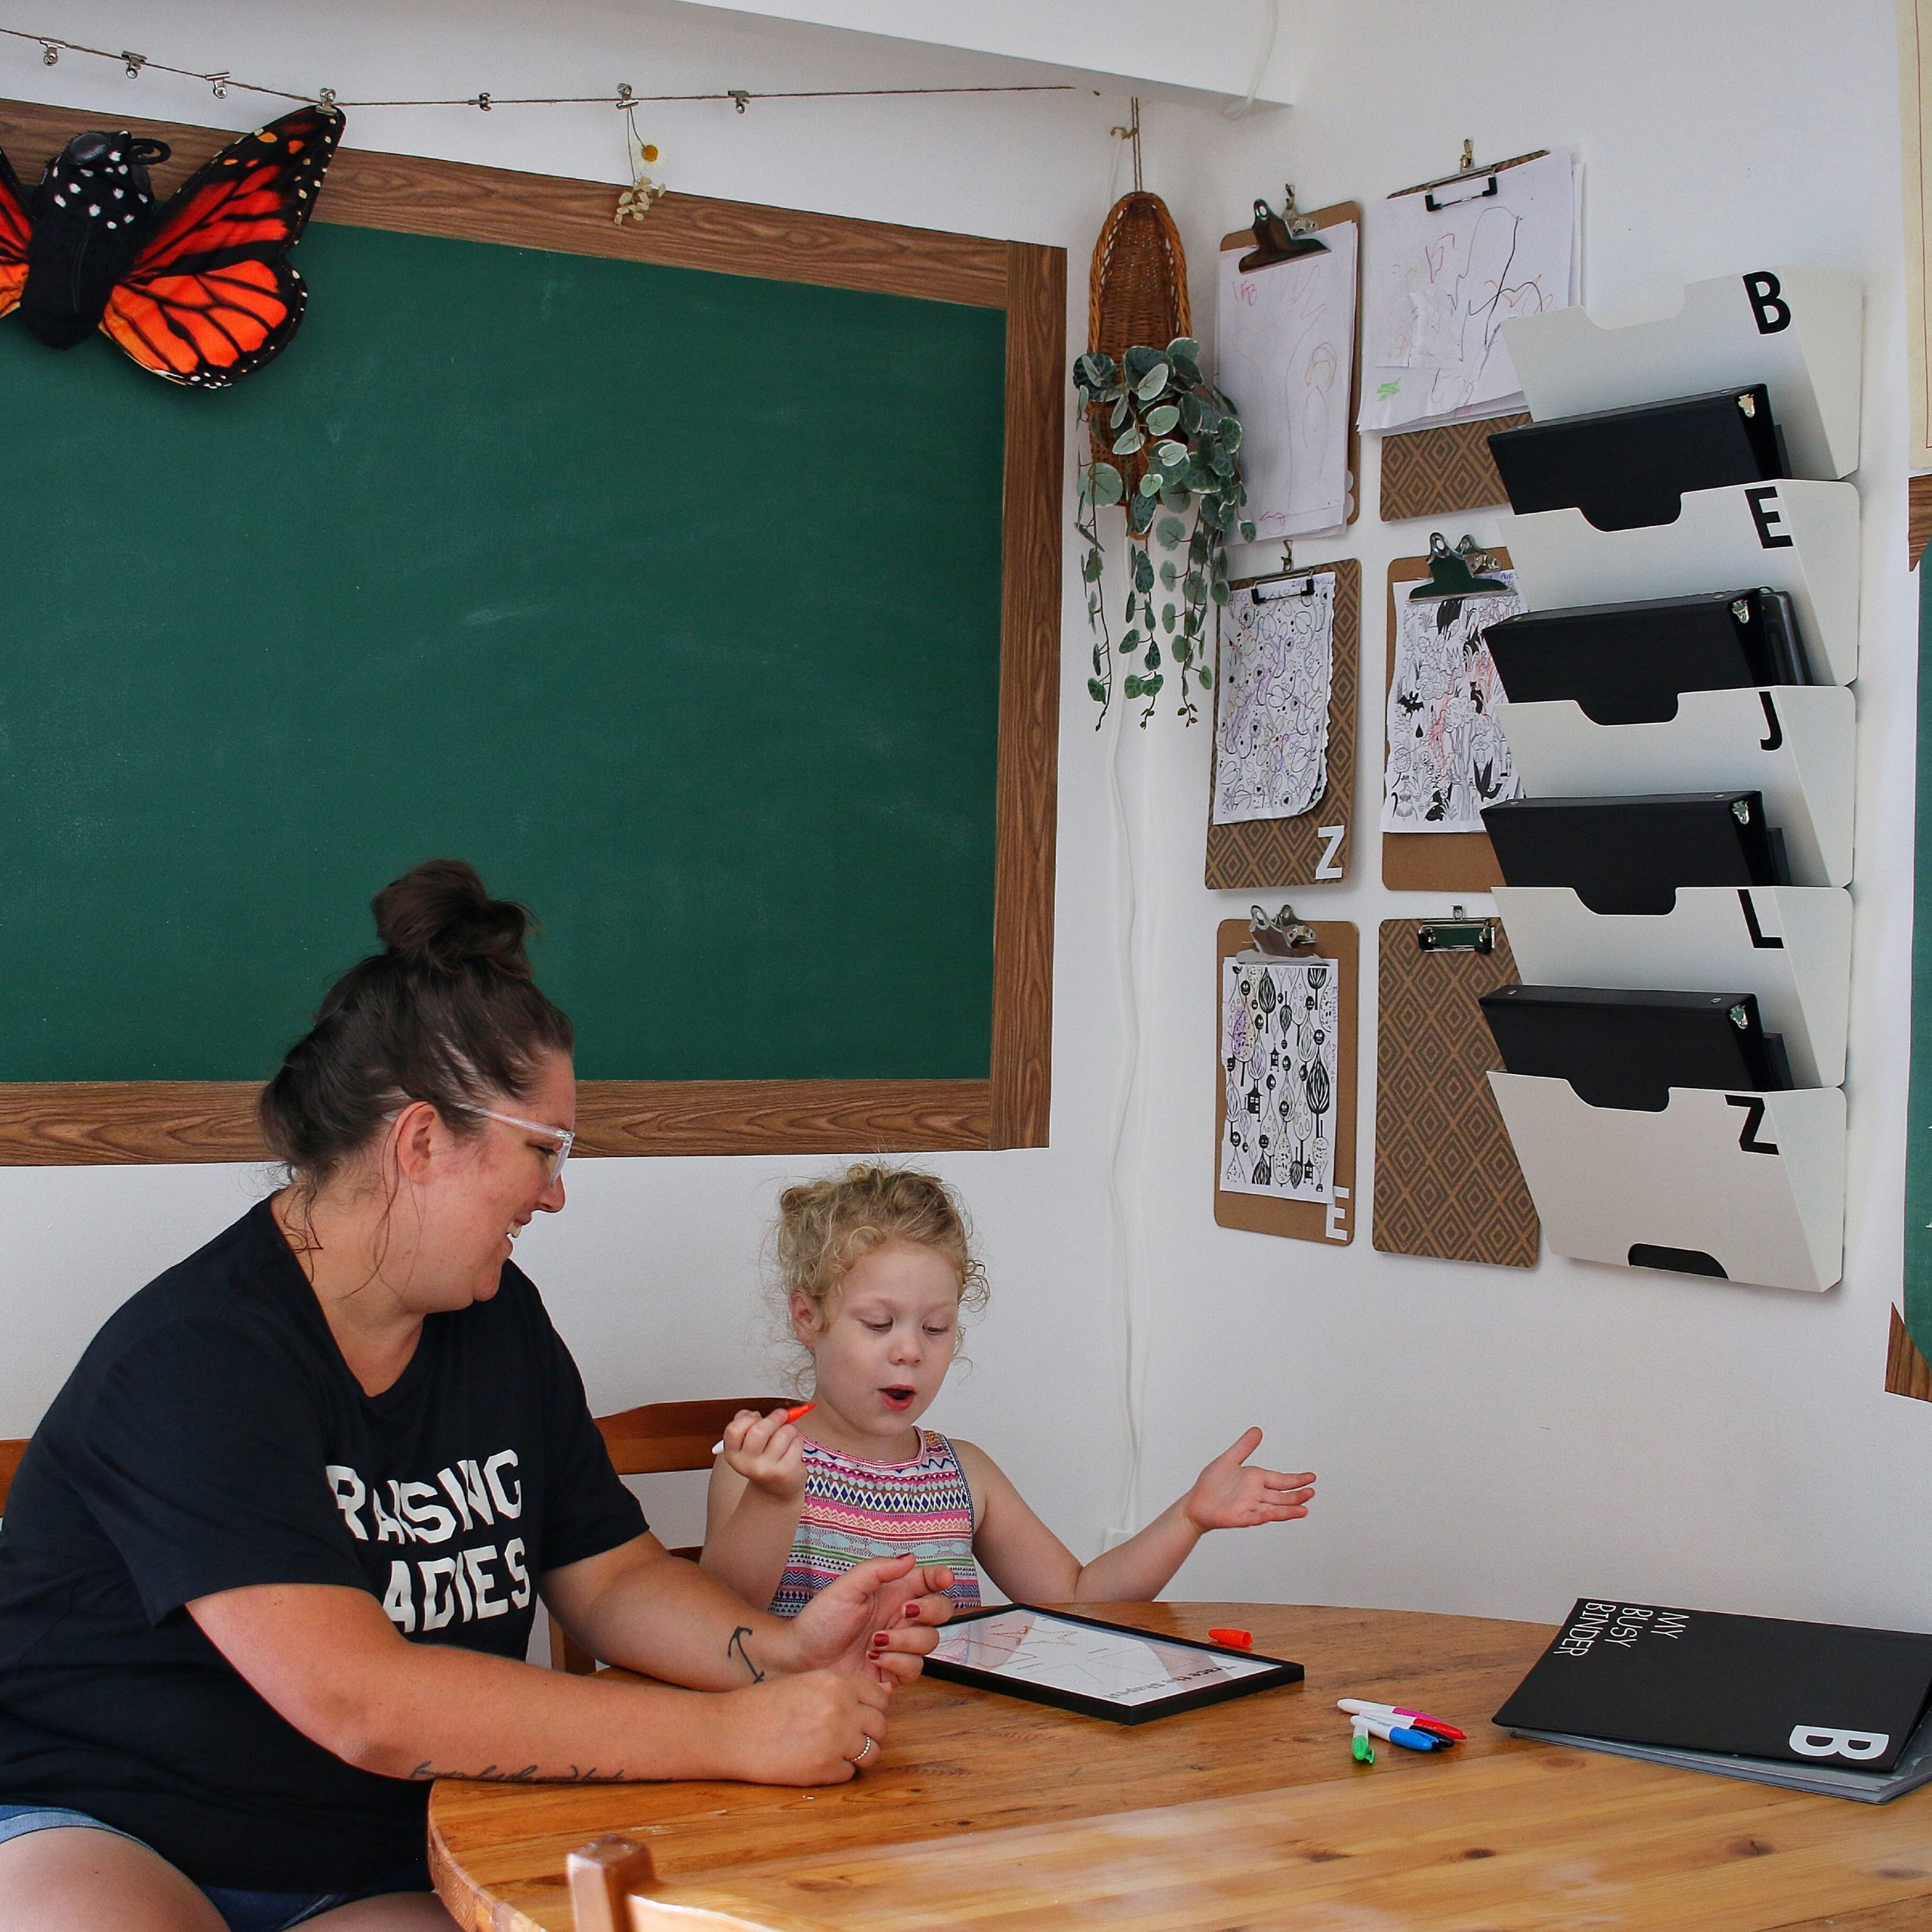
Between having three kids of our own, running a home daycare and now having a preschooler who will be homeschooling, having a space to all sit together to learn, play and work was a must for me. Living in a row of narrow townhouses leaves us with very little space to work with and even less windows. Luckily the corner of the main room worked out perfect. It gets the right amount of natural light, it’s part of the playroom so the younger ones can play while the older ones work and I can see it from the kitchen while I’m prepping meals.
Initially our plans for this fall were for our eldest to be starting Junior Kindergarten but unfortunately, thanks to COVID, that won’t be happening this year. Left with no back to school items to shop for and personalize I thought about what kind of items I could pull together to make our home daycare/home school learning experience a little more organized.
So I used our Cricut Joy to personalize these little learning kits for the kids, as well as an area to store them!
The Cricut Joy makes projects like this learning corner makeover a breeze. The machine itself takes seconds to set up (just plug it in!), cuts the materials quickly and quietly and can be set up anywhere I the house I feel like crafting.
The Cricut Joy is compatible with Cricut Design Space. Design Space is very user friendly and easy to figure out. It’s loaded with tons of Cricut fonts and images so you’ll be able to find one that works for you without having to download extra fonts. Every font I used for our learning corner makeover can be found H E R E in my Design Space canvas.
Tip: I like to google ‘Cricut fonts’ and look at the fonts in the image section. I find it helps me visualize the fonts a little easier than scrolling through them on the font tab in Design Space.
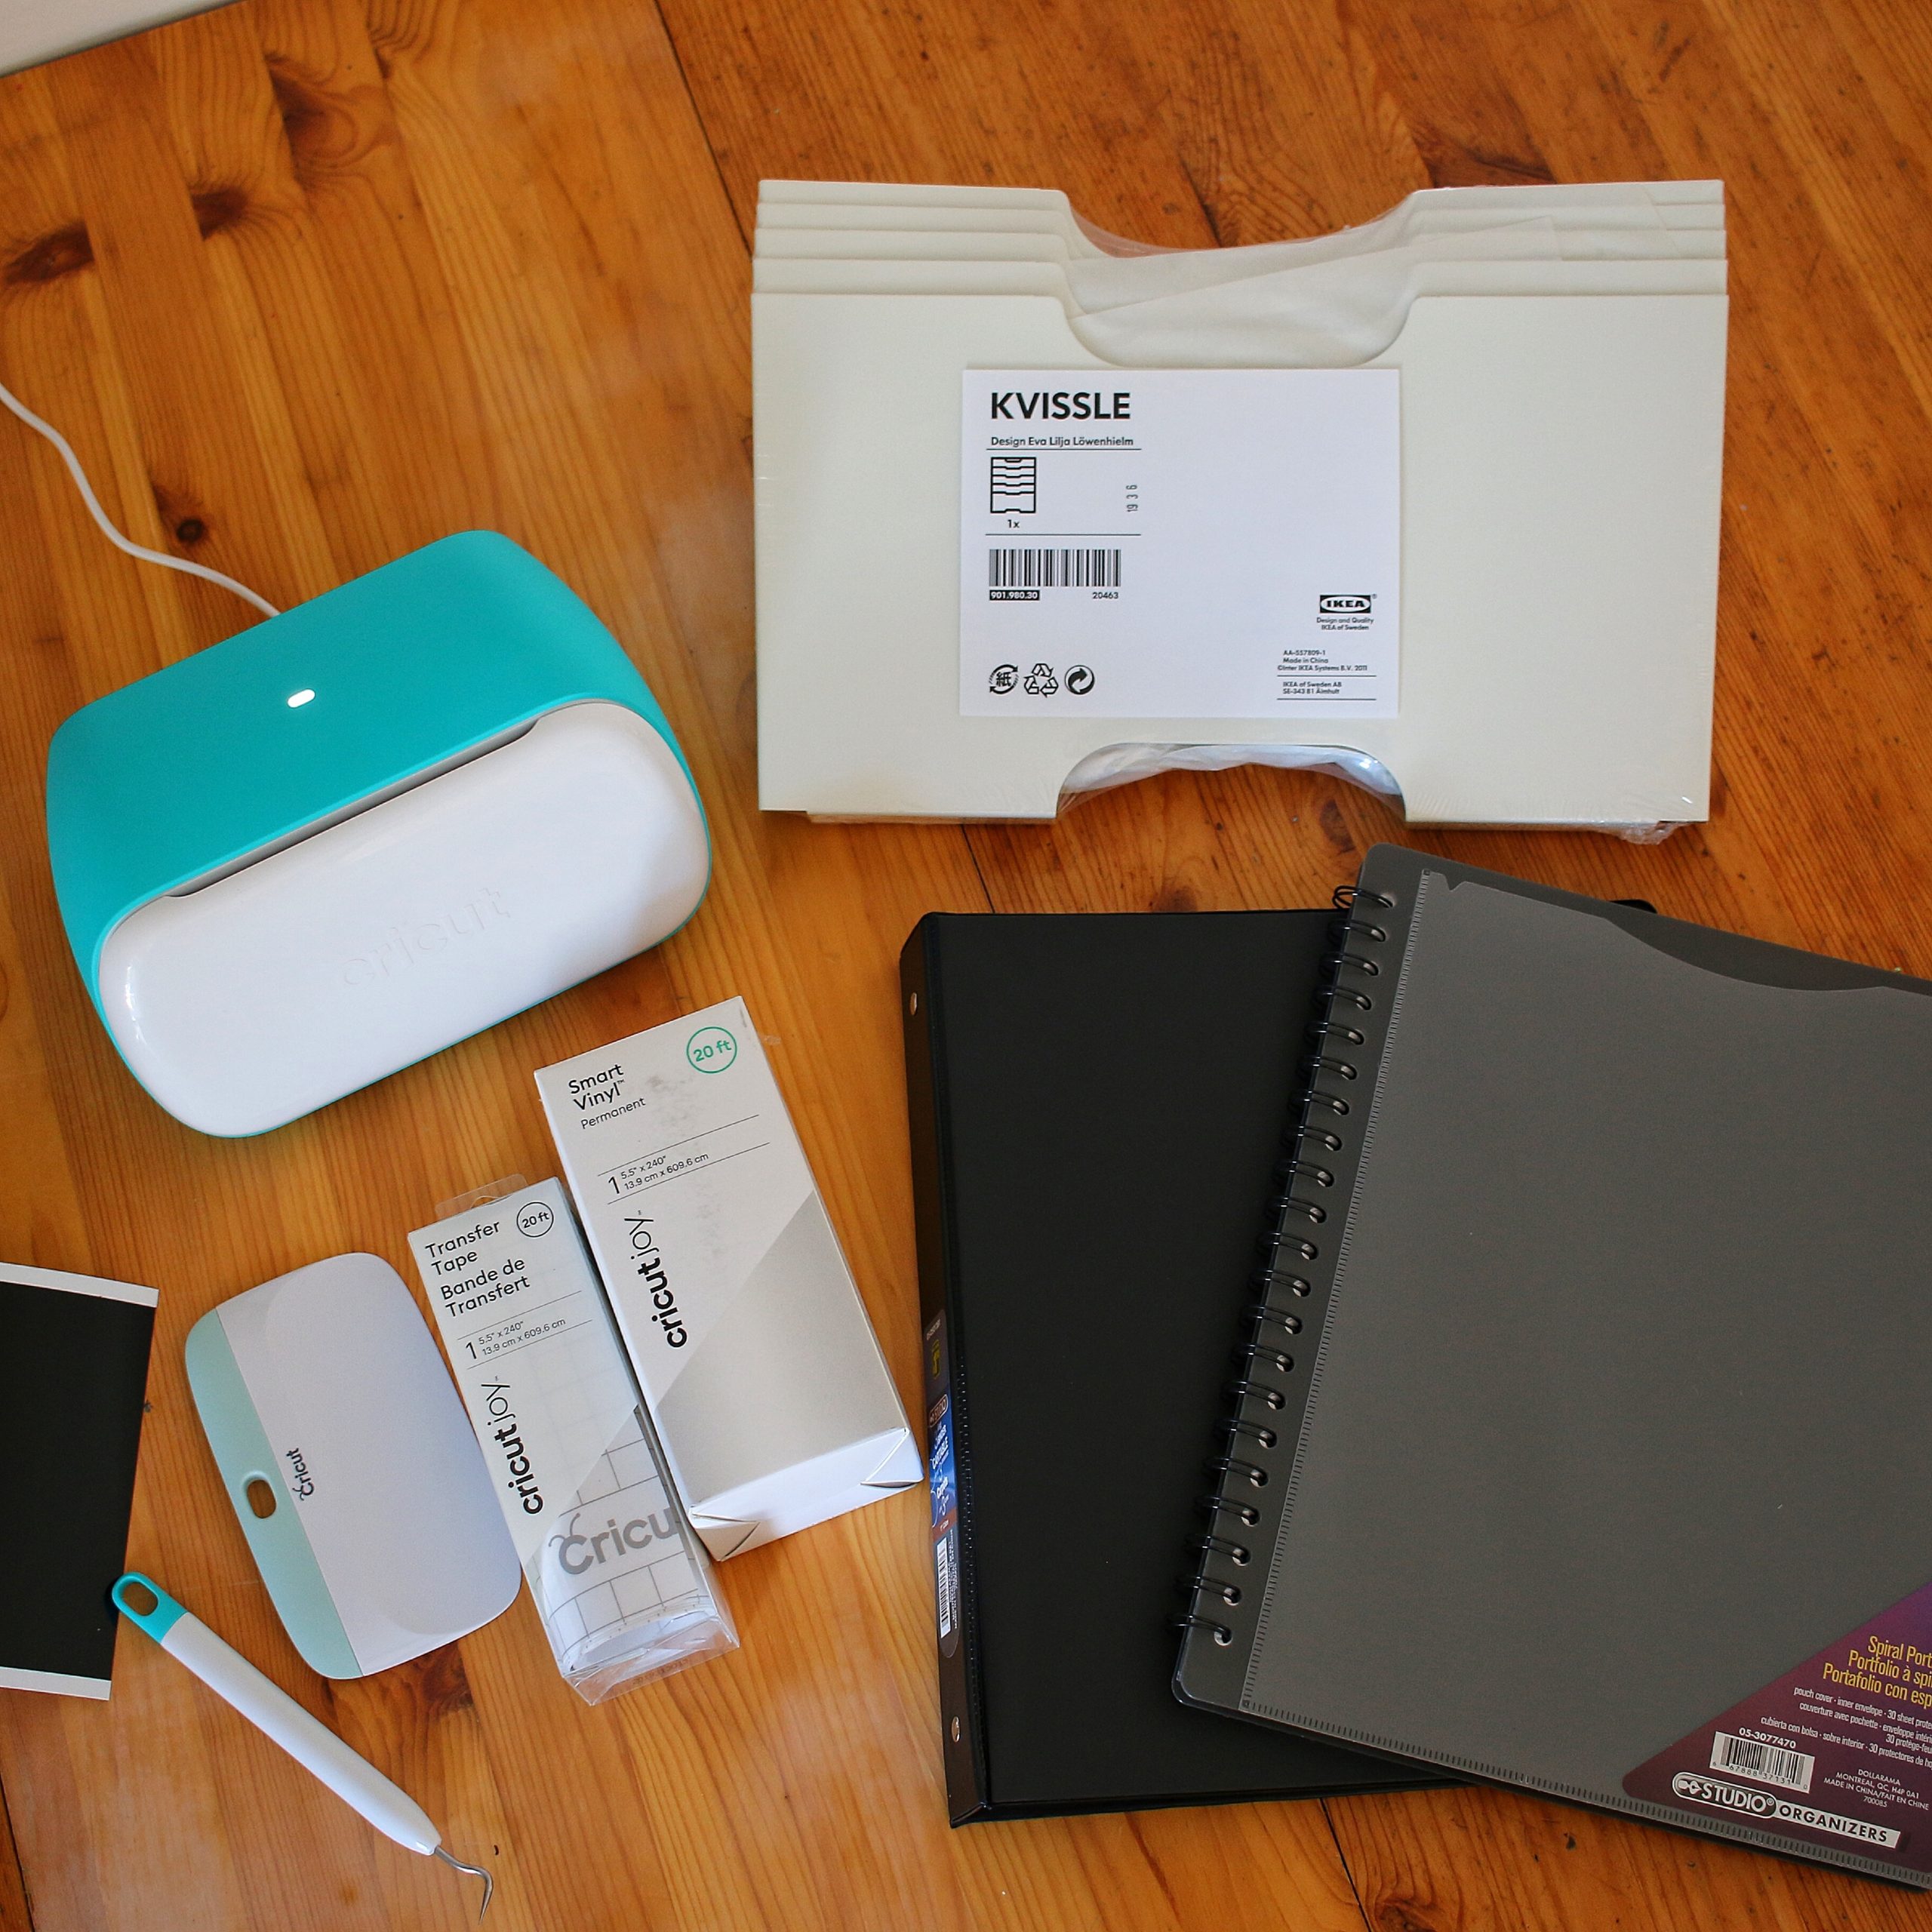
MATERIALS USED:
STEP ONE
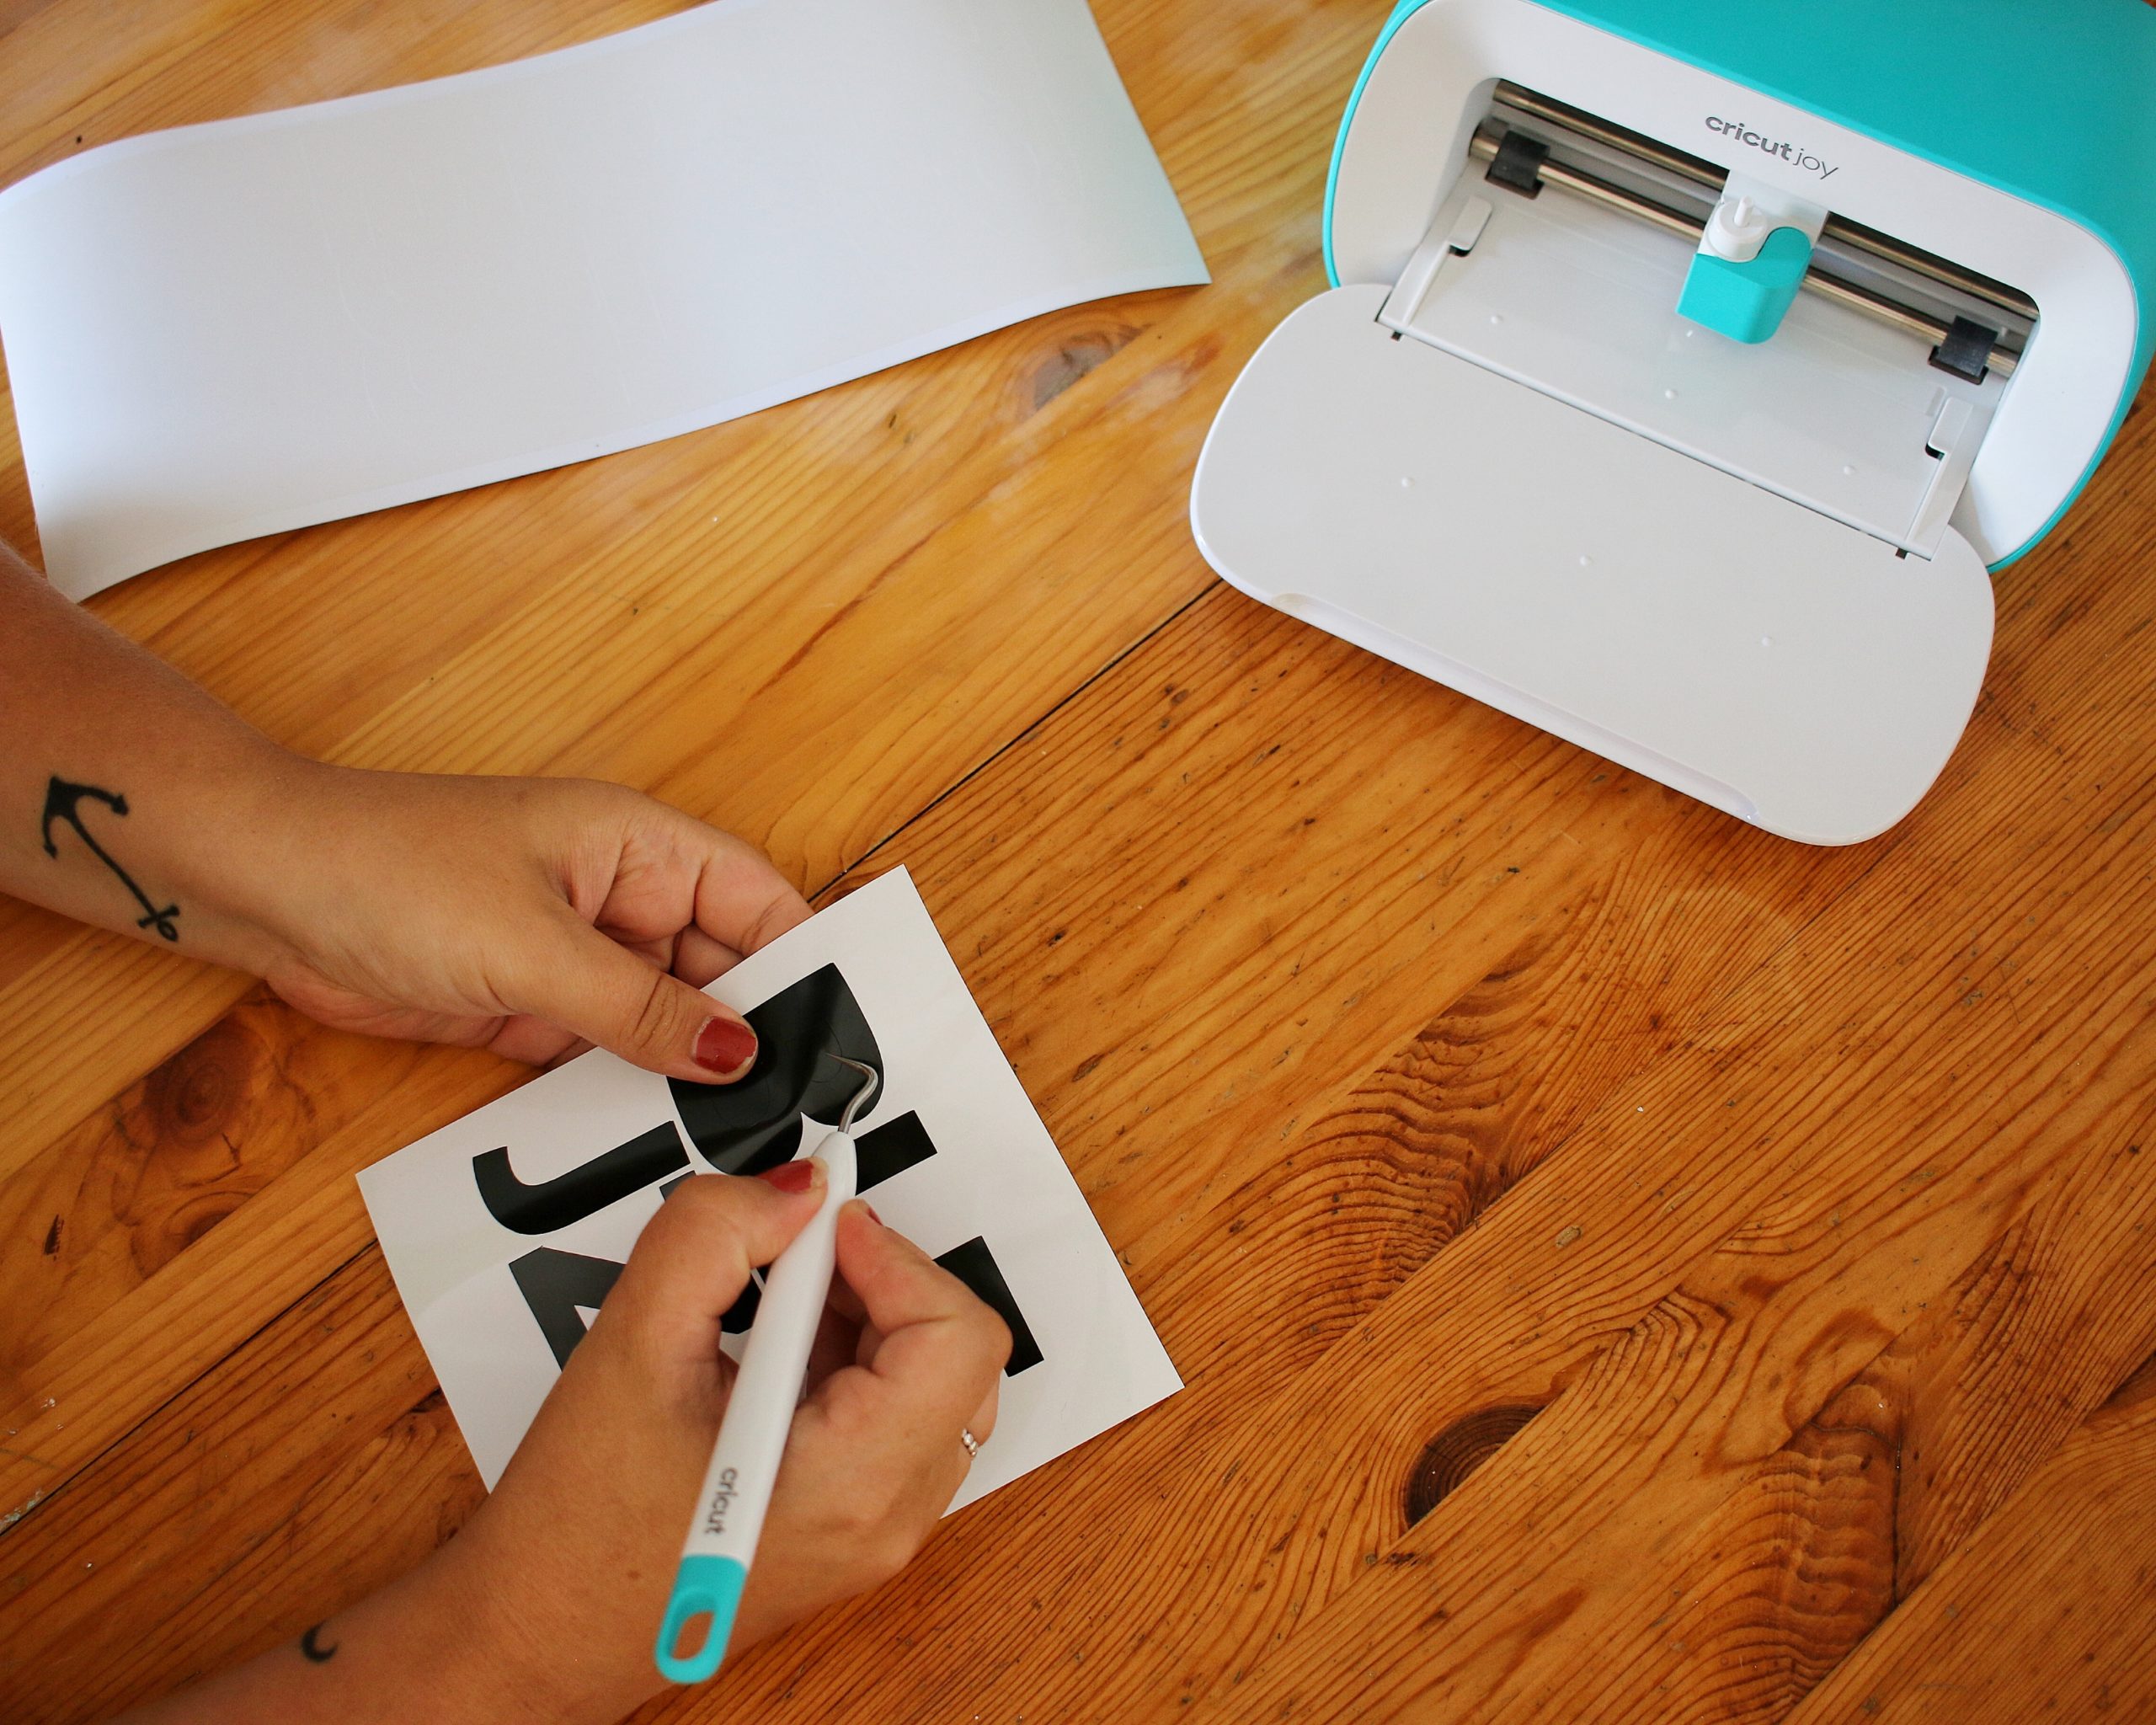
After designing and printing your design, remove the background vinyl and smaller inner pieces. Use the Cricut Weeder tool to be sure you don’t damage your vinyl!
I’m a sucker for creating the least amount of waste possible, so before I remove the background I make sure to trim any pieces I can use in the future for small projects.
STEP TWO

Once your vinyl is ready for transfer you’ll want to cut a piece of transfer tape that fits your design.
Using a Cricut Scraper (I use the XL one!) press the transfer tape down onto the vinyl, making sure to get every edge and remove any air bubbles.
Tip: flip it over and give the back side a rub as well.
STEP THREE
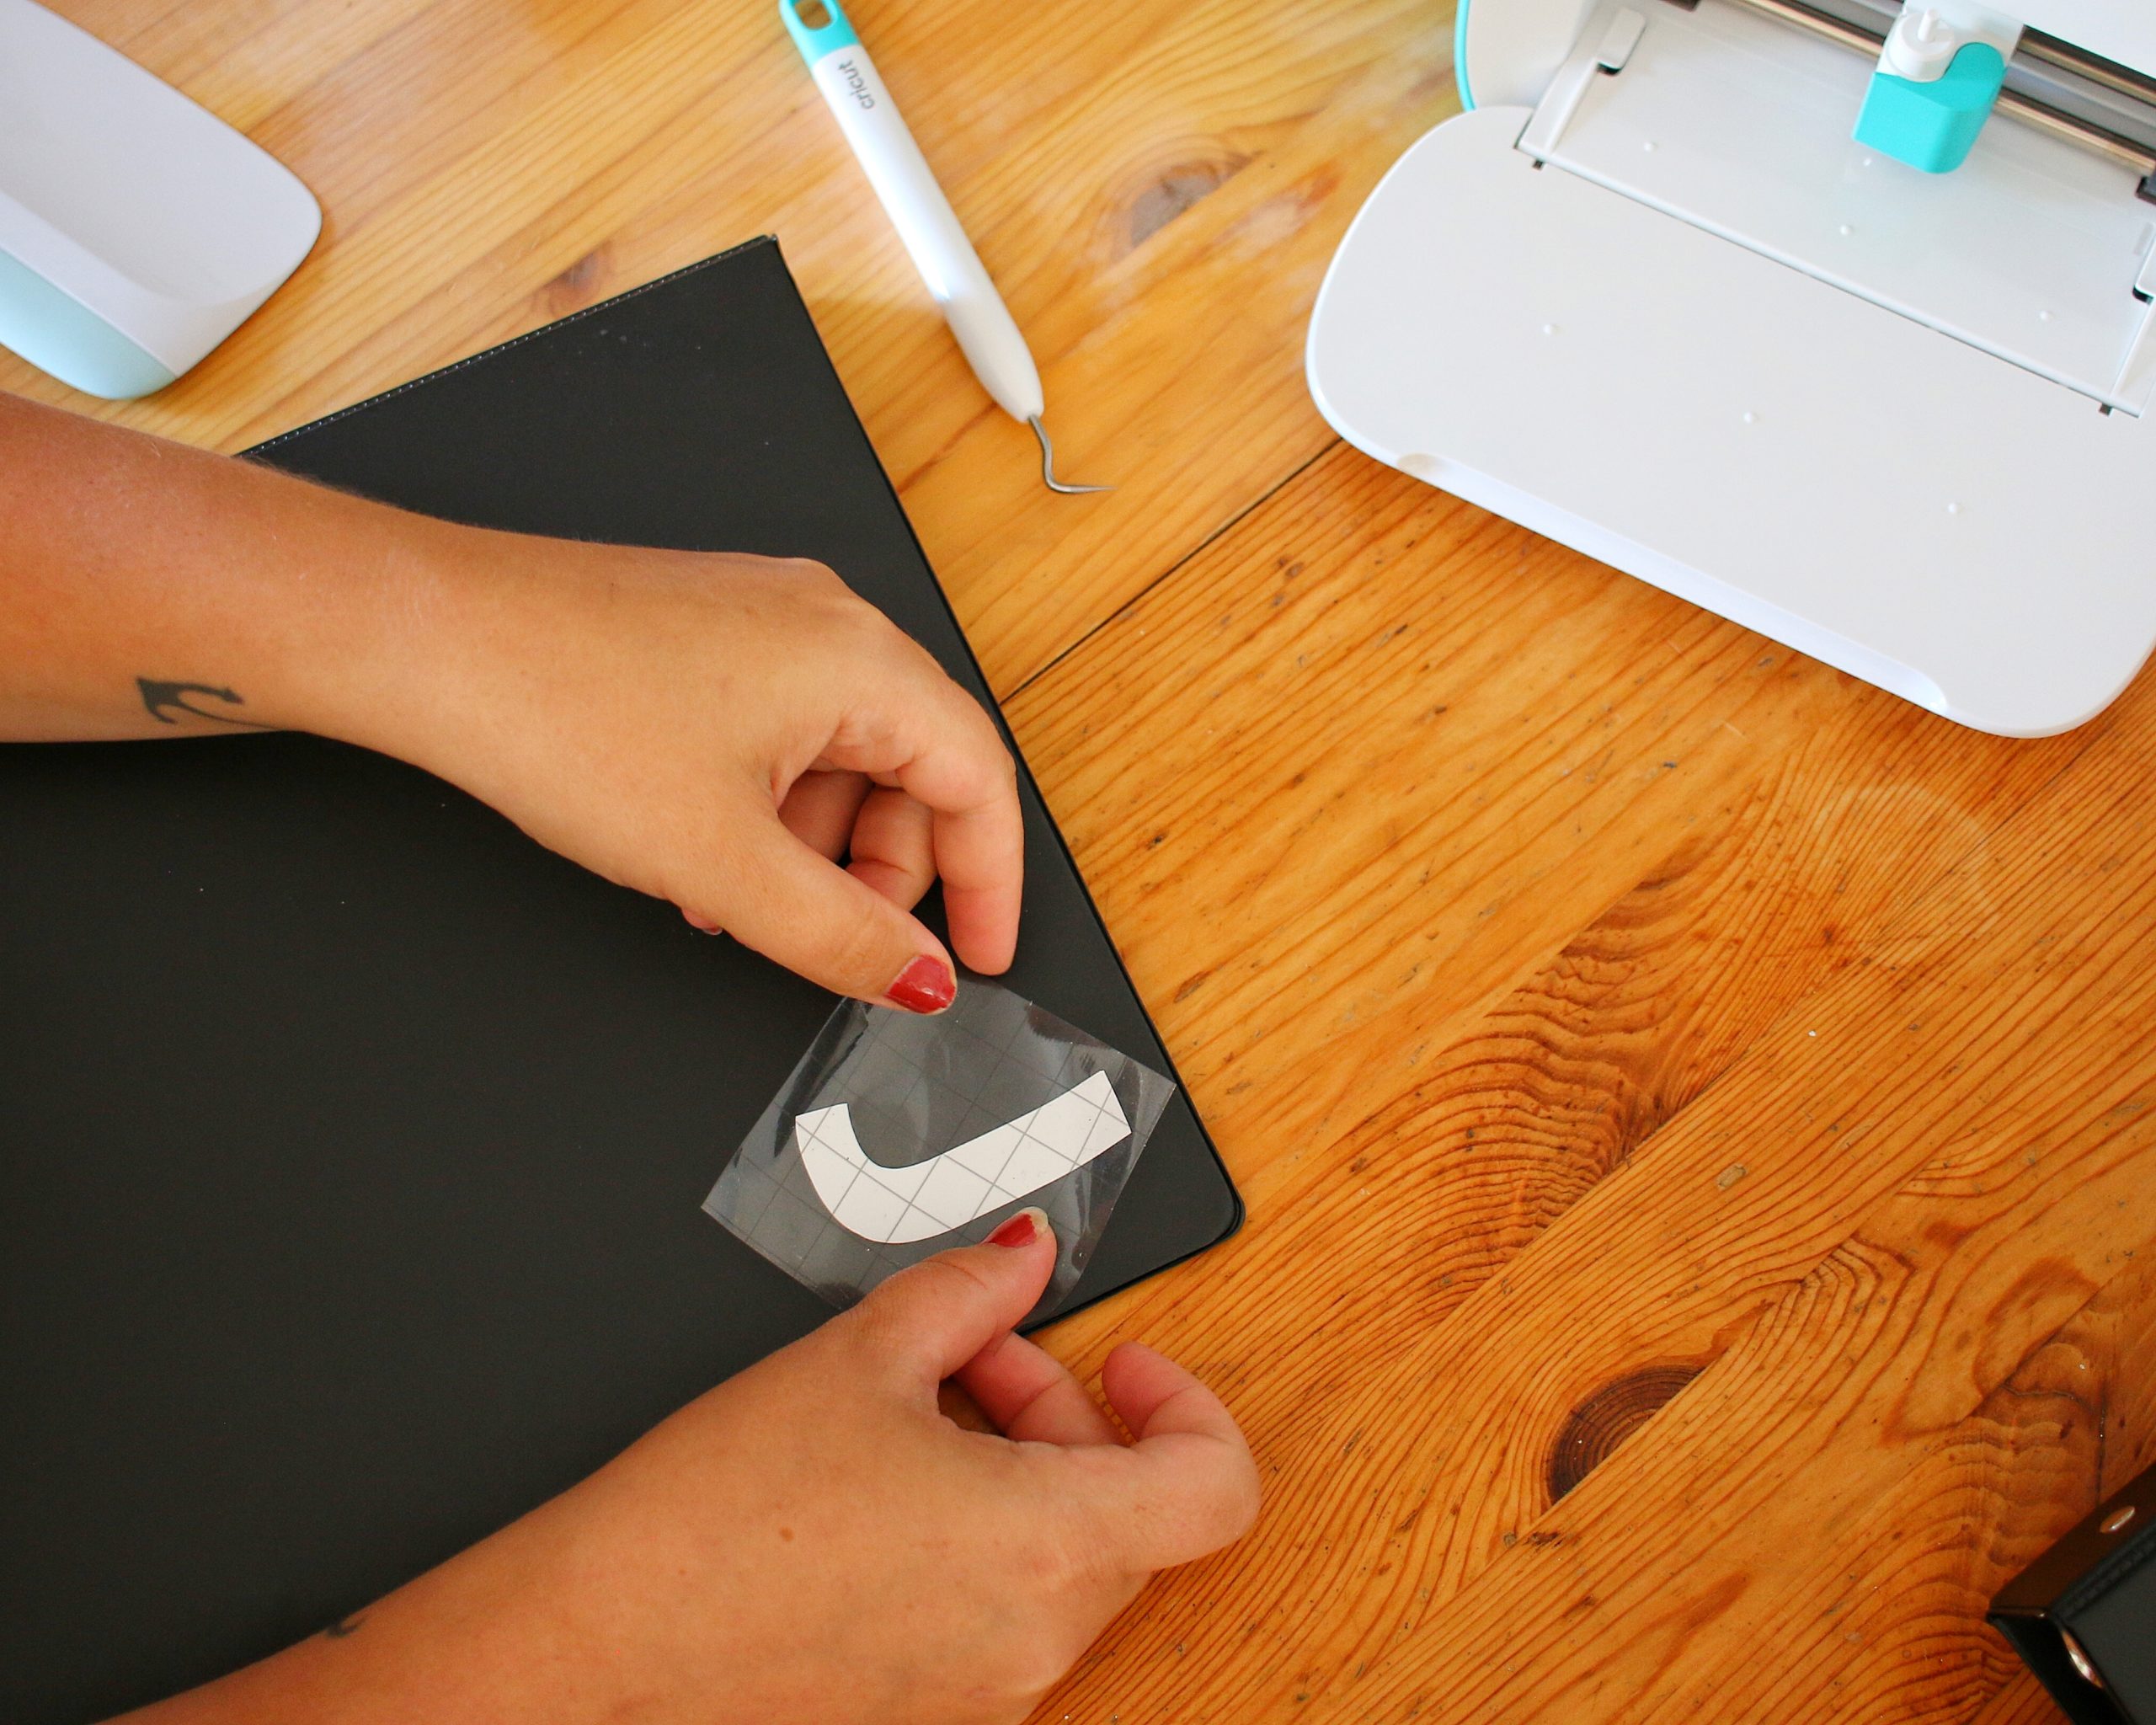
Once you’ve given both sides of your vinyl + transfer tape a good rub, turn it upside down and gently remove the transfer tape. Be sure to pay attention to whether or not the vinyl is lifting so you don’t rip it.
Position the lettering where you’d like it to be on your materials and press down. Then use your scraper tool once again to press the vinyl onto your materials, taking care to get all edges.
Gently peel off the transfer tape and boom, personalized!
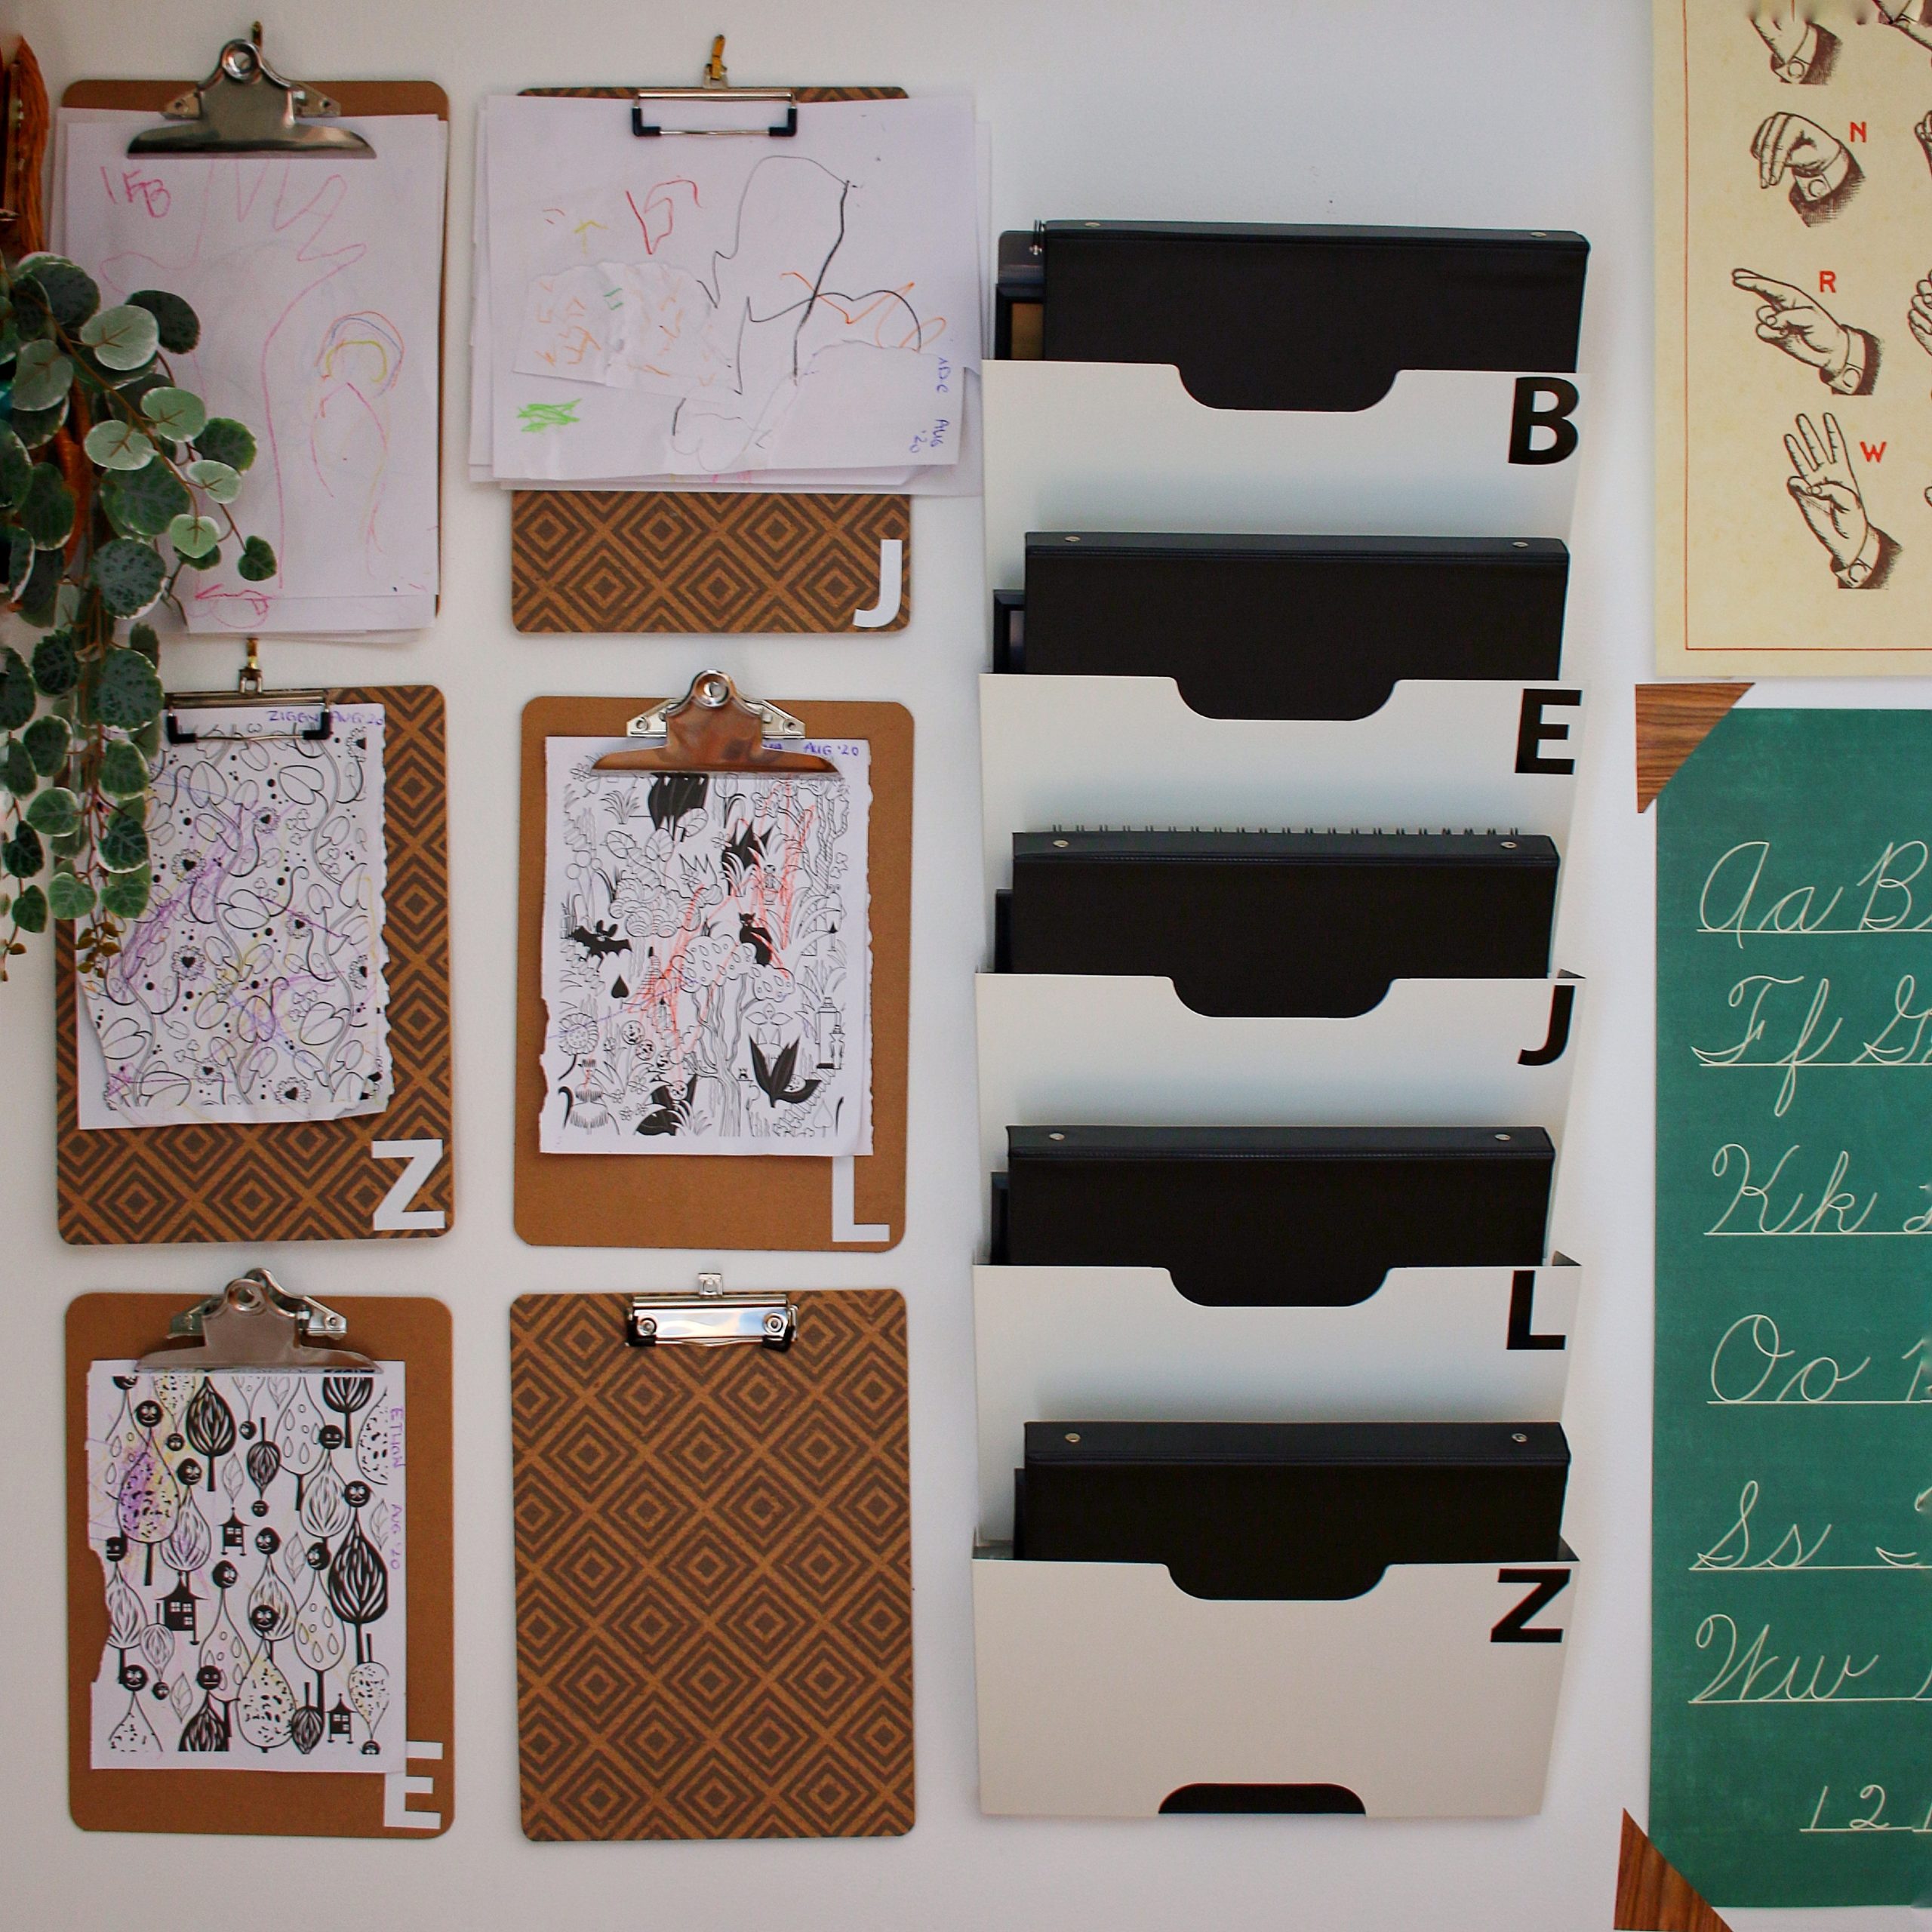
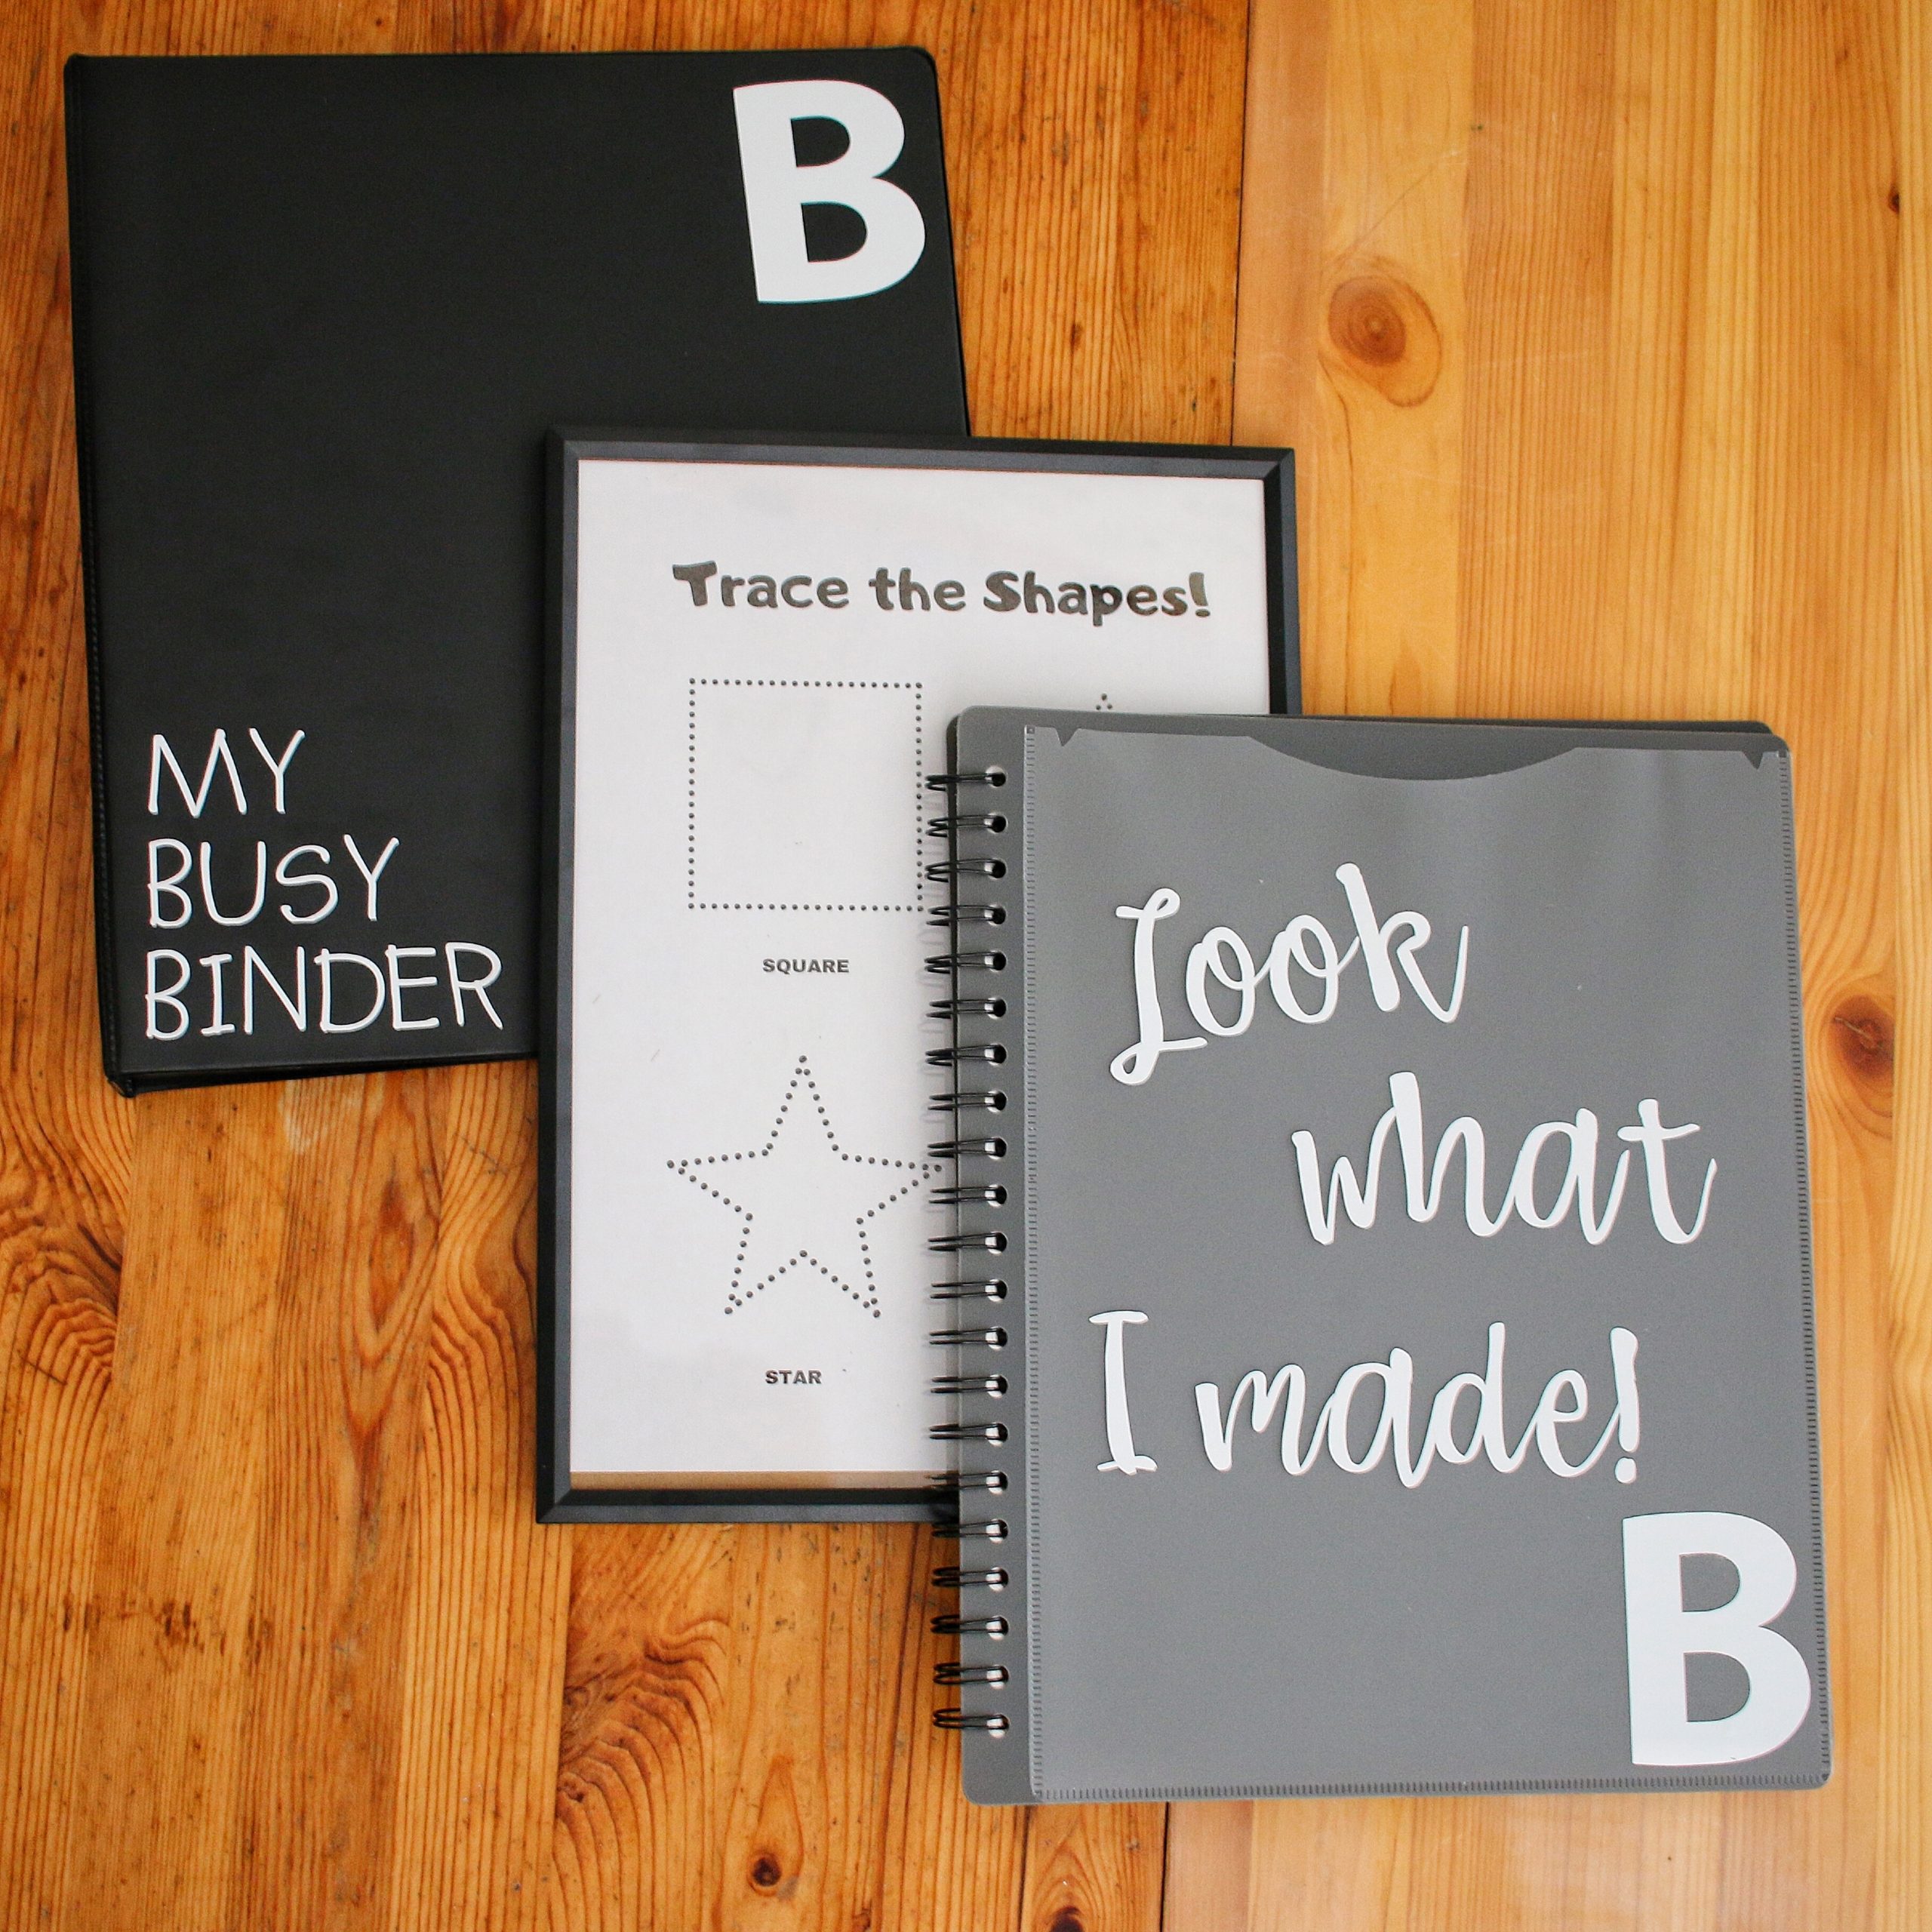
I personalized a binder, presentation folder, clipboard and wall folder for each child using the first letter of their name. The clipboards are to hang artwork, the binders are being made into busy binders for quiet time learning and the wall folder is to store everything in! I’m also considering adding a pencil case pouch for each child to keep their own set of white erase markers and such in.
From opening Design Space to finishing this project, my total time spent was one nap time! So, under two hours. The longest part of this project was choosing fonts and letter sizing which took me an entire hour because I couldn’t decide!
As sad and frustrated as we are that this fall won’t be going the way we once hoped it would, I’m so excited that our Cricut Joy was able to help us personalize these materials for learning at home. Most importantly – the kids are so excited for them and can’t wait to keep using them.
Remember: no matter what decision you make this fall, make sure it’s the decision that’s best for YOUR family. Whether you’re getting backpacks and lunch bags ready or stocking up on coffee to tackle homeschooling you’re doing an amazing job and most importantly – you aren’t alone!
Be sure to check out this blog post for more back to school personalization projects using Cricut products.
16 Back to School Projects to Make With Your Cricut - Play Party Plan
August 28, 2020 at 4:22 pm[…] things organized but help kids, especially young ones, know where things should go. Check it out! Personalized Learning CornerHave multiple kids at home? Use this simple tutorial to create a learning corner that’s […]
40+ Back To School Projects with Cricut - Tastefully Frugal
August 28, 2020 at 8:36 pm[…] Personalized Homeschool Command Center from Being This Mama […]
15 DIY Back to School Project Ideas Using Your Cricut
September 1, 2020 at 3:36 pm[…] Are you homeschooling or distance learning? Here is a great learning corner idea from Being This Mama. […]
14 Back To School Ideas To Make With A Cricut
September 1, 2020 at 5:16 pm[…] You can read more about how I used my Cricut Joy to complete this project h e r e! […]
The BEST Cricut Back to School Projects - Over The Big Moon
September 7, 2020 at 11:23 pm[…] Homeschool Command Center from Being This Mama […]
DIY Mickey Mouse Pillow using the Cricut Joy
September 16, 2020 at 7:09 pm[…] PERSONALIZED LEARNING CORNER USING THE CRICUT JOY […]
Five Reasons I love My Cricut Joy - Being This Mama
November 19, 2020 at 8:52 pm[…] PERSONALIZED HOMESCHOOL LEARNING CORNER USING THE CRICUT JOY […]