DISNEY CASTLE WALL DECOR USING THE CRICUT JOY
This is a sponsored post written by me on behalf of Cricut for Cricut. All opinions are 100% mine.
A dream is a wish your heart makes, and our toddler’s heart wanted a Disney Castle of her own!
We’re huge Disney fans in this house and we have wanted to do some sort of Disney Castle wall decor in her room for a long while – I was just never able to decide on how to do it. Paint felt too permanent since we rent, I couldn’t find a castle shaped headboard that was within our budget and most of the decals on Etsy were too small.
So, enter my Cricut Joy and a little creativity!
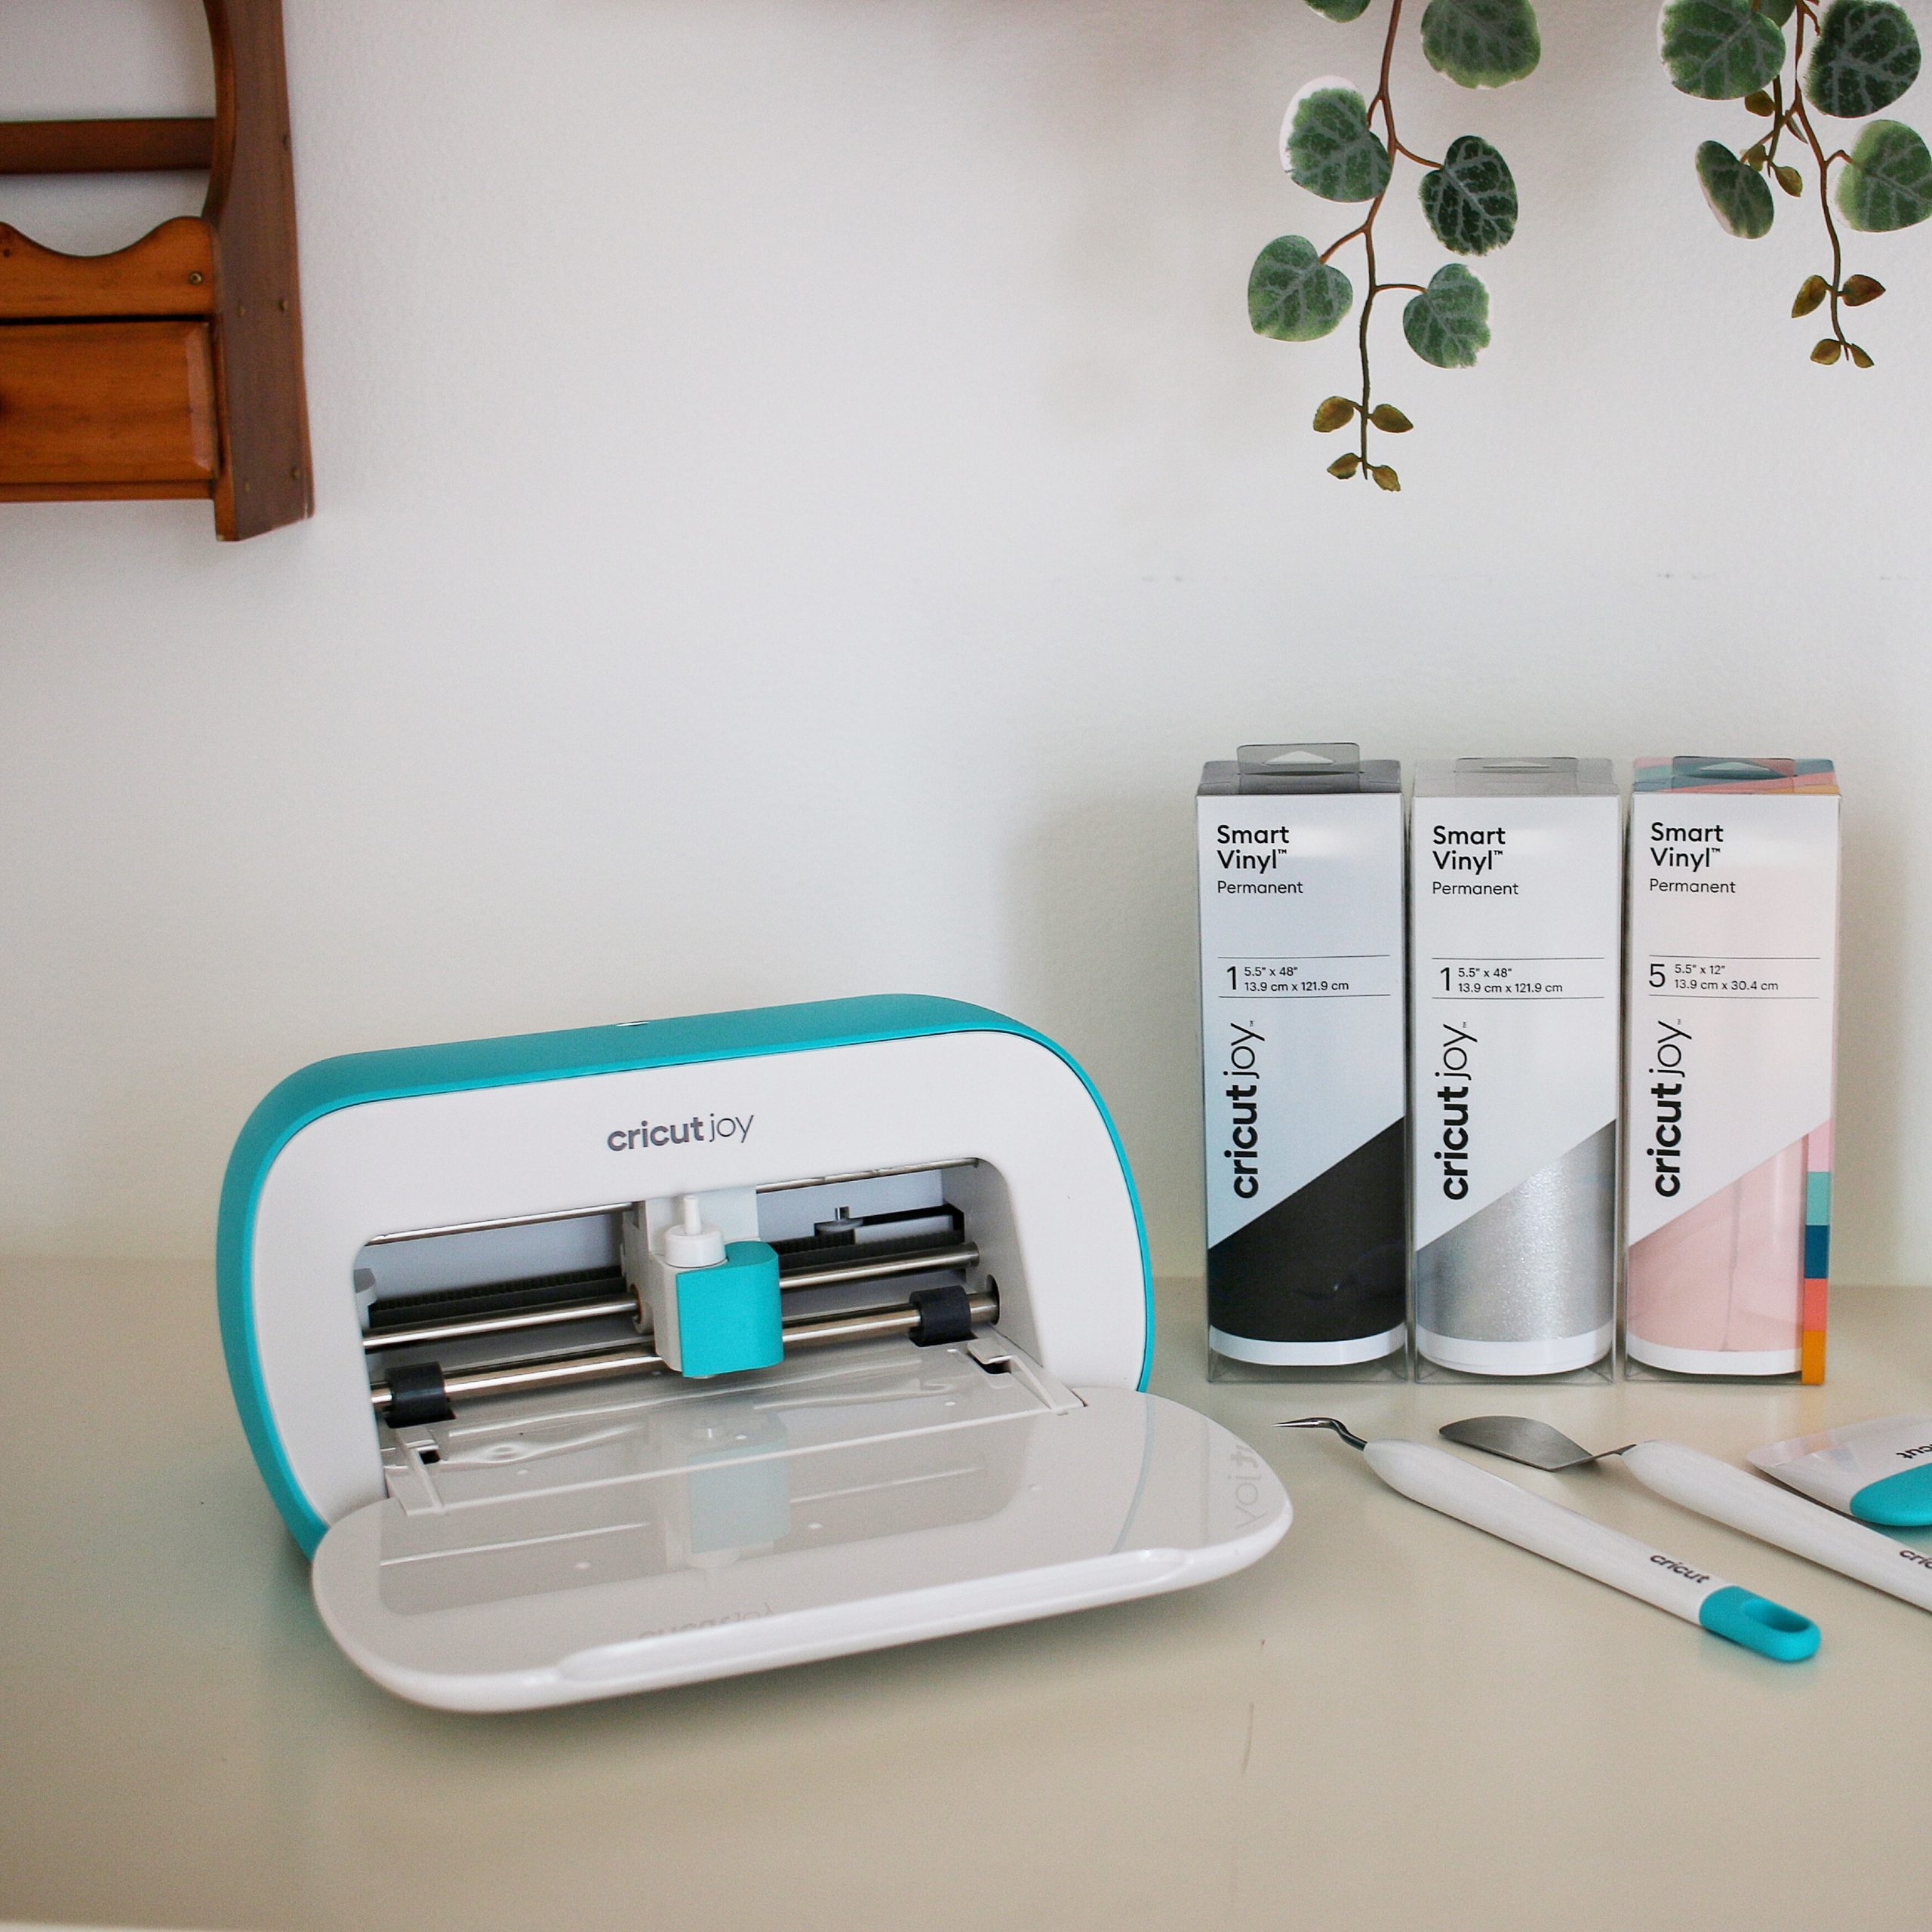
MATERIALS
This castle project was our first step towards giving our toddler her first real ‘grown up’ bedroom. In our first house, her bedroom was a crib in her playroom – and it was actually our living room, technically. Since moving into this house almost two years ago her room has slowly had some decor and furniture added but we had never taken the time to really create a space for her. Somewhere where she can escape her sisters to hang out, read, colour and play on her own.
As much as we’ve given her a wide variety of toys, clothing and material themes (aka as much as I’ve avoided pink and glitter) she is undeniably a pink, glitter loving princess. So that’s what her room was based on! When I went to look at which vinyl to pick I fell in love with the Beachside packages colour palette and went from there. I knew that black would still be the main dot colour, so I added a package of glittery black to add some sparkle as well as the silver.
There are so, so many options when it comes to the Smart Vinyl line that you’ll be able to customize this to any colour palette. Outside of the variety of permanent vinyl, there’s also iron-on vinyl, cards and paper which means you could create matching pillows, artwork, banners or blankets for the room!
STEP ONE
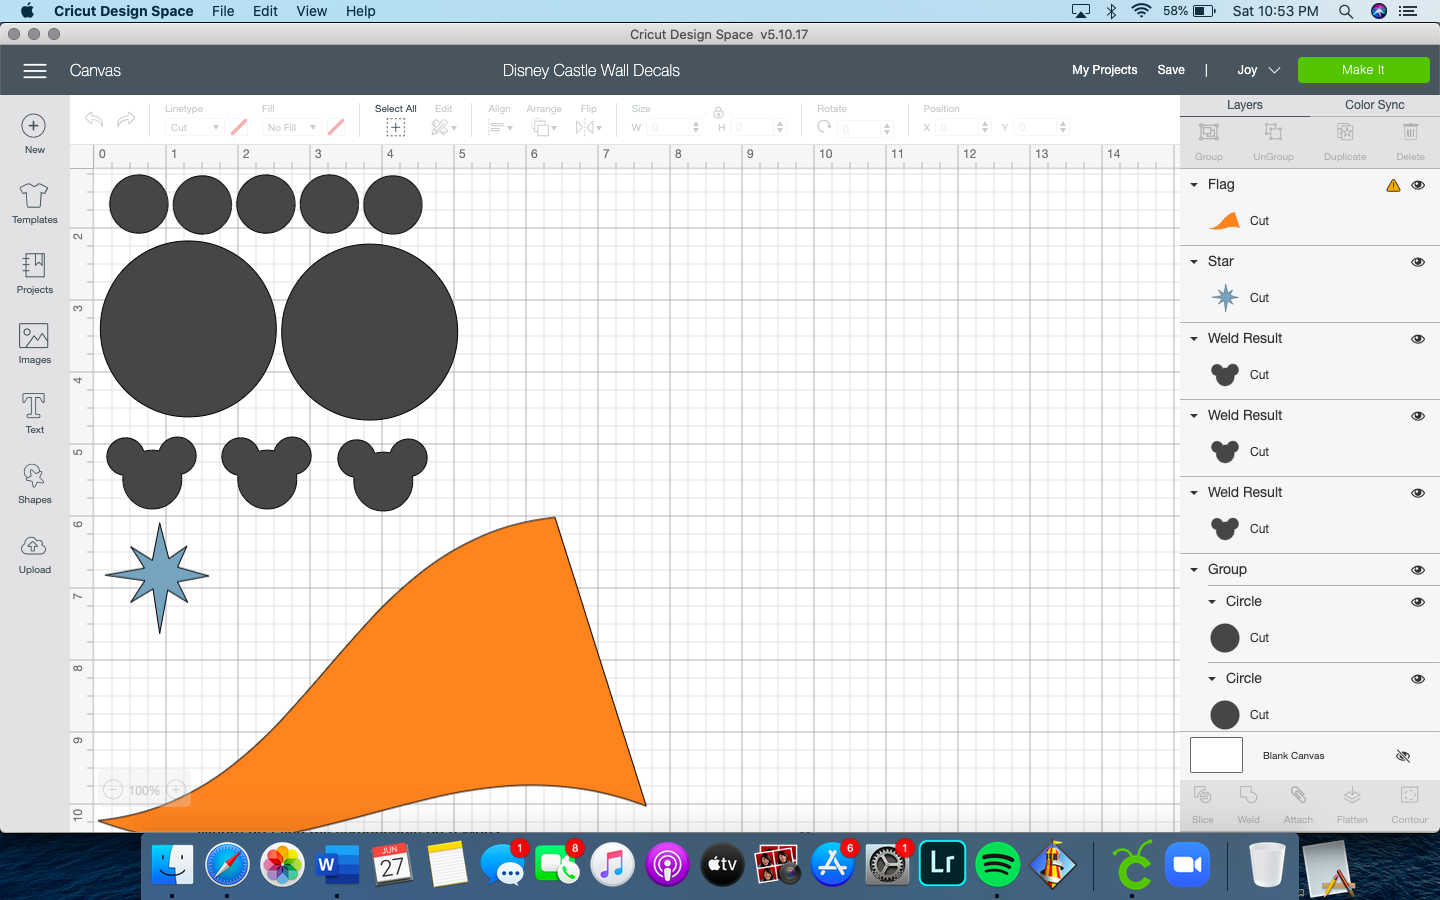
The first thing I did when creating this Disney Castle wall decor was choosing the shapes and their sizes in design space. I chose three sizes of regular circles, created a Mickey head using the circles, added a star for some pixie dust and found the perfect flag shape.
You can find my Design Space canvas h e r e.
STEP TWO
My next step was printing all my shapes. I made sure to print many more dots than I did Mickey heads – the dots look better and are easier to layer.
I used:
- One package of the Beachside sampler
- One 5.5″ x 48″ package of Silver
- One 5.5″ x 48″ package of Glitter Black
- One 5.5″ x 24″ package of Coral
- One 20ft roll of Black vinyl
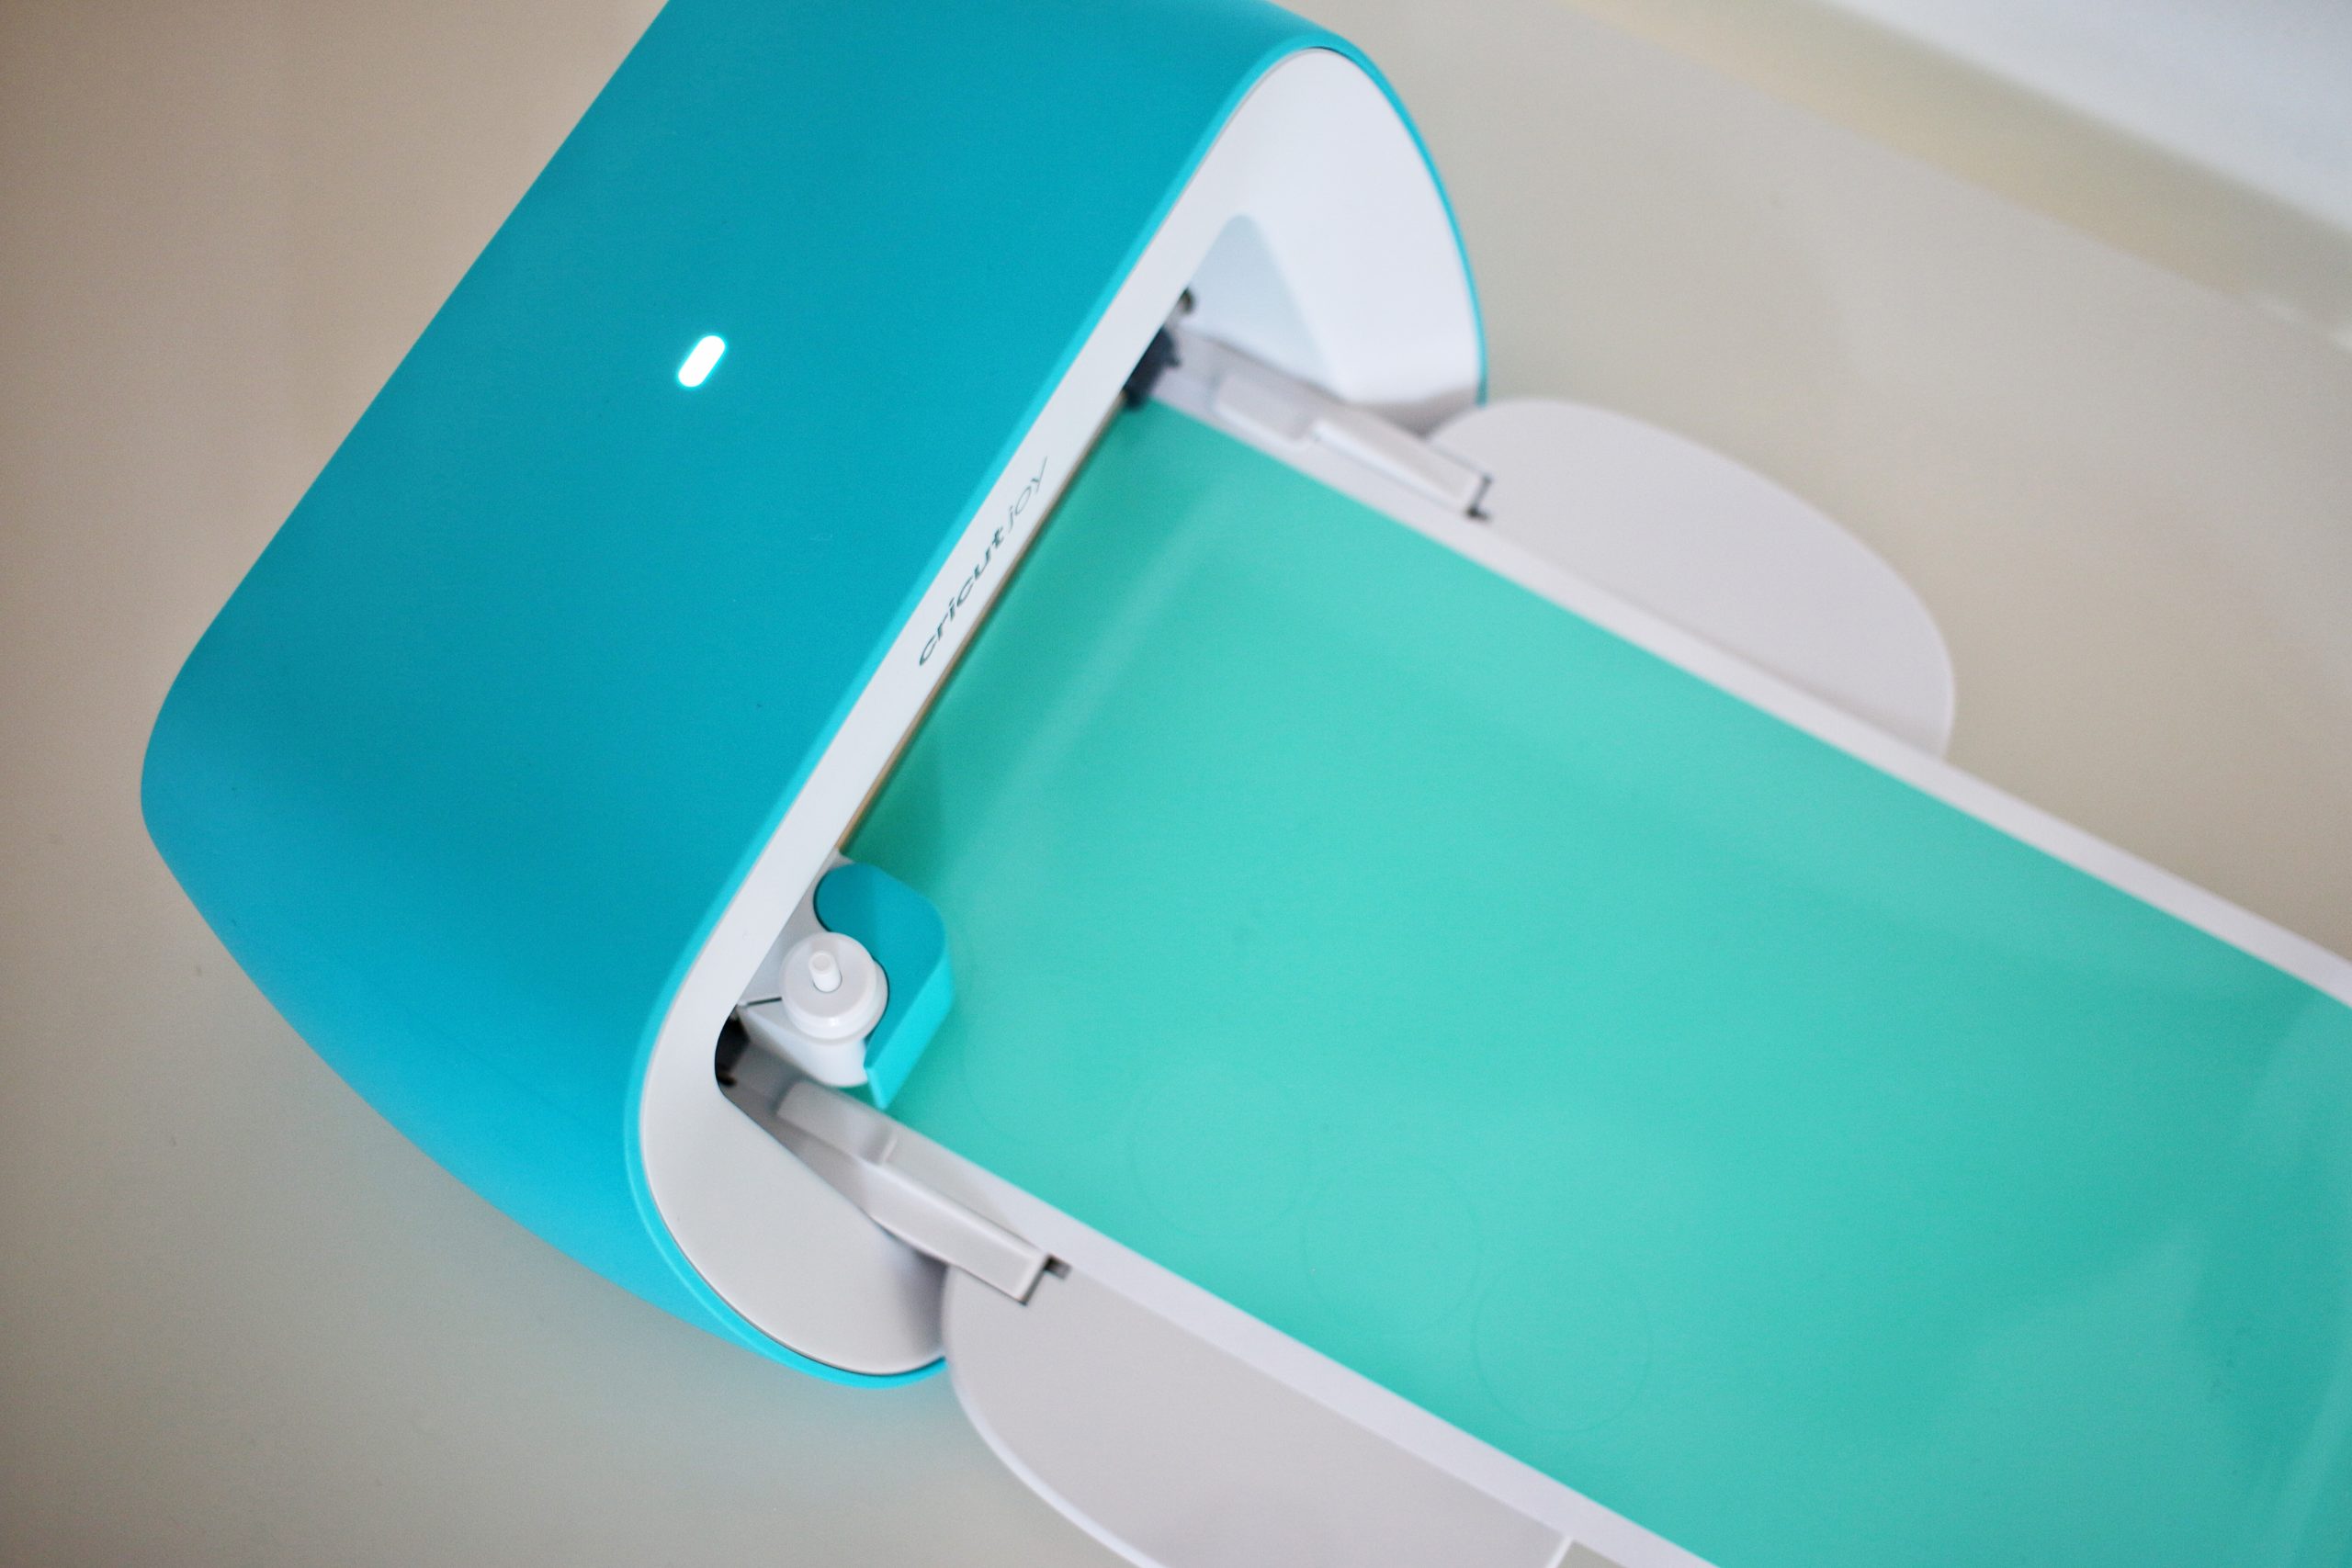
I love how fast, quiet and easy printing with the Cricut Joy is. I started this after I put the kids down for their nap and had it all designed, printed and prepped but the time nap was only halfway done. Since the machine itself is quiet I can have it running during nap time without worrying about waking them up.
One of the aspects that makes printing with a Cricut Joy so easy is its matless cutting option. Unlike other Cricut machines, the Smart Vinyl for the Joy requires no mat – just cut to the right length, load and print!
STEP THREE
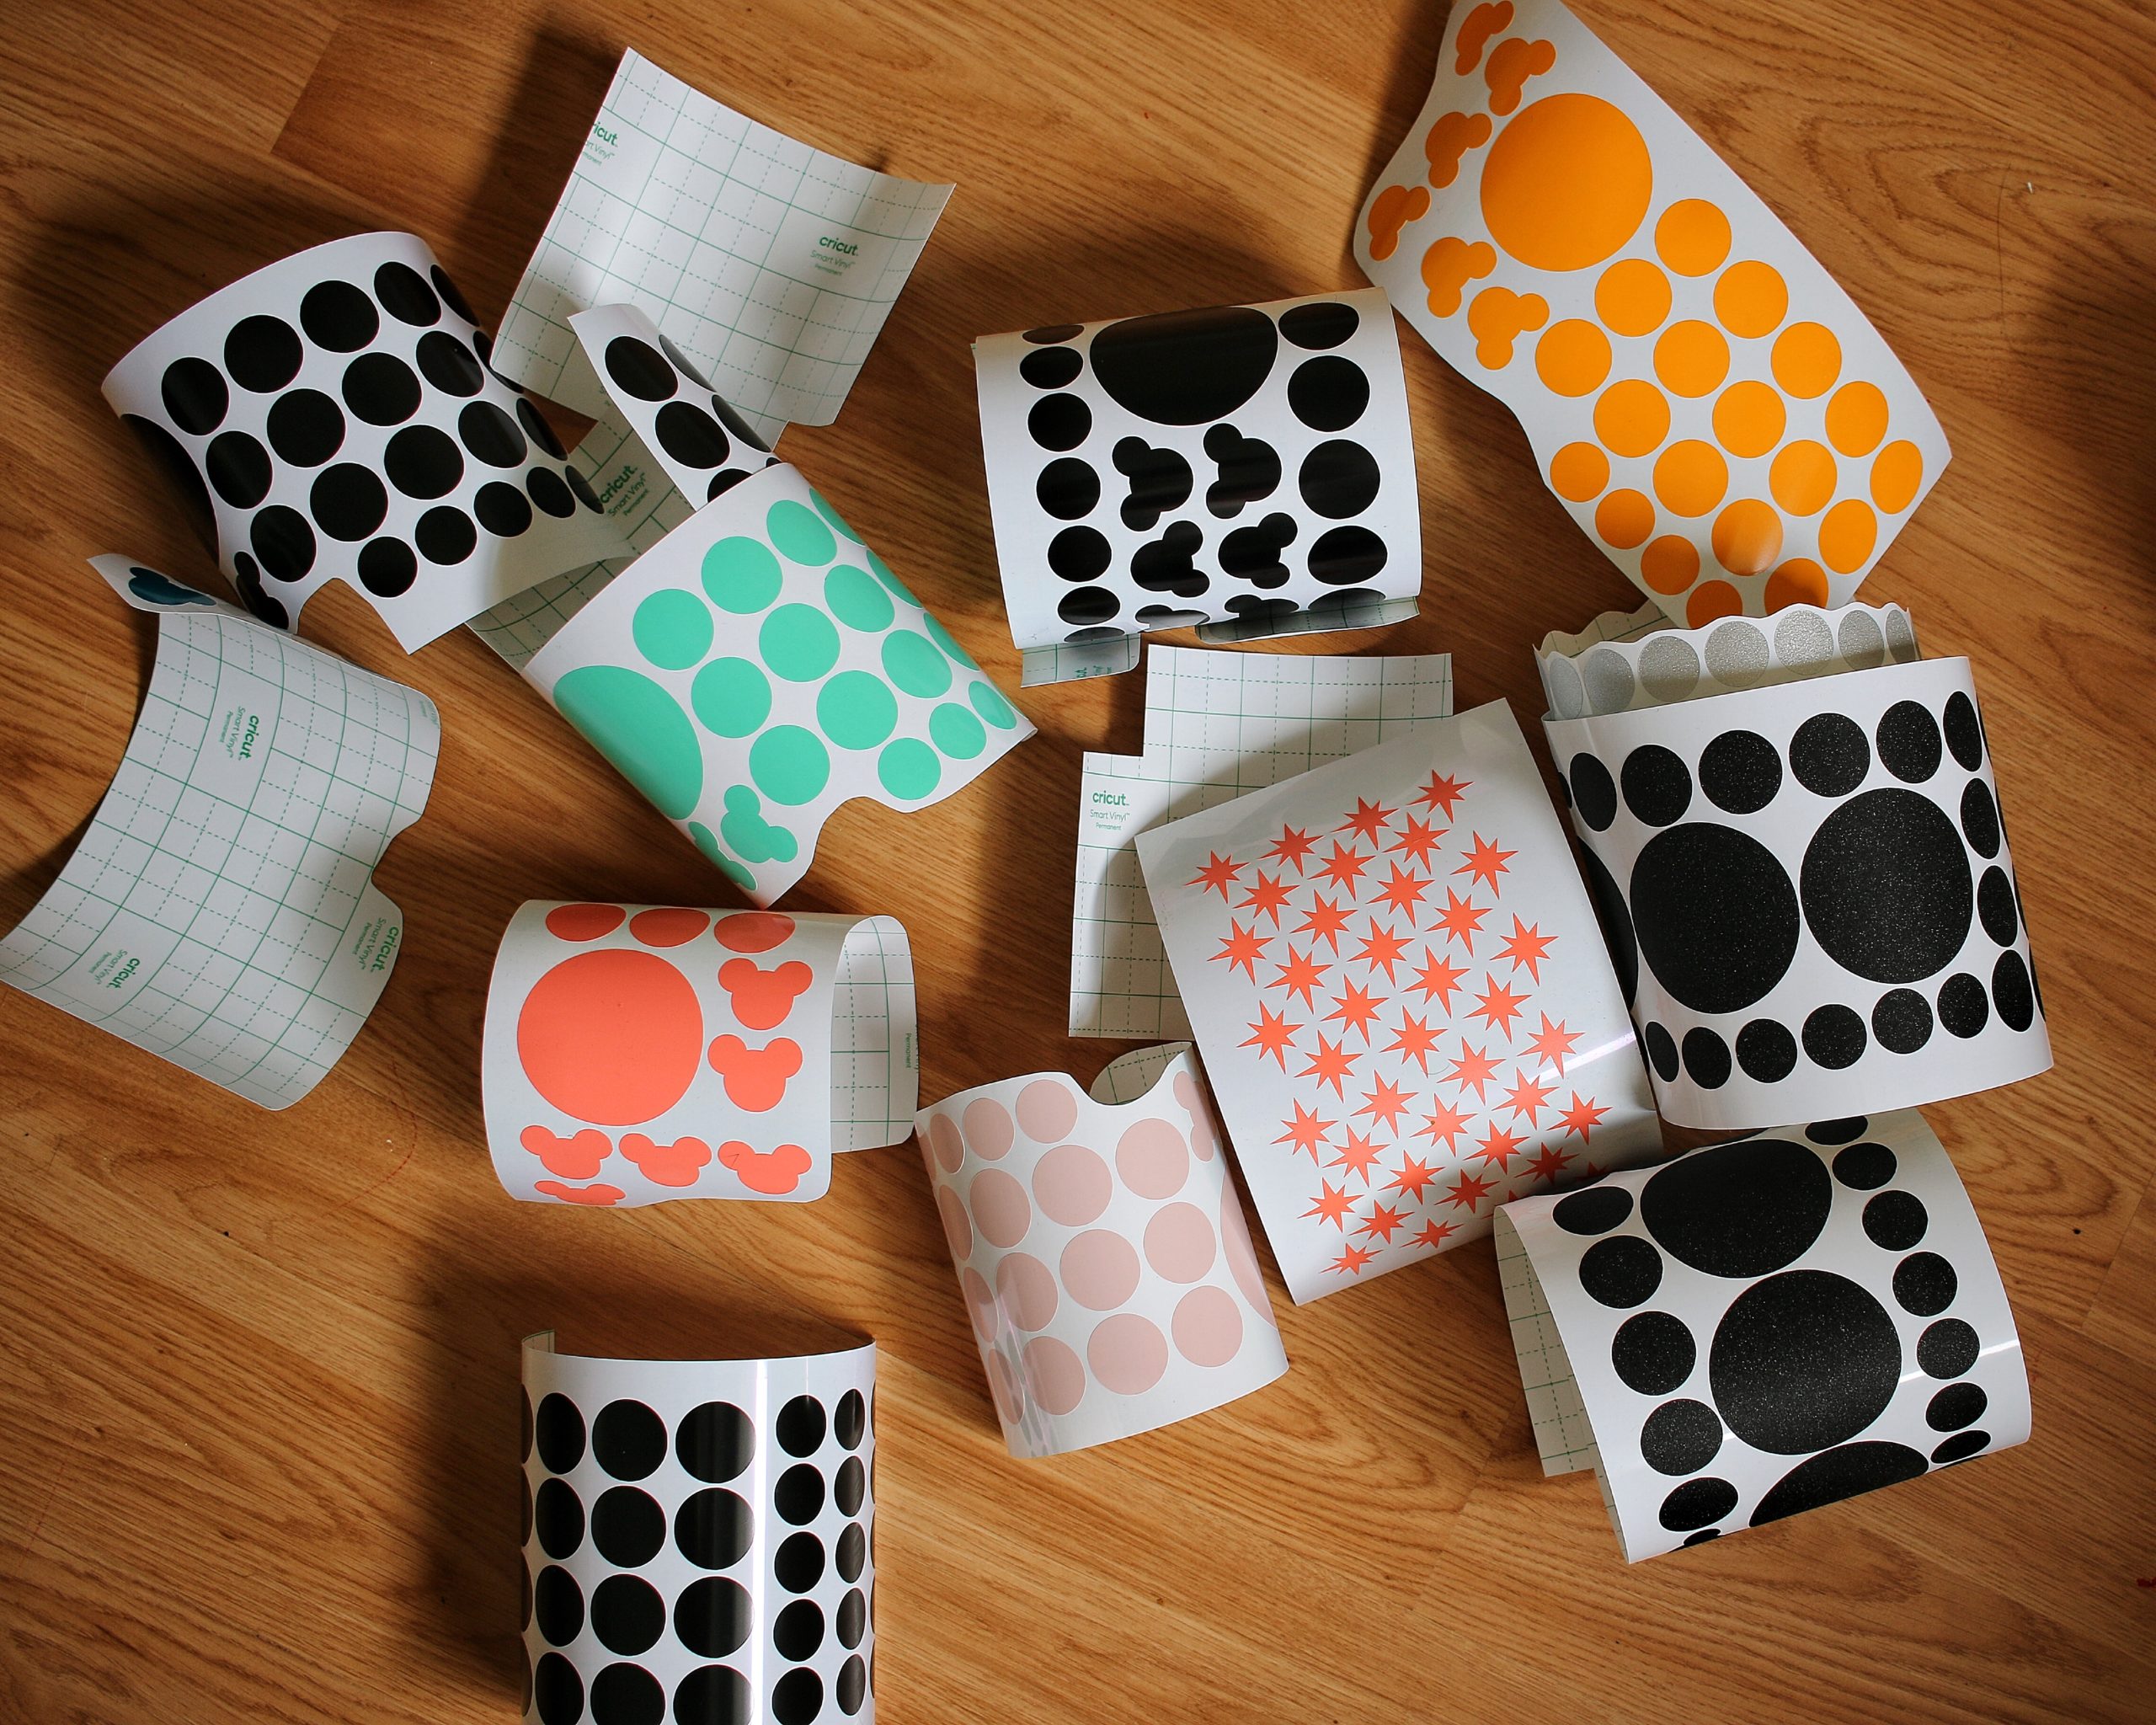
The last preparation step in the Disney Castle wall decor was peeling the backing off each chunk. I used the weeder tool to make sure I didn’t damage any of the shapes, but since it was mainly circles it wasn’t a bad or hard removal step.
The only one I needed to go slow and use the weeder tool were the stars!
STEP FOUR
I prepped the bedroom walls the same way I do before I paint. I washed them down with TSP Cleaner to be sure there’d be no dirt, grime or grease getting in the way of the vinyl. Goodbye, toddler fingerprints!
I wouldn’t skip washing your walls before applying your Disney Castle wall decor. Any dirt or dust can affect the vinyl’s durability in lasting on your wall – and not all grime and grease is visible.
STEP FIVE
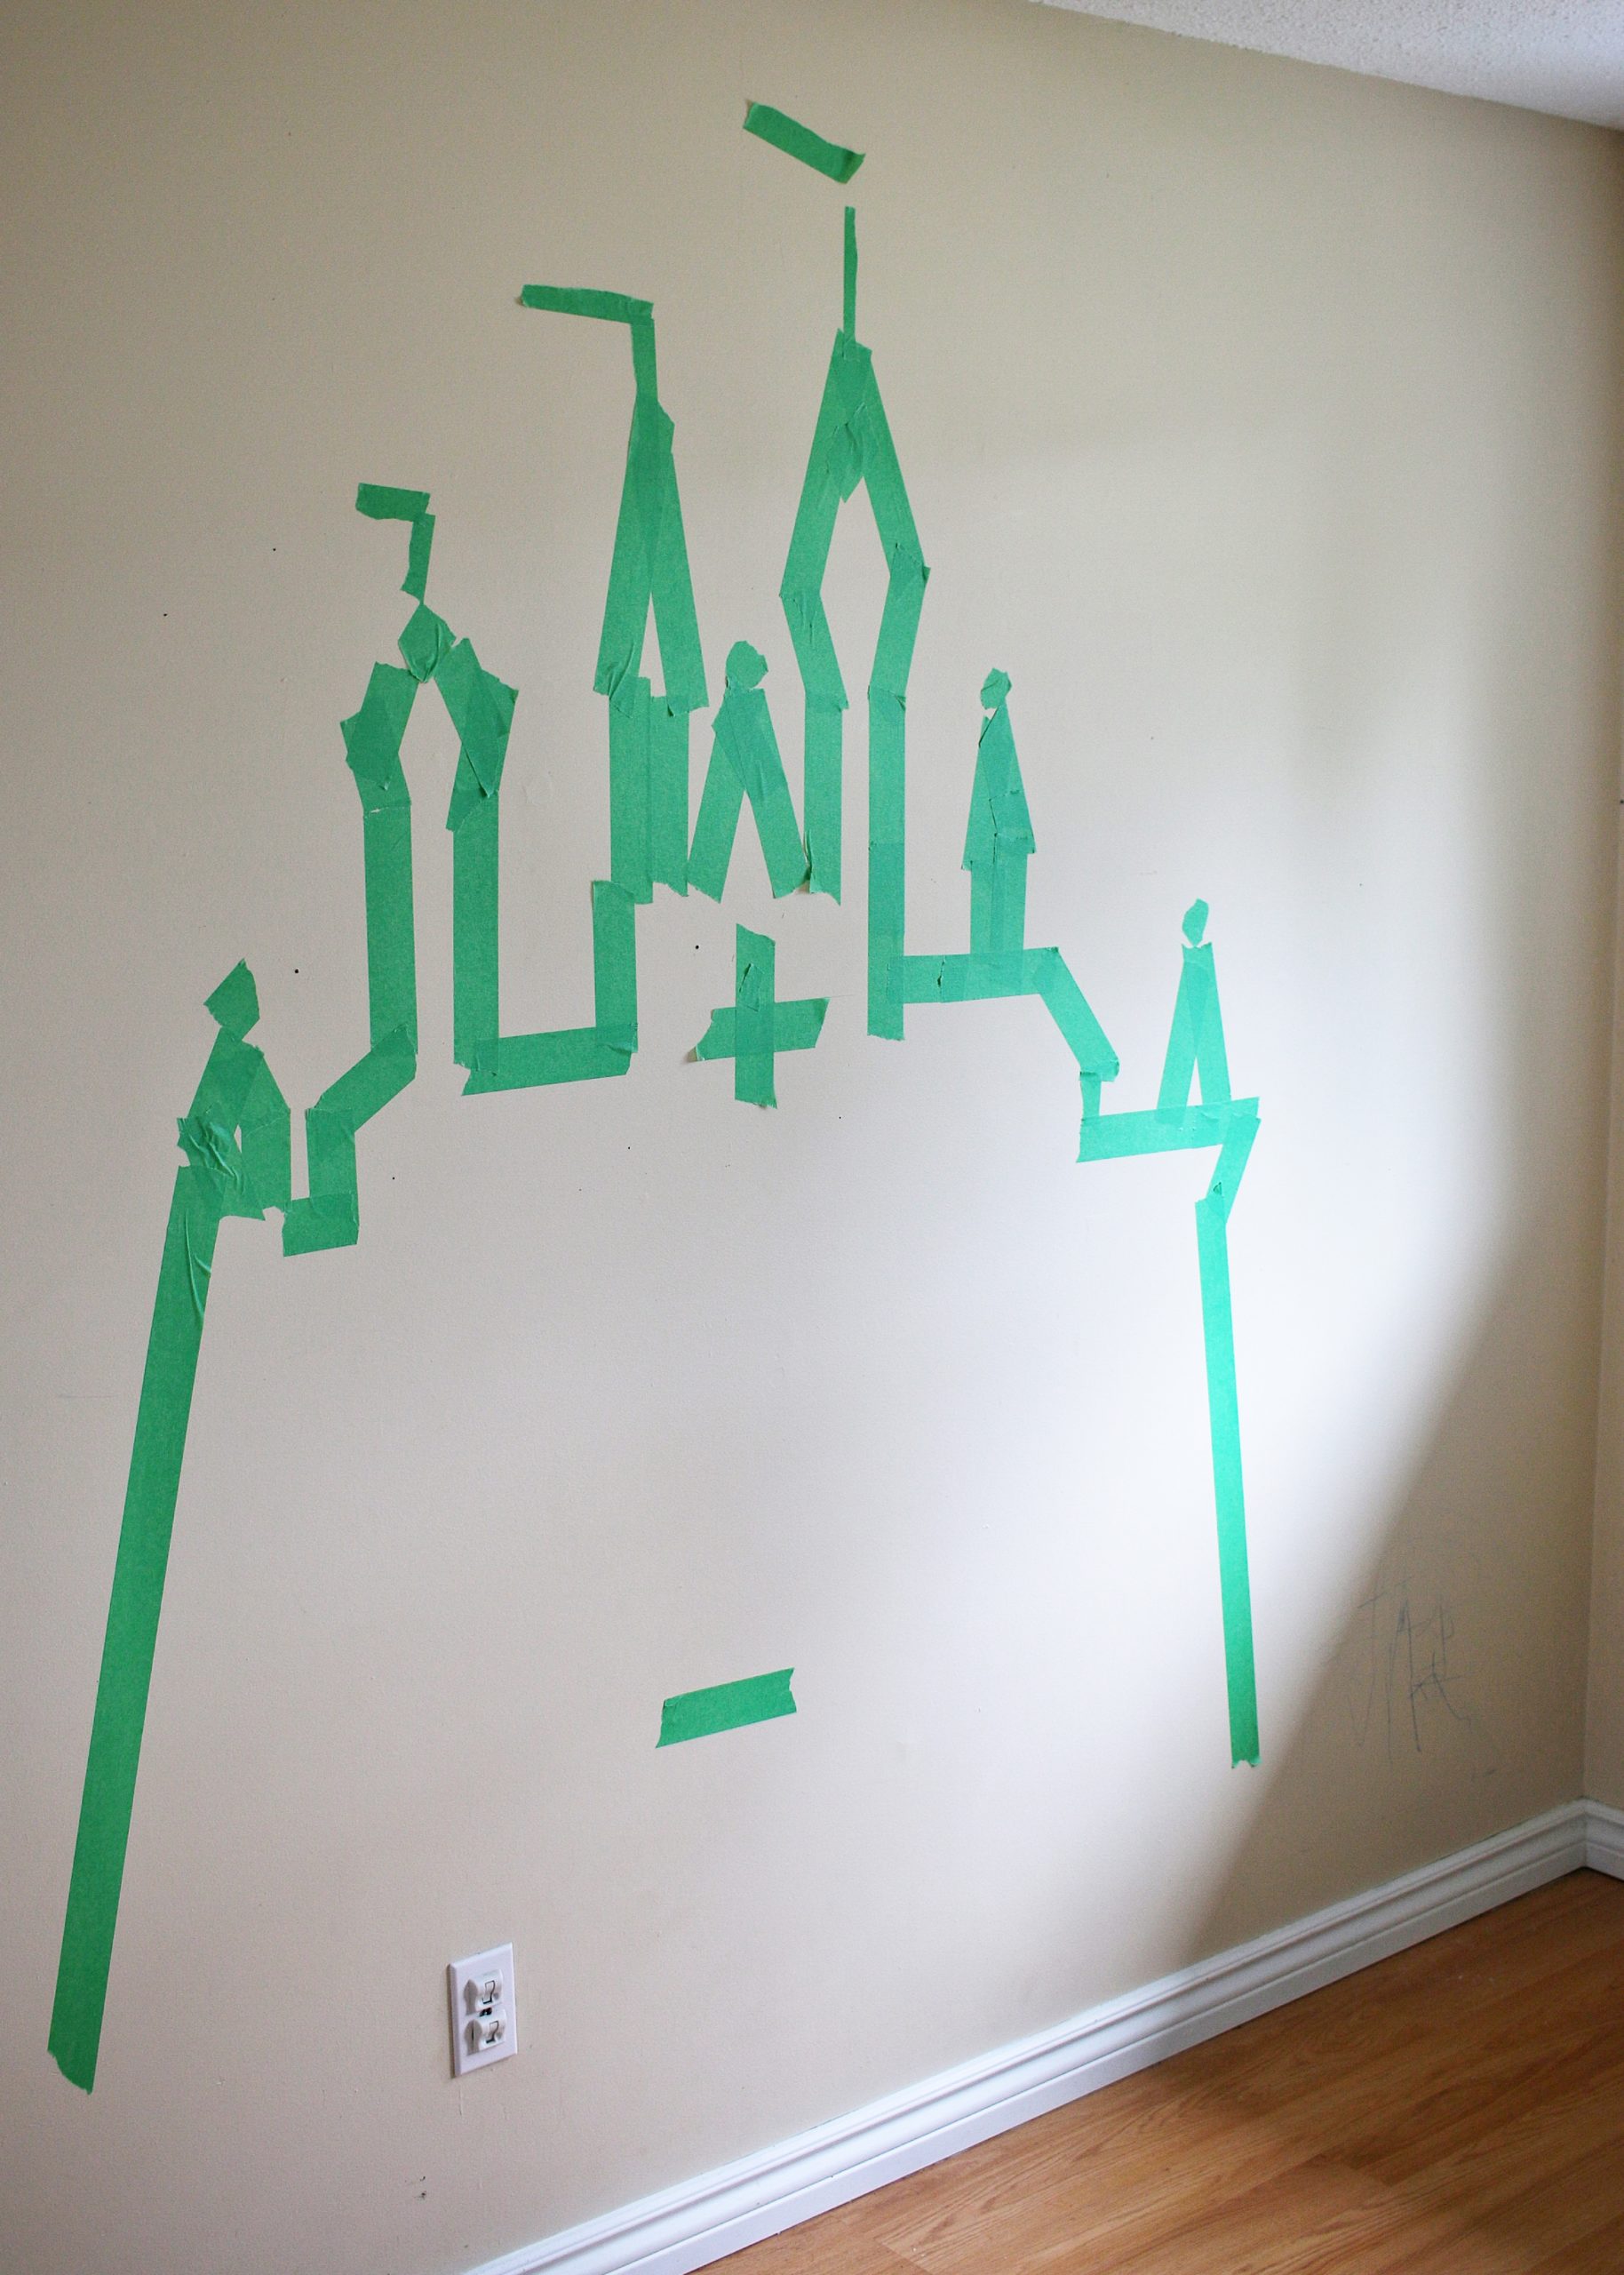
Can’t have a Disney Castle wall decor without a castle outline!
So, you’ll need to decide which Disney Castle is best suited for your space. I copied the classic Cinderella castle outline, but you could do this with whichever castle is your favourite!
I googled ‘Cinderella castle silhouette’ and just kept the photo open on my laptop while I freehanded an outline. It’s not 100% perfect but it’s close enough to it for me.
Another option would be to have a projector and project it onto the wall.
I decided against drawing the castle on the wall as I didn’t want to have to worry about erasing pen or pencil lines when I was finished.
STEP SIX
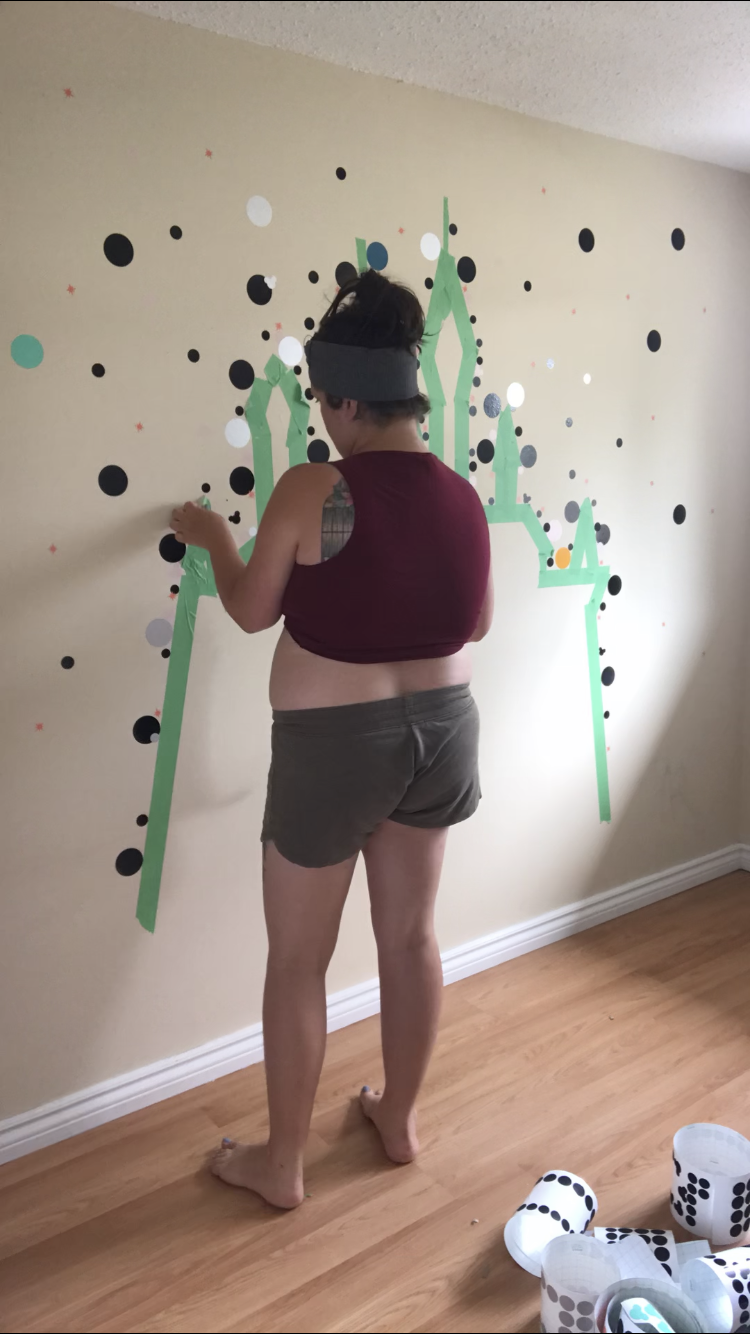
Dots, dots, dots, dots, dots, dots, dots – everybody!
I took me about an hour and a half to apply all my dots. I did not use transfer paper for this project.
Since the decals were all a decent size and did not need to be kept in a certain pattern or distance, transfer paper would have been very wasteful and time consuming for nothing!
The decals should peel off fairly easily, but I kept my Weeder on hand for the ones that were proving to be difficult. I do recommend using the Weeder tool to remove the stars from the backing paper no matter what. Their shape makes it easy to rip them and they can be sow to carefully peel without the Weeder.
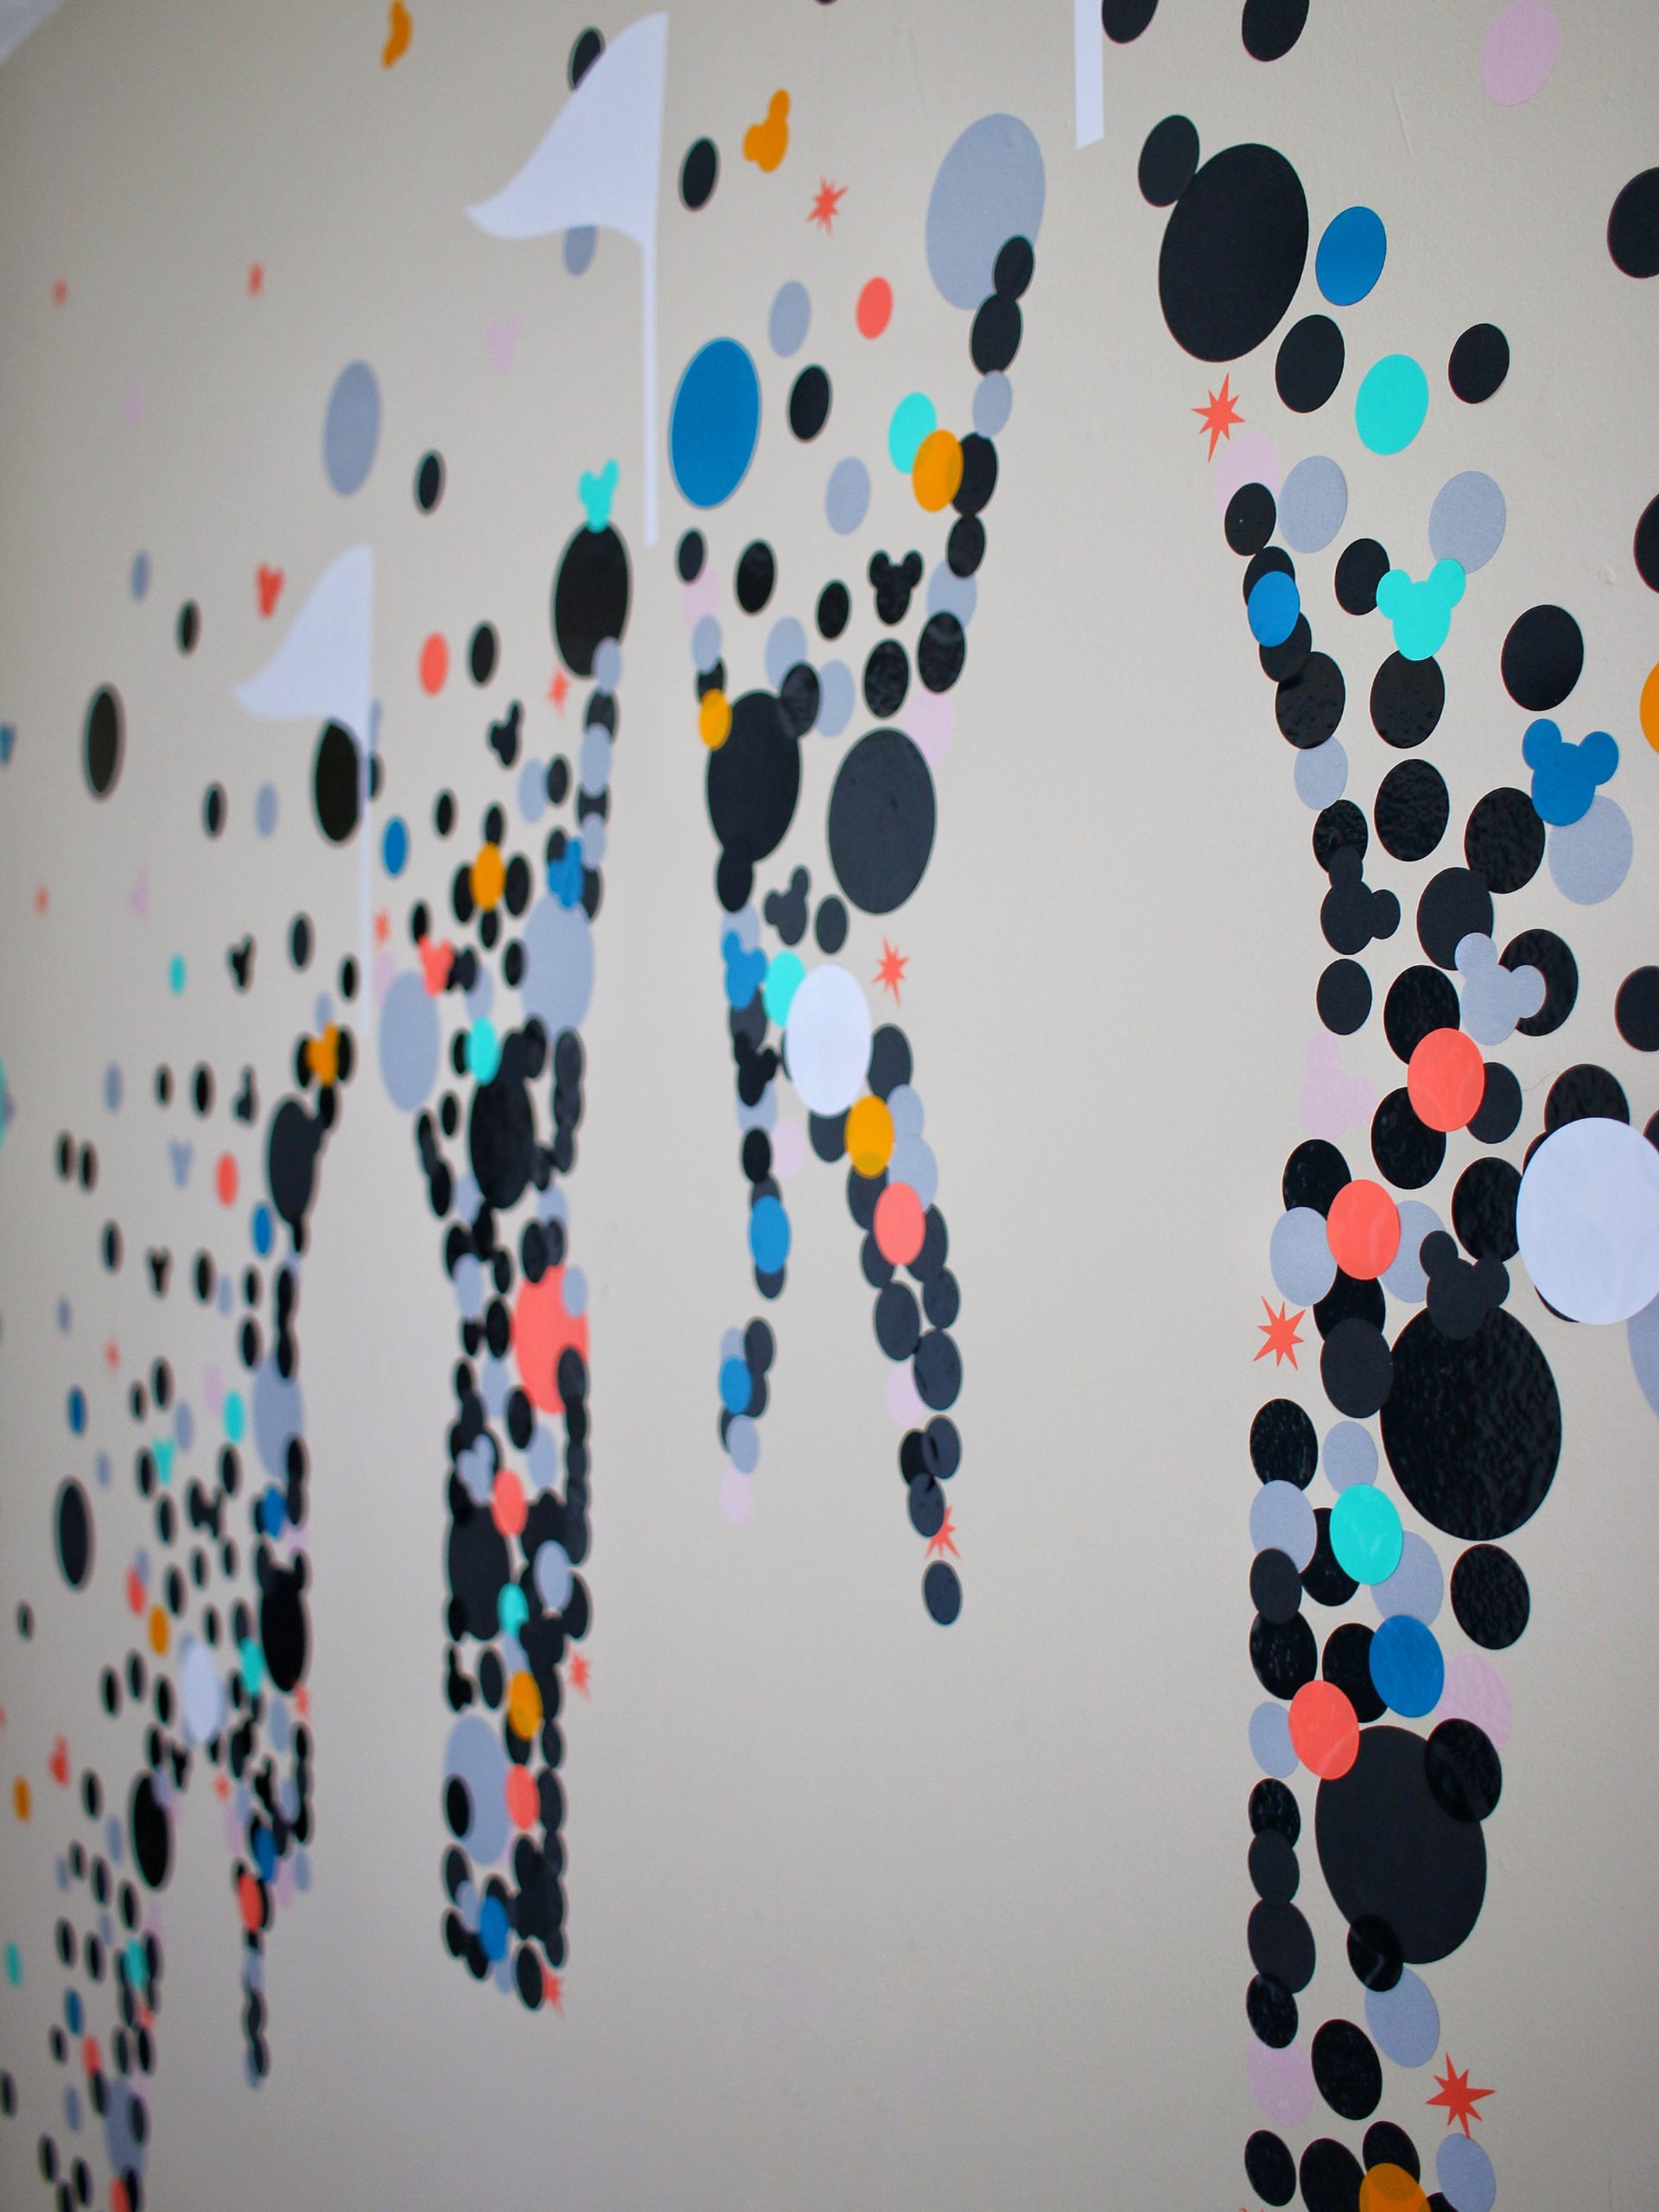
To make the castle shape really stand out, you will want to cluster the decals together all around the edge – layering them too.
The flags were actually an afterthought after I had added all the dots and removed the tape. It made me really thankful that the Cricut Joy is so portable and light – you can craft anywhere there’s a power outlet to plug it in. I was able to go grab it, bring it upstairs to my kids bedroom and quickly print out the flag decals!
THE FINAL RESULT
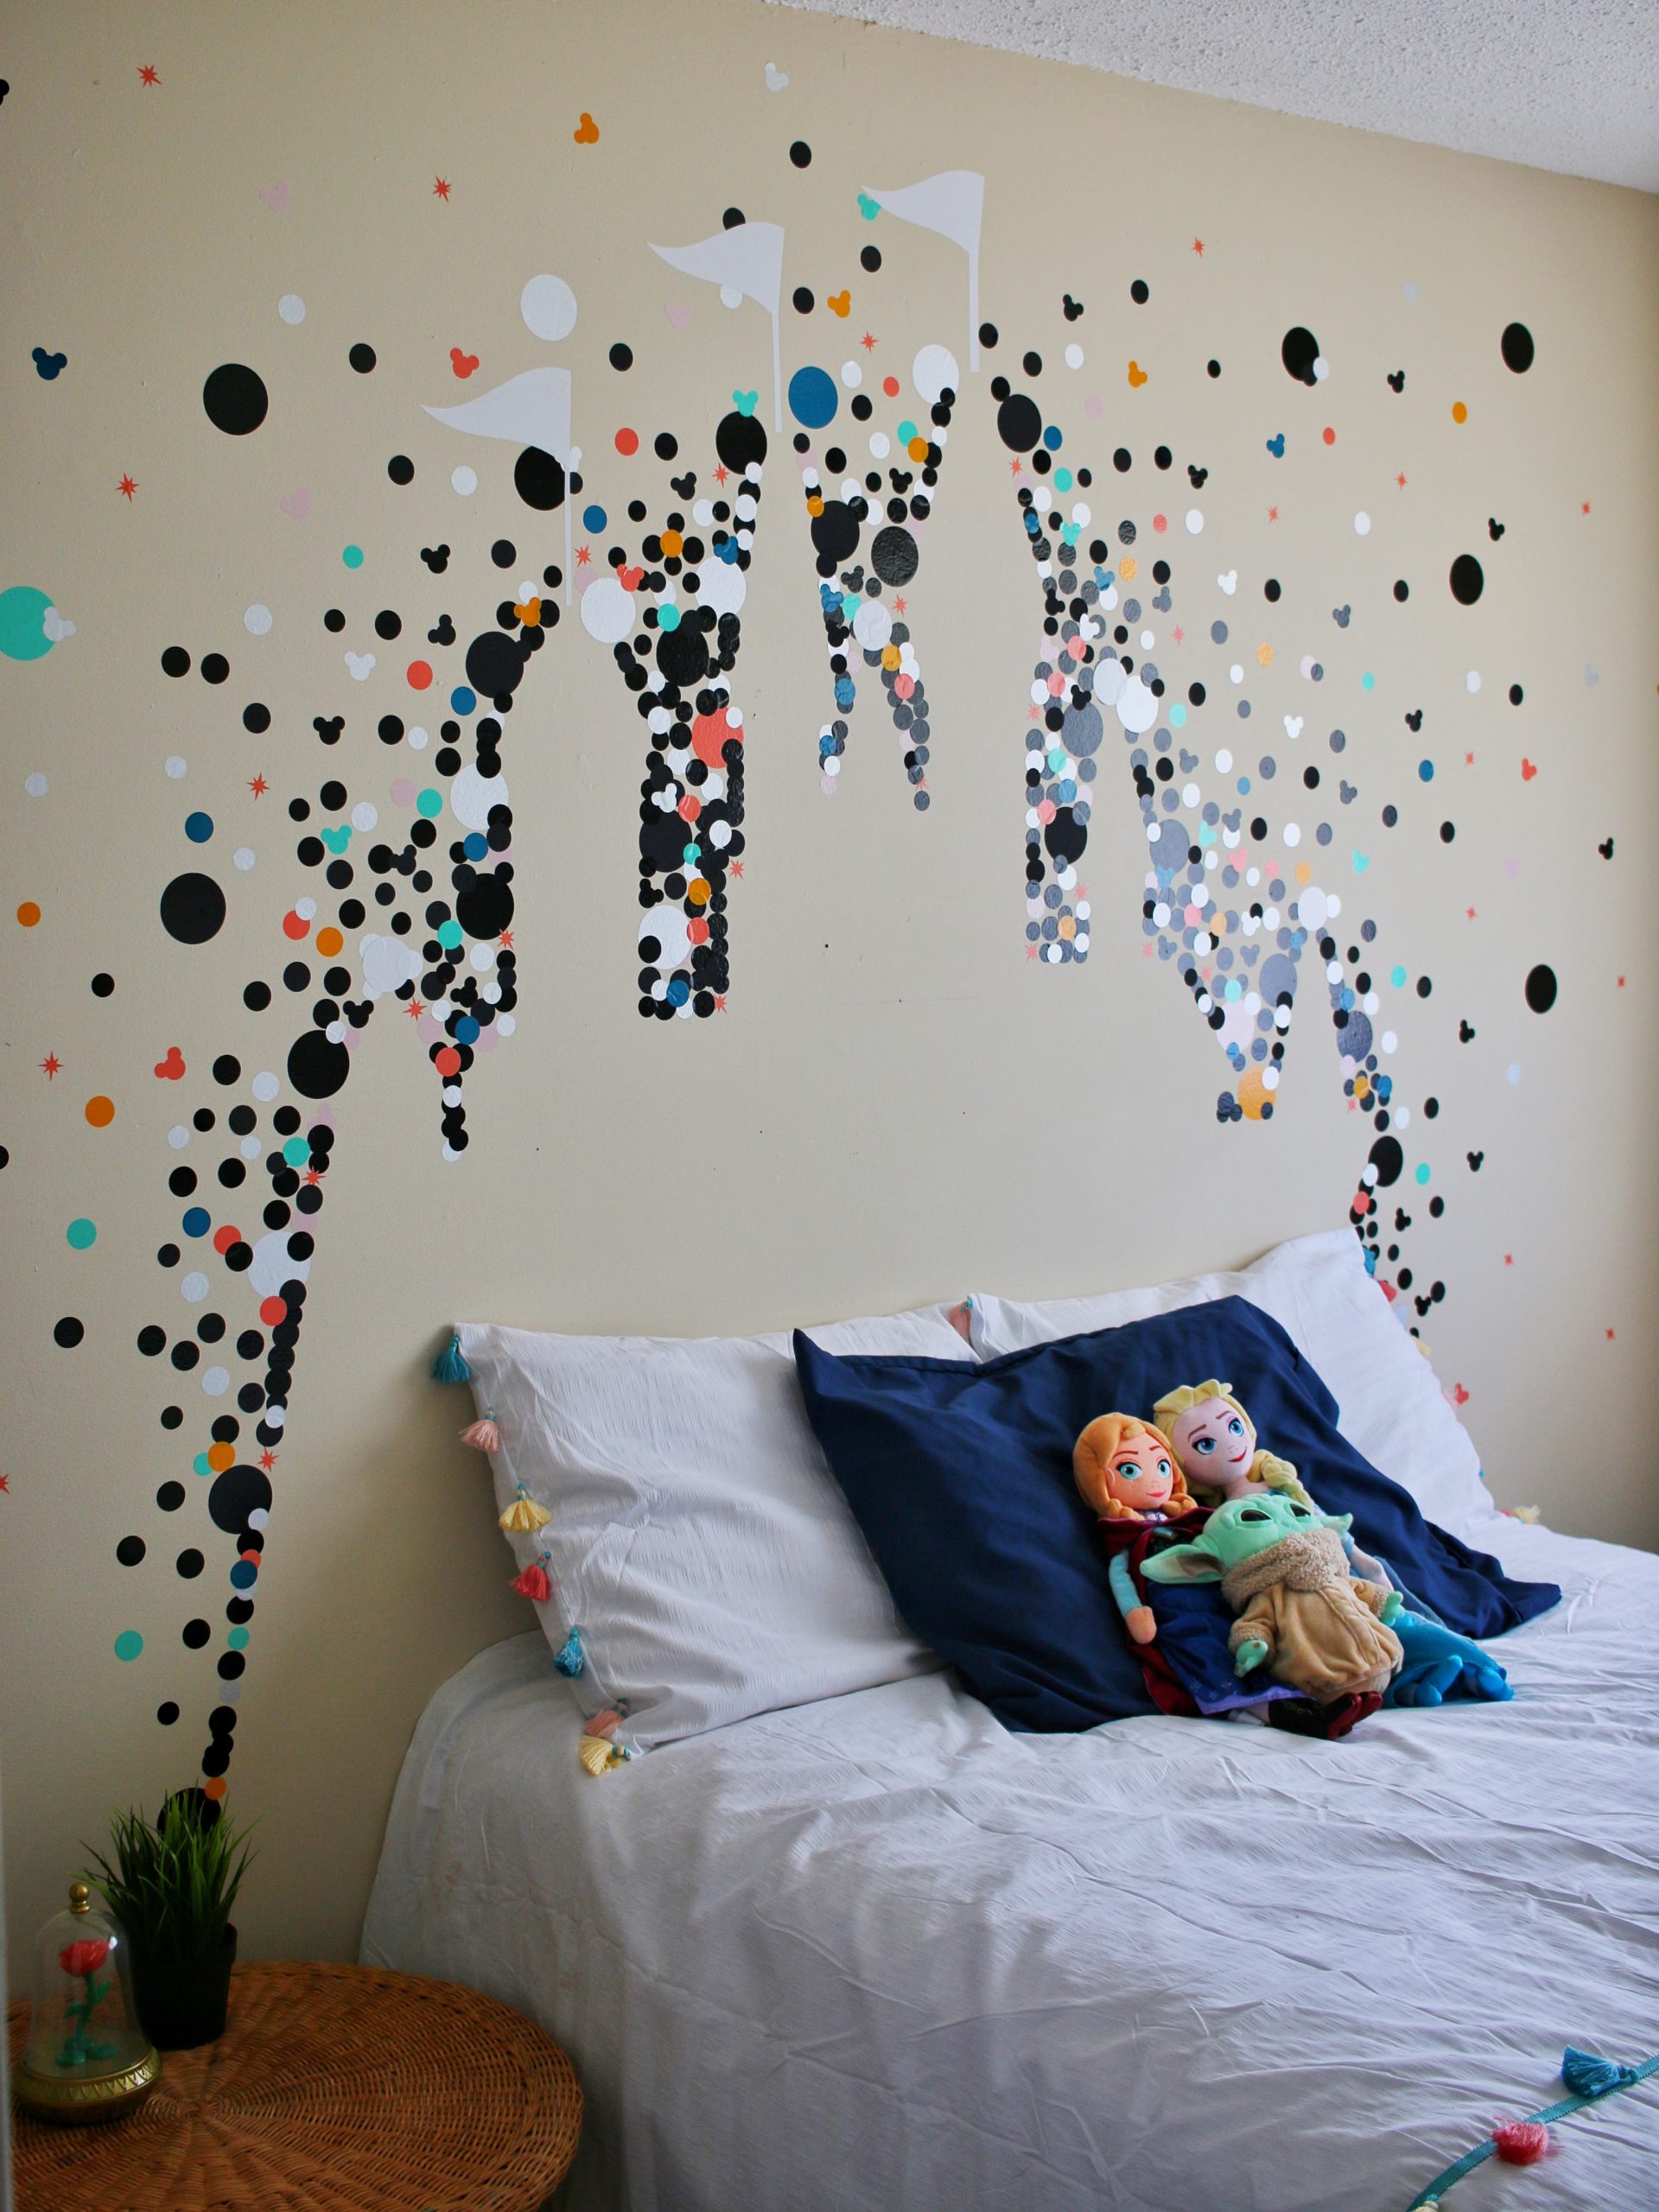
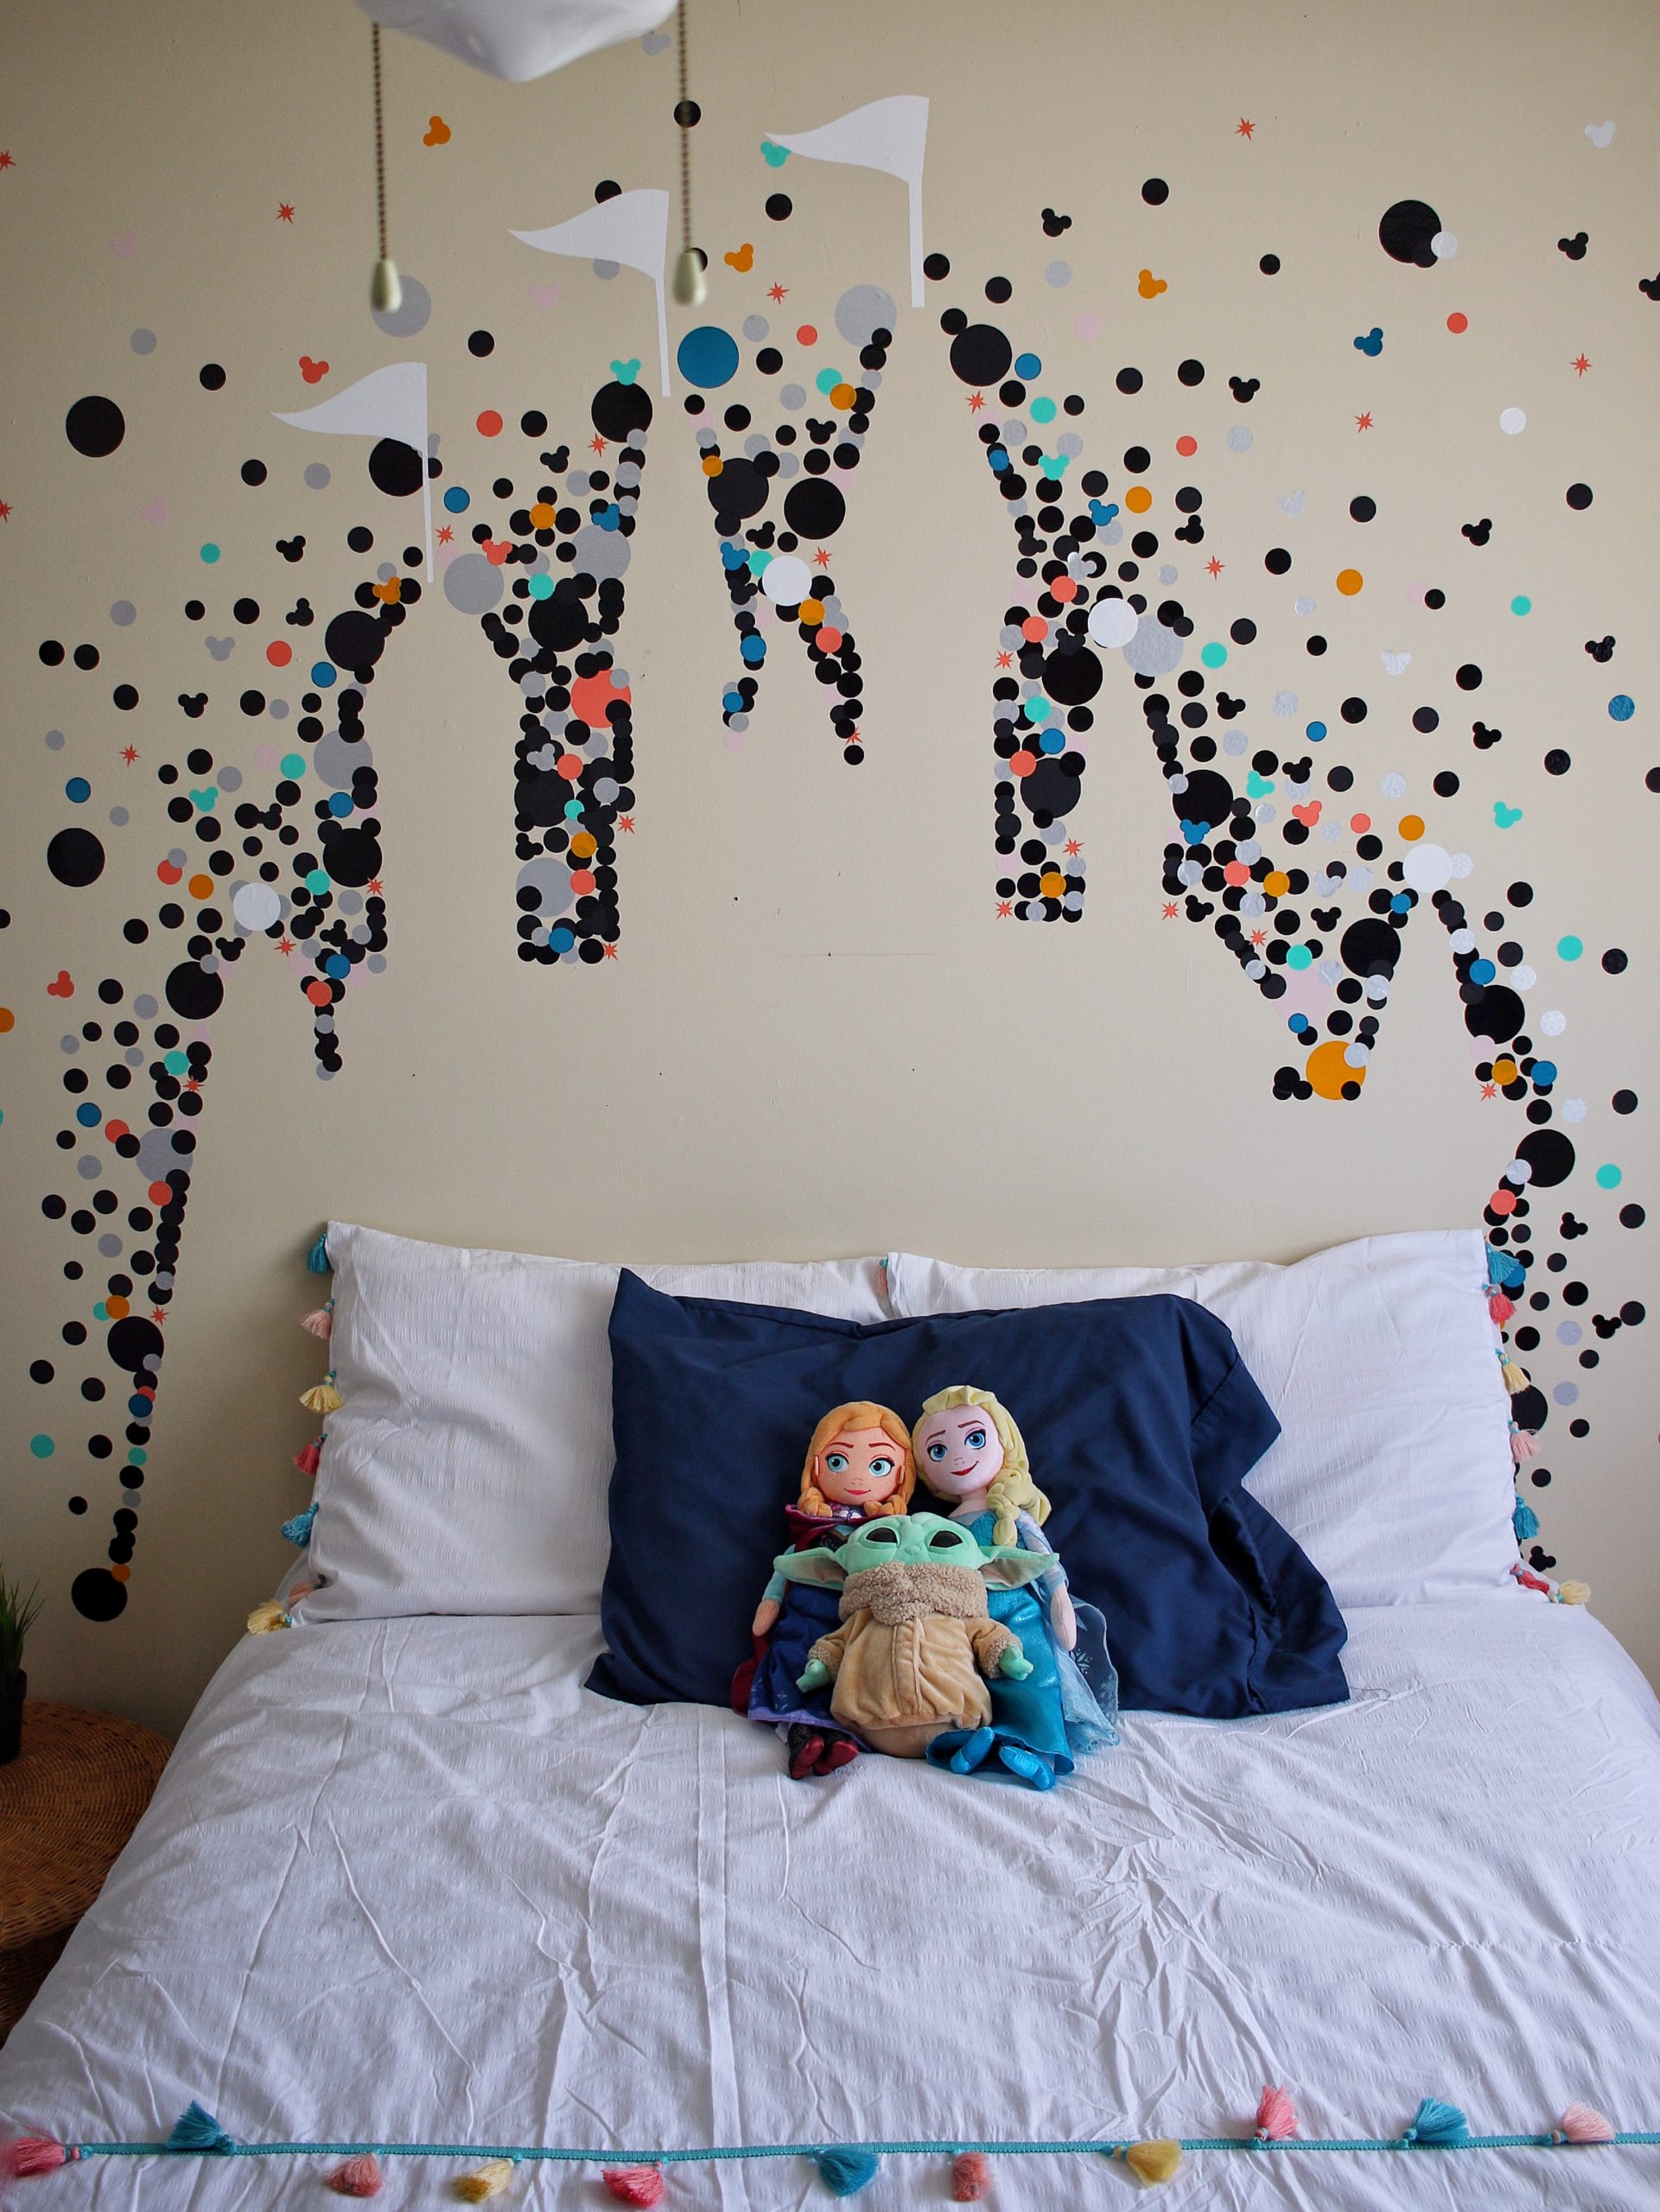
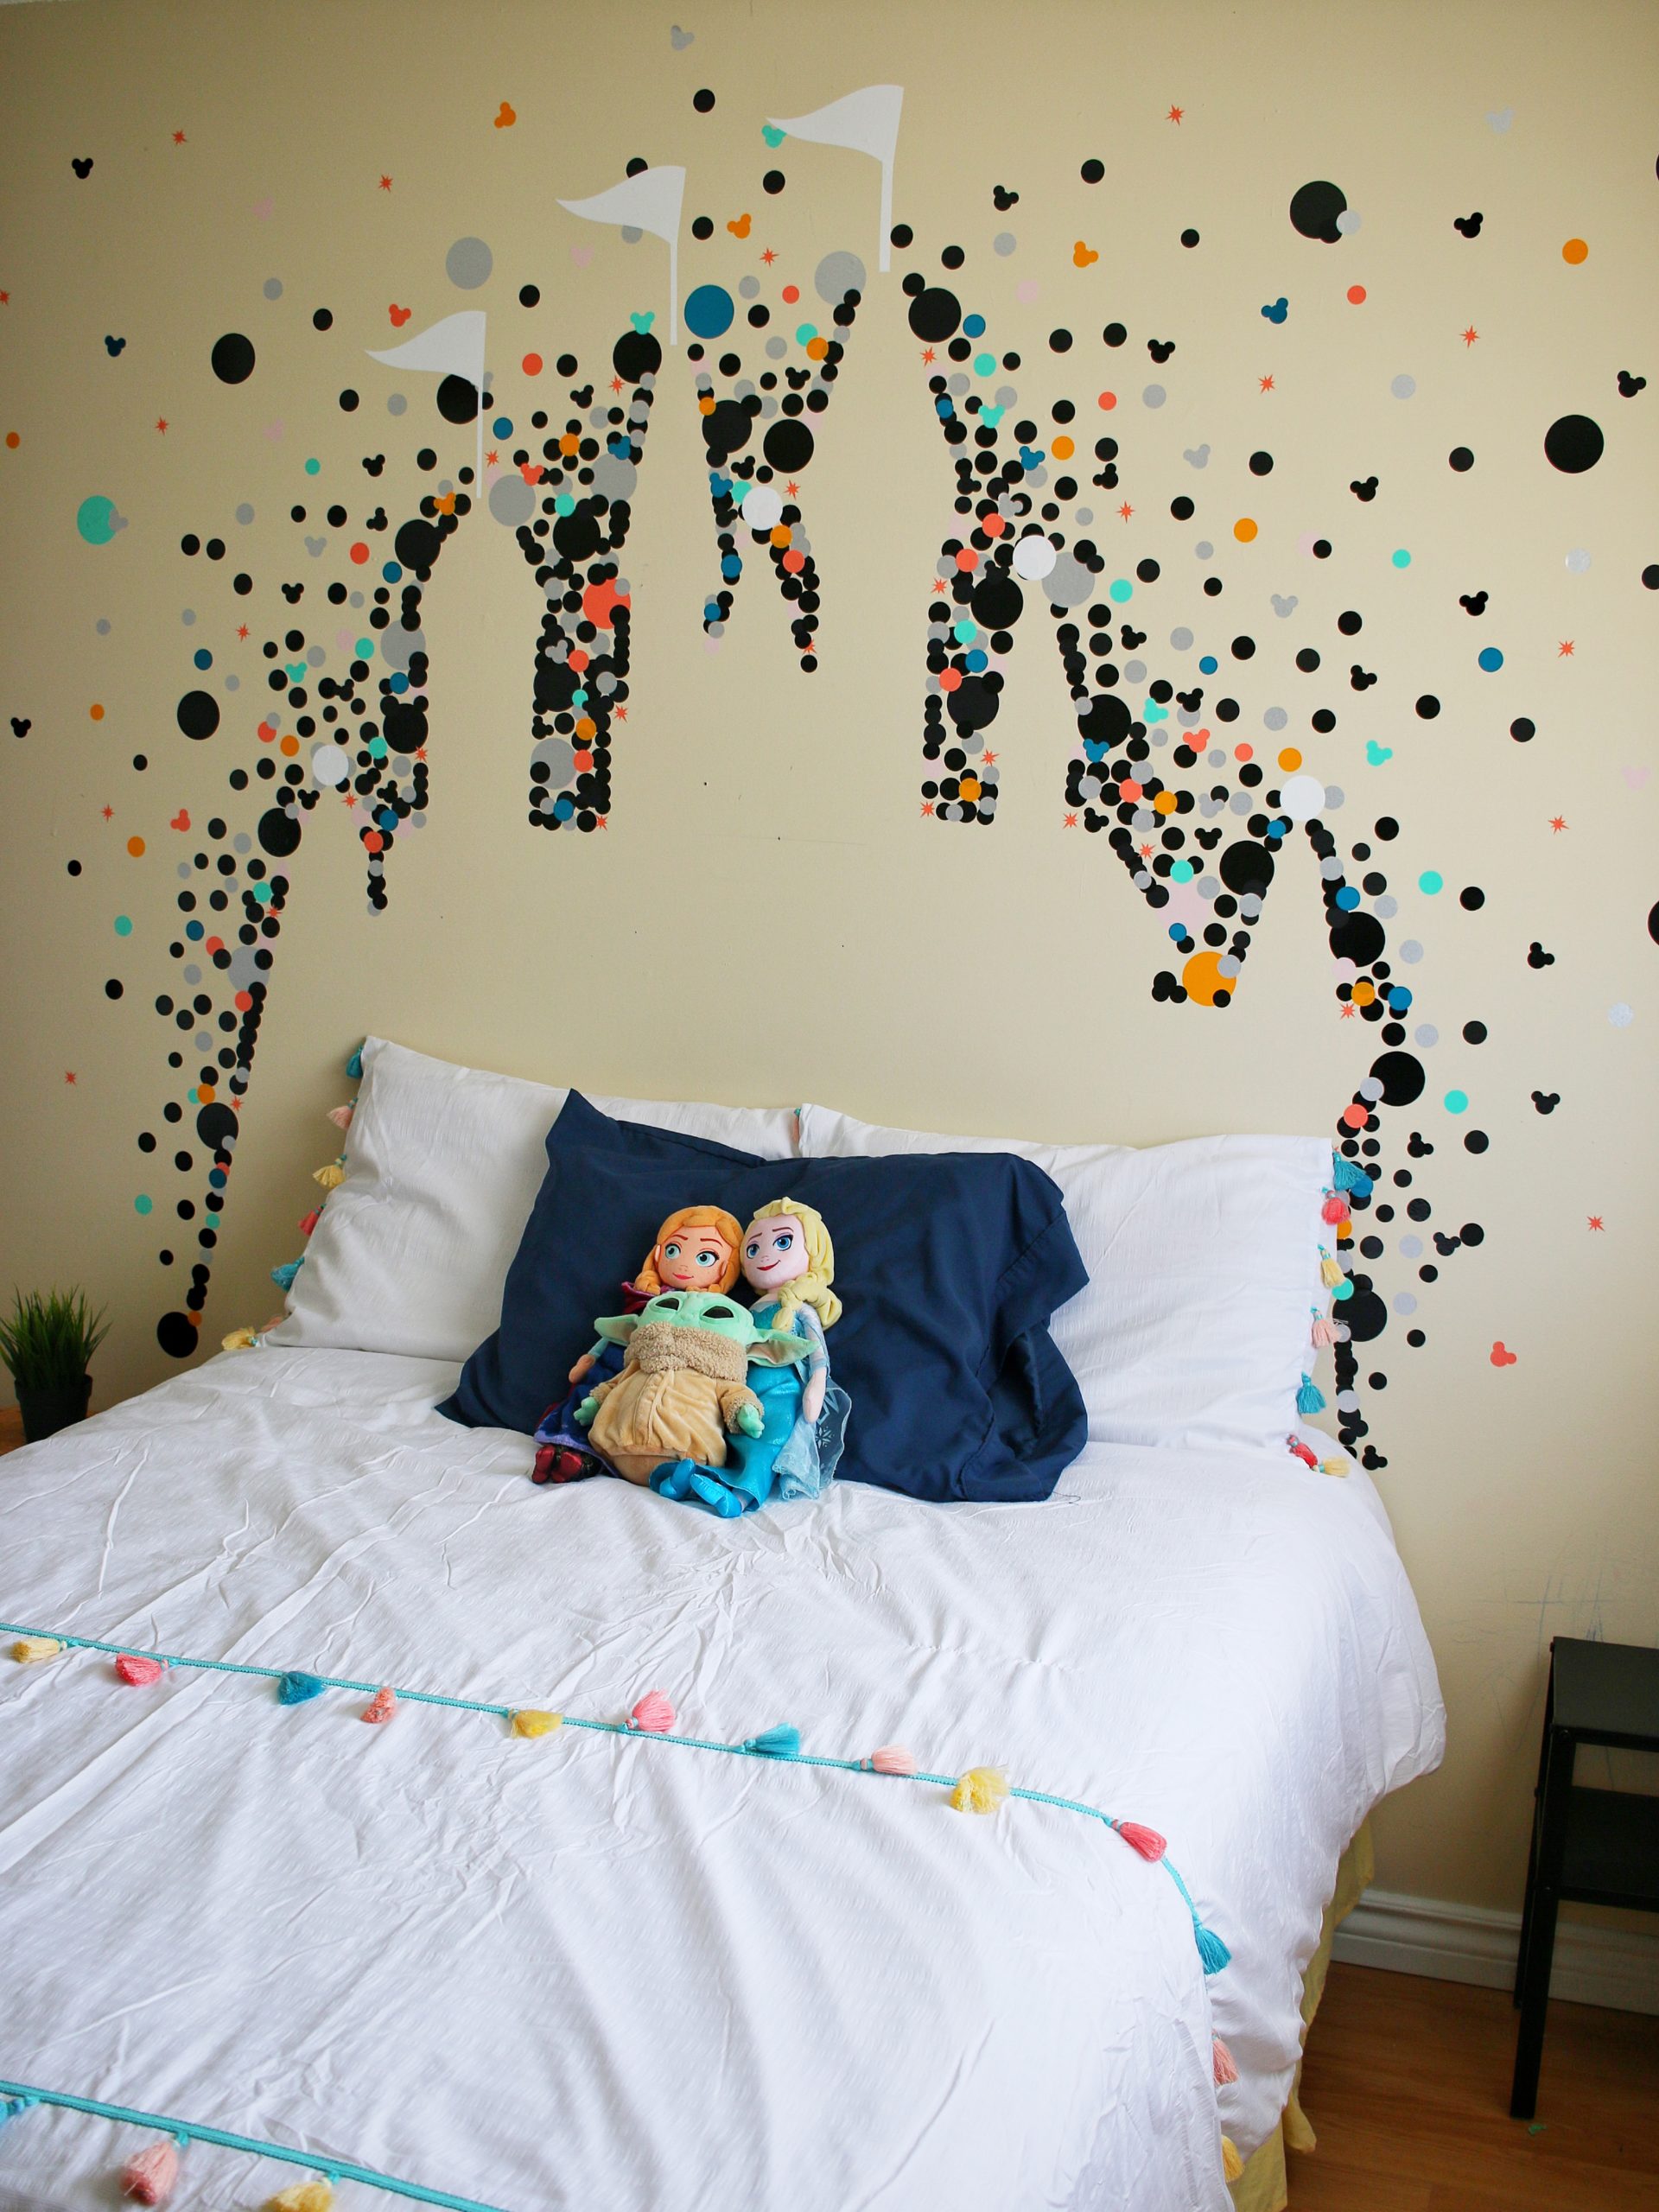
Needless to say, I’m obsessed with how it turned out!
It’s added such a wonderful pop of colour and fun to our kiddo’s bedroom and she’s beyond excited to have a cool Disney Castle wall decor to help live out all her princess dreams.
The next step with our will be creating some matching throw pillows using the Cricut Joy and our Cricut EasyPress, hanging some shelving and finally framing the pile of artwork we’ve collected for her room!
I cannot say enough praises for the Cricut Joy. It’s very user friendly, it gets the job done fast and it has yet to fail me when I have an idea. Be sure to check out the Cricut Blog to find more weekly home renovation project inspiration and tutorials!
The form you have selected does not exist.
Cricut guide to DIY home projects | Cricut
July 8, 2020 at 11:05 pm[…] Tedoro flamingos Being This Mama castle wall Living la Vida Holoka nautical […]
EASY PERSONALIZED LEARNING CORNER FOR NOT-SO BACK TO SCHOOL (USING THE CRICUT JOY!) | BEING THIS MAMA
August 21, 2020 at 2:55 am[…] DISNEY CASTLE WALL DECOR USING THE CRICUT JOY […]
DIY Mickey Mouse Pillow using the Cricut Joy
August 28, 2020 at 1:40 am[…] finishing up the Disney Castle wall decor in our toddler’s room I was obsessed with the idea of creating a matching pillow that used […]
Five Reasons I love My Cricut Joy - Being This Mama
August 28, 2020 at 2:34 am[…] favourite project I’ve accomplished so far is definitely the Disney Castle wall I made with decals I cut out on my Cricut Joy. After finishing the wall I decided kiddo’s […]
14 Back To School Ideas To Make With A Cricut
September 16, 2020 at 7:30 pm[…] DIY DISNEY CASTLE WALL USING THE CRICUT JOY […]
DIY Star Wars Wall Art (Using the Cricut Joy)
October 20, 2020 at 7:10 pm[…] DISNEY CASTLE WALL DECOR USING THE CRICUT JOY […]
Plant Shelf DIY Using an Ikea GREJIG Shoe Rack
May 31, 2021 at 2:37 pm[…] DIY ORNAMENTS USING CRICUT SCRAPS […]